Host on KeyCDN
2 分钟阅读
Host on KeyCDN
https://gohugo.io/hosting-and-deployment/hosting-on-keycdn/
Accelerate your Hugo site globally with a KeyCDN integration. This tutorial shows you how to set up your static site as a GitLab page behind a KeyCDN pull zone.
KeyCDN provides a multitude of features to help accelerate and secure your Hugo site globally including Brotli compression, Let’s Encrypt support, Origin Shield, and more.
Assumptions
- You already have a Hugo page configured
- You have a GitLab account
- You have a KeyCDN account
Create a KeyCDN Pull Zone
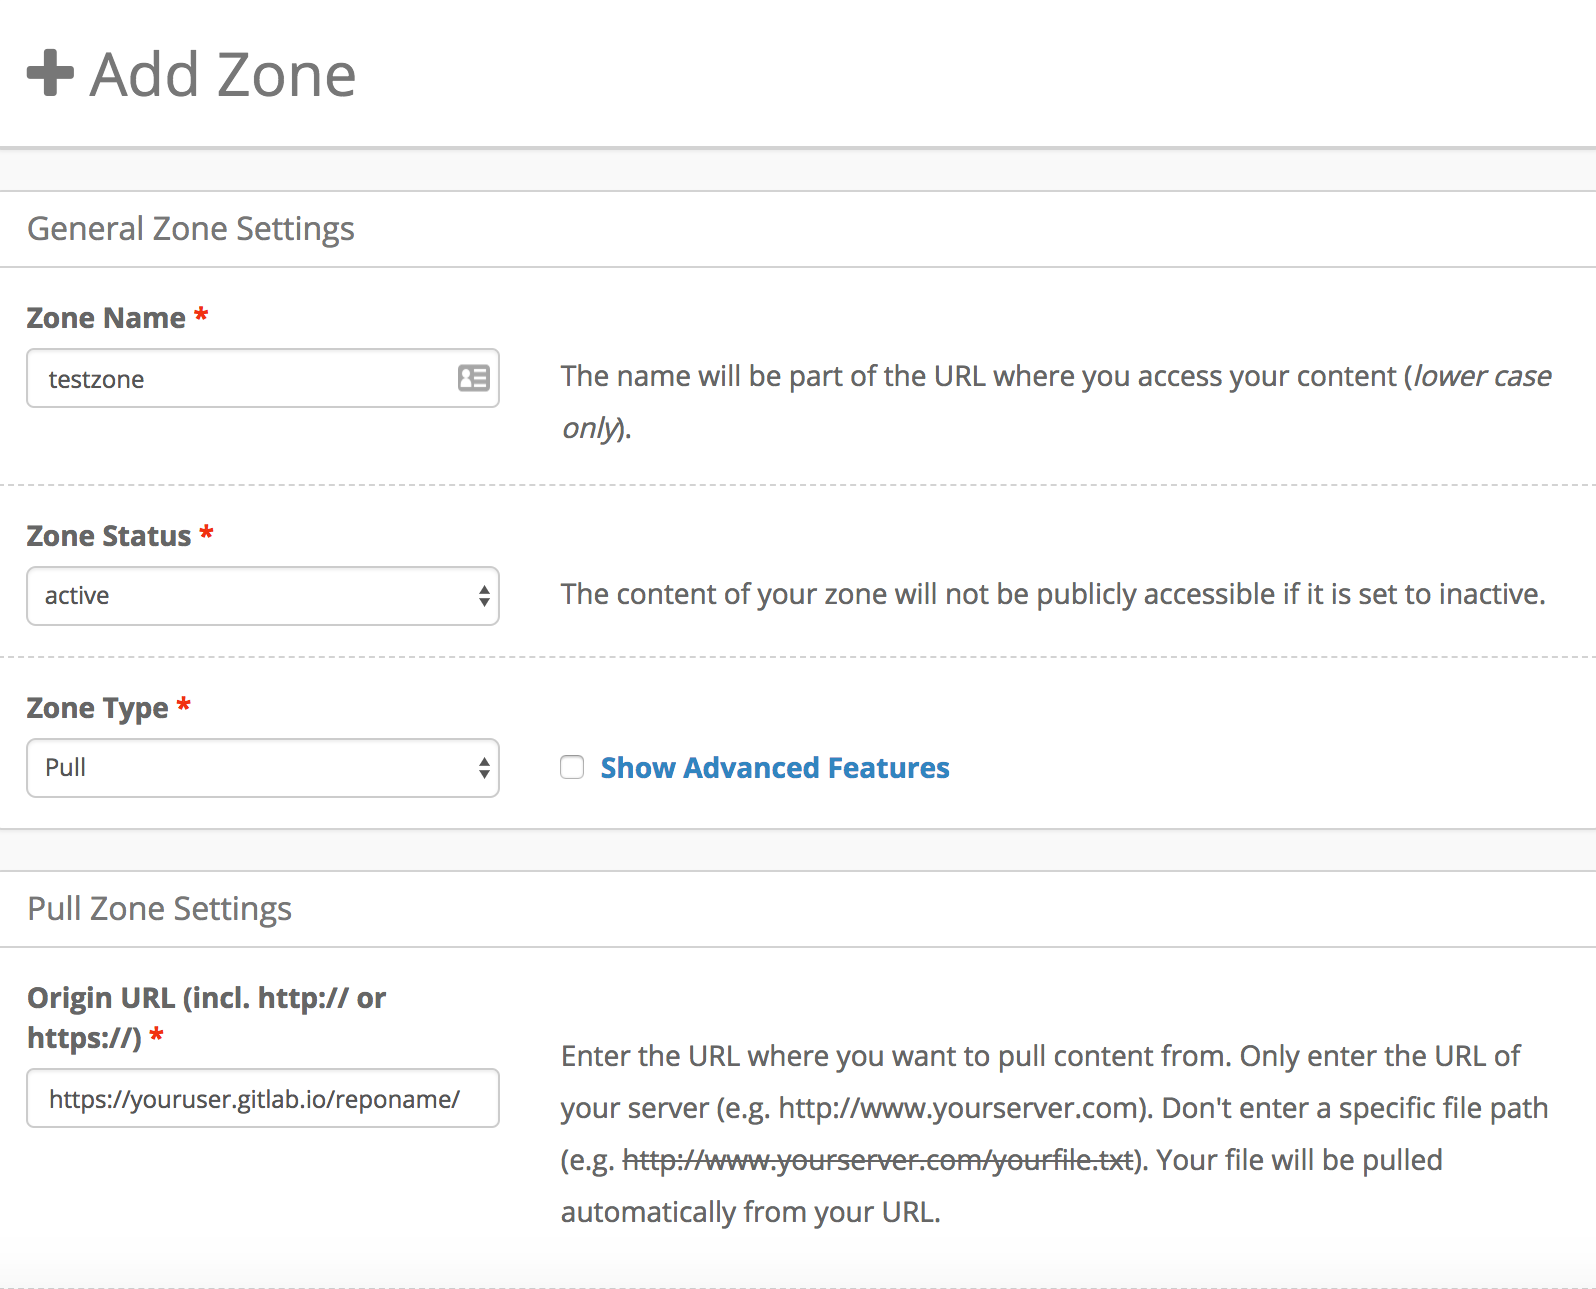
The first step will be to log in to your KeyCDN account and create a new zone. Name this whatever you like and select the Pull Zone option. As for the origin URL, your site will be running on GitLab Pages with a URL of https://youruser.gitlab.io/reponame/. Use this as the Origin URL.

While the origin location doesn’t exist yet, you will need to use your new Zone URL address (or Zone Alias) in the .gitlab-ci.yml file that will be uploaded to your GitLab project.
Ensure that you use your Zone URL or Zone alias as the BASEURL variable in the example below. This will be the user-visible website address.
Configure Your .gitlab-ci.yml File
Your .gitlab-ci.yml file should look similar to the example below. Be sure to modify any variables that are specific to your setup.
| |
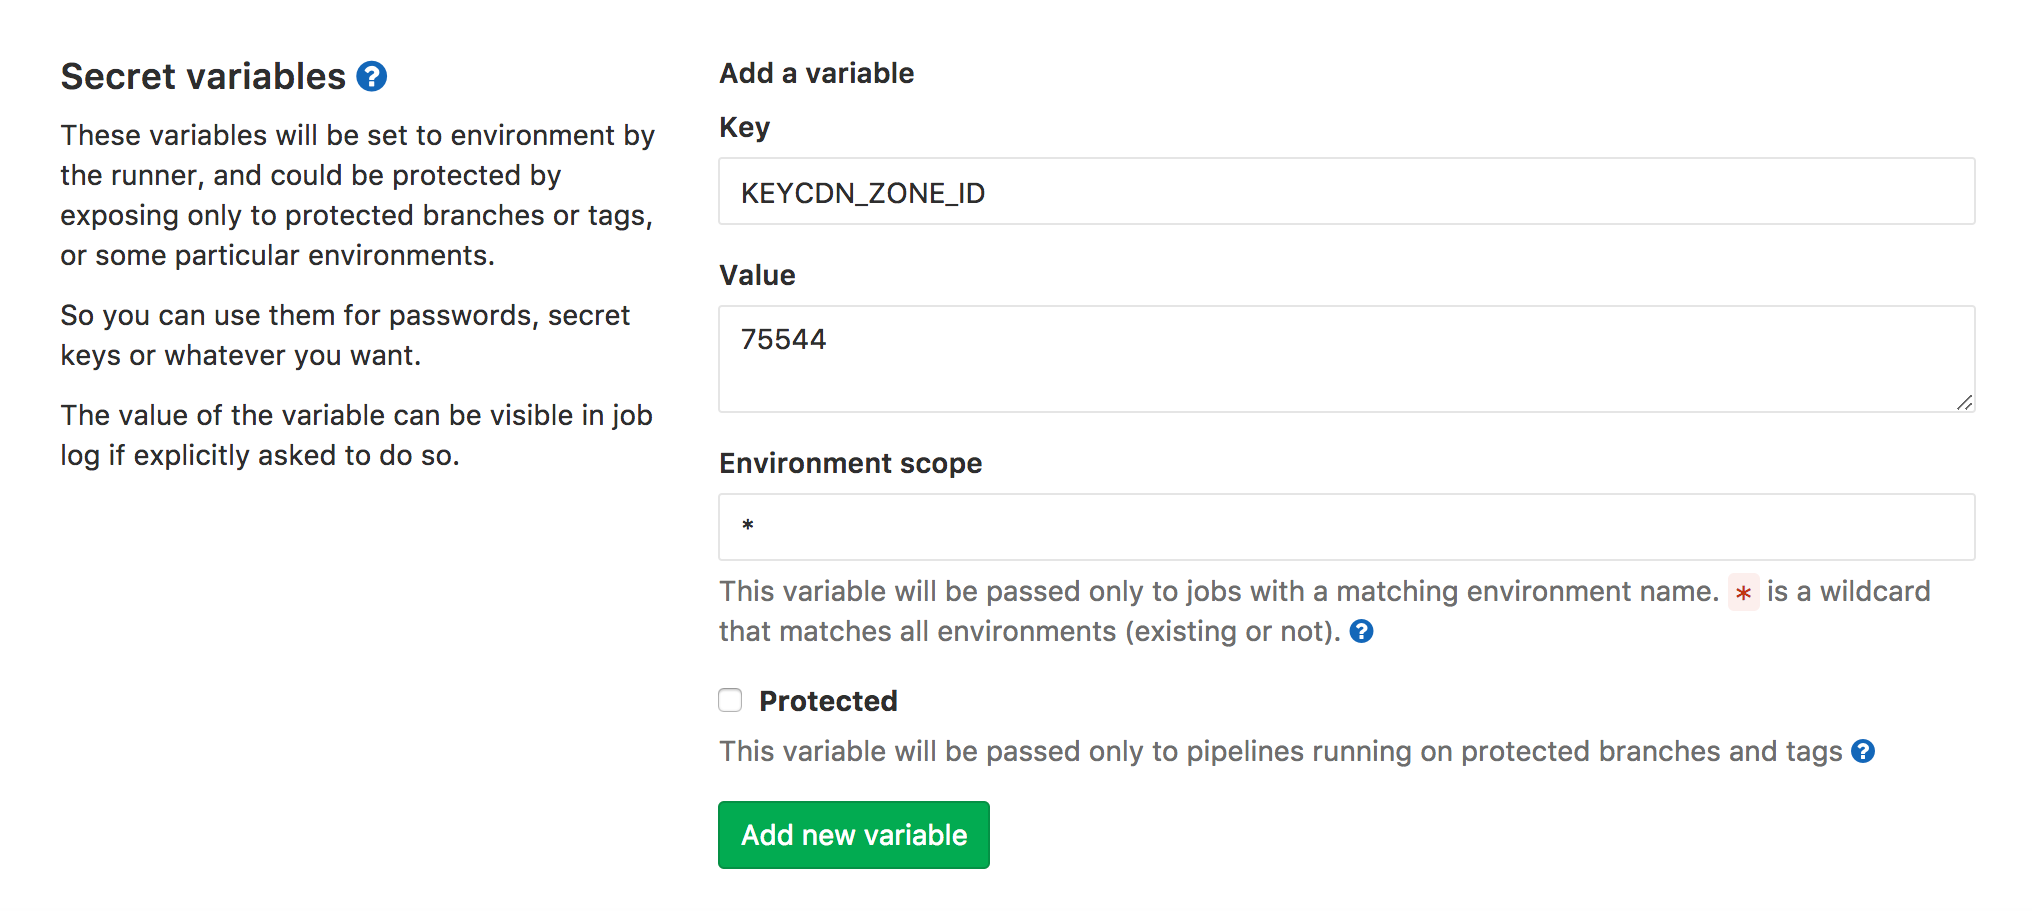
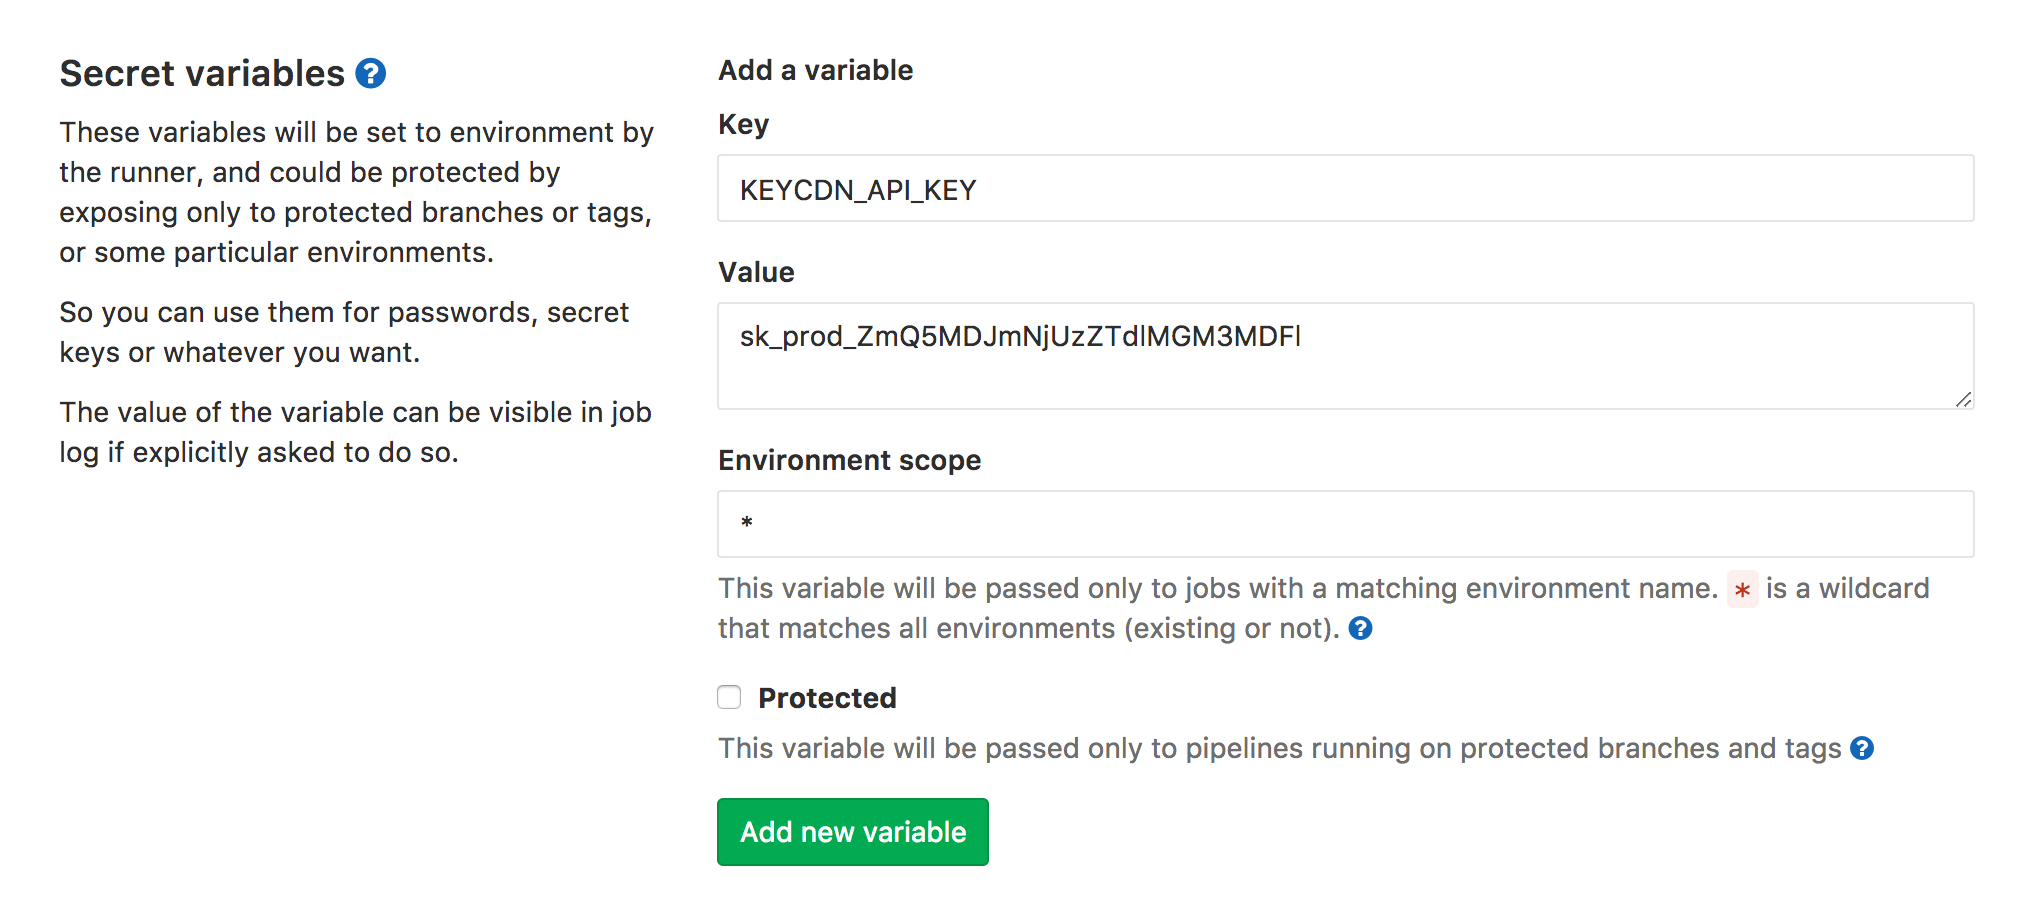
Using this integration method, you will have to specify the Zone ID and your KeyCDN API key as secret variables. To do this, navigate to the top-left menu bar in GitLab and select Projects. Then, select your project and click on the Settings page. Finally, select Pipelines from the sub-menu and scroll down to the Secret Variable section.
The Secret Variable for your Zone ID should look similar to:

While the Secret Variable for your API Key will look similar to:

The Zone ID and API key are used to purge your zone – it’s not strictly needed but otherwise, the CDN might deliver older versions of your assets for quite a while.
Push Your Changes to GitLab
Now it’s time to push the newly created repository to GitLab:
| |
You can watch the progress and CI job output in your Gitlab project under “Pipelines”.
After verifying your CI job ran without issues, first check that your GitLab page shows up under https://youruser.gitlab.io/reponame/ (it might look broken depending on your browser settings as all links point to your KeyCDN zone – don’t worry about that) and then by heading to whatever Zone alias / Zone URL you defined.
To learn more about Hugo hosting options with KeyCDN, check out the complete Hugo hosting with KeyCDN integration guide.