文档
- 1: 入门指南
- 1.1: 将Docsy作为Hugo模块使用
- 1.1.1: 开始之前
- 1.1.2: 创建新站点:从预设的站点开始
- 1.1.3: 创建新站点:从头开始创建新站点
- 1.2: 其他设置选项
- 1.3: 在 Docker 容器中部署 Docsy
- 1.4: 基本站点配置
- 1.5: 已知问题
- 2: 内容和自定义
- 2.1: 添加内容
- 2.2: 外观与感受
- 2.3: 导航和搜索
- 2.4: 文档版本控制
- 2.5: Docsy简码
- 2.6: Logo和图片
- 2.7: 打印支持
- 2.8: 分析、用户反馈和SEO
- 2.9: 代码库链接
- 2.10: 分类支持
- 2.11: 图表和公式
- 3: 多语言支持
- 4: 预览和部署
- 5: 更新 Docsy
- 5.1: 更新您的 Docsy Hugo 模块
- 5.2: 不使用 Hugo 模块更新 Docsy
- 5.3: 迁移到Hugo模块
- 6: 最佳实践
- 7: 贡献指南
1 - 入门指南
Get started - 入门指南
https://www.docsy.dev/docs/get-started/
学习如何开始使用Docsy,包括安装和使用Docsy主题的可用选项。
正如我们在介绍中看到的,Docsy是一个Hugo主题,这意味着如果您想使用Docsy,您需要设置您的站点源,以便Hugo静态站点生成器可以在构建站点时找到并使用Docsy主题文件。最简单的方法是复制和编辑我们的示例站点,尽管我们也提供了将Docsy主题手动添加到新站点或现有站点的说明。
如果您想在本地构建和测试您的站点,您还需要能够运行Hugo本身,要么通过安装它和任何其他所需依赖项,要么使用我们提供的Docker容器。
本页面描述了Docsy的安装选项,并帮助您选择适当的设置指南以开始使用。
安装选项
Hugo提供了多种使用主题的选项,Docsy支持所有这些选项。
- 将主题添加为Hugo模块:Hugo模块是使用Hugo主题的最简单和最新的方式。Hugo使用模块机制从主Docsy仓库拉取主题文件,您可以选择版本,并且在您的站点中保持主题更新非常容易。我们的示例站点使用Docsy作为Hugo模块。
- 将主题添加为Git子模块:将主题作为Git子模块添加也可以让Hugo使用主题文件,尽管比Hugo模块方法更难维护。这是Docsy示例站点旧版本中使用的方法,现在仍然受支持。
- 克隆主题文件:如果您不想让Hugo从外部仓库获取主题文件(例如,如果您想直接自定义和维护主题的副本,或者您的部署选择需要您在仓库中包含主题的副本),您可以直接将文件克隆到您的站点源中。
迁移和向后兼容性
如果您有一个使用Docsy作为Git子模块的现有站点,并希望将其更新为使用Hugo模块,请遵循我们的迁移指南。如果您还没有准备好迁移,不要担心!您的站点将继续像往常一样工作。
设置指南
按照您选择的方法的设置指南。如果您是Docsy的新手,并不确定要按照哪个指南,我们建议按照"将Docsy作为Hugo模块使用"指南,这是一种简单且易于维护的选择。
将Docsy作为Hugo模块使用
学习如何使用主题作为Hugo模块来开始使用Docsy。
其他设置选项
使用Git或NPM创建一个新的Docsy站点。
在Docker容器中部署Docsy
有关如何使用 Docker 设置和运行本地 Docsy 站点的说明。
基本站点配置
新的 Docsy 站点的基本配置。
已知问题
安装 Docsy 主题时已知的问题。
1.1 - 将Docsy作为Hugo模块使用
Use Docsy as a Hugo Module - 将Docsy作为Hugo模块使用
https://www.docsy.dev/docs/get-started/docsy-as-module/
学习如何通过将本主题作为 Hugo 模块使用来开始使用 Docsy。
在构建站点时,Hugo 模块是使用 Hugo 主题(如 Docsy)的最简单和最新的方法。Hugo 使用模块机制从您选择的版本中拉取主题文件,使得在站点中轻松地保持主题最新。我们的示例站点使用 Docsy 作为 Hugo 模块。
要了解其他设置方法,请参阅我们的入门概述。如果您想将现有的 Docsy 站点迁移到使用 Hugo 模块,请查看我们的迁移指南。
使用 Hugo 模块的设置选项
要将 Docsy 作为 Hugo 模块使用,您有以下几个选项:
- 复制并编辑 Docsy 示例站点的源代码。这种方法为您的站点提供了一个骨架结构,包括顶级和文档章节以及可根据需要修改的模板。示例站点使用 Docsy 作为 Hugo 模块。
- 使用 Docsy 主题构建自己的站点。在创建或更新站点时像任何其他 Hugo 主题一样指定 Docsy 主题。使用此选项,您将获得 Docsy 的外观和感觉、导航和其他功能,但需要指定自己的站点结构。
如果您是初学者,我们建议您通过复制我们的示例站点来开始。如果您已经熟悉 Hugo 或想要非常不同的站点结构,您可以按照我们的指南从头开始创建站点,这样您就可以在较高的实现努力成本下获得最大的灵活性。在两种情况下,您需要遵循我们的先决条件指南,以确保您已安装了 Hugo 和所有必要的依赖项。
开始之前
使用 Docsy 作为 Hugo 模块构建站点的先决条件。
创建新站点:从预设的站点开始
通过使用 Docsy 示例站点的克隆作为起点,创建一个新的 Hugo 站点。
创建新站点:从头开始创建新站点
使用 Docsy 作为 Hugo 模块,从头开始创建一个新的 Hugo 站点。
1.1.1 - 开始之前
Before you begin - 开始之前
https://www.docsy.dev/docs/get-started/docsy-as-module/installation-prerequisites/
使用 Docsy 作为 Hugo 模块构建站点的先决条件。
本页面描述了构建使用 Docsy 作为 Hugo 模块的站点的先决条件。
安装 Hugo
为了本地构建和预览使用 Docsy 的站点(比如这个示例站点),需要安装最新的扩展版 Hugo(我们推荐使用版本 0.73.0 或更高版本)。如果从发布页面进行安装,请确保获取的是支持 SCSS的扩展版(extended) Hugo;你可能需要滚动到发布列表的末尾才能找到它。
有关全面的 Hugo 文档,请参阅 gohugo.io。
在 Linux 上
谨慎使用 sudo apt-get install hugo 命令进行安装,因为它不能为所有 Debian/Ubuntu 版本提供扩展版 Hugo,也可能不是最新的版本。
如果你已经安装了 Hugo,请检查其版本:
| |
如果结果是 v0.73 或更早版本,或者看不到 Extended 字样,那么你需要安装最新版本。在 Install Hugo 页面中,可以查看完整的 Linux 安装选项。以下是从发布页面安装 Hugo 的方法:
前往 Hugo releases 页面。
在最新版本中,向下滚动直到找到扩展版 Hugo 的列表。
下载最新的扩展版 Hugo(
hugo_extended_0.1XX_Linux-64bit.tar.gz)。创建一个新目录:
1mkdir hugo将下载的文件解压到
hugo目录中。切换到新的目录:
1cd hugo安装 Hugo:
1sudo install hugo /usr/bin
在 macOS 上
使用 Brew安装 Hugo。
作为 npm 模块
你可以使用 hugo-bin 将 Hugo 安装为 npm 模块。这将把 hugo-bin 添加到你的 node_modules 文件夹中,并将依赖项添加到 package.json 文件中。要安装 Hugo 的扩展版:
| |
有关用法详细信息,请参阅hugo-bin文档。
安装Go语言
Hugo的模块管理命令需要在系统上安装Go编程语言。检查go是否已安装:
| |
确保您正在使用版本1.12或更高版本。
如果go语言尚未安装在您的系统上,或者您需要升级它,请前往Go站点的下载区域,选择适合您系统架构的安装程序并执行它。之后,检查是否成功安装。
安装Git VCS客户端
Hugo的模块管理命令需要在系统上安装git客户端。检查您的系统上是否已存在git:
| |
如果您的系统上尚未安装git客户端,可以前往Git站点,下载适合您系统架构的安装程序并执行它。之后,检查是否成功安装。
安装PostCSS
要构建或更新站点的CSS资源,您还需要PostCSS来创建最终的assets。如果您需要安装它,则必须在您的计算机上安装最新版本的NodeJS,以便您可以使用npm,即Node包管理器。默认情况下,npm会在您运行npm install的目录下安装工具:
| |
从postcss-cli的8版本开始,您还必须单独安装postcss:
| |
请注意,如果全局安装了PostCSS的版本大于5.0.1,则不会加载autoprefixer,您必须使用本地安装。
安装/升级Node.js
为了确保您可以正确构建站点而不仅仅是执行hugo server,您必须安装最新的长期支持(LTS)版本的Node.js。如果您没有最新的LTS版本,则可能会看到以下错误之一:
Error: Error building site: POSTCSS: failed to transform "scss/main.css" (text/css): Unexpected identifier
#OR
/home/user/repos/my-new-site/themes/docsy/node_modules/hugo-extended/postinstall.js:1
import install from "./lib/install.js";
^^^^^^^
SyntaxError: Unexpected identifier
at Module._compile (internal/modules/cjs/loader.js:723:23)
at Object.Module._extensions..js (internal/modules/cjs/loader.js:789:10)
at Module.load (internal/modules/cjs/loader.js:653:32)
at tryModuleLoad (internal/modules/cjs/loader.js:593:12)
at Function.Module._load (internal/modules/cjs/loader.js:585:3)
at Function.Module.runMain (internal/modules/cjs/loader.js:831:12)
at startup (internal/bootstrap/node.js:283:19)
at bootstrapNodeJSCore (internal/bootstrap/node.js:623:3)
您可以通过运行node -v来检查当前的Node.js版本。如果您需要安装新版本,请参阅以下说明:
tl;dr:
1 2 3 4 5 6 7# Using Ubuntu curl -fsSL https://deb.nodesource.com/setup_18.x | sudo -E bash - sudo apt-get install -y nodejs # Using Debian, as root curl -fsSL https://deb.nodesource.com/setup_18.x | bash - apt-get install -y nodejstl;dr:
1 2 3 4 5# As root curl -fsSL https://rpm.nodesource.com/setup_18.x | bash - # No root privileges curl -fsSL https://rpm.nodesource.com/setup_18.x | sudo bash -
接下来呢?
在安装完所有必要的前提条件之后,选择如何开始你的新Hugo站点
1.1.2 - 创建新站点:从预设的站点开始
Create a new site: start with a prepopulated site - 创建新站点:从预设的站点开始
https://www.docsy.dev/docs/get-started/docsy-as-module/example-site-as-template/
通过使用 Docsy 示例站点的克隆作为起点来创建新的 Hugo 站点。
创建新 Docsy 站点的最简单方法是使用 Docsy 示例站点的源代码作为起点。这种方法为您的站点提供了一个骨架结构,包括顶层和文档章节以及您可以根据需要修改的模板。示例站点会自动作为 Hugo 模块引入 Docsy 主题,因此很容易保持最新状态。
如果您更喜欢从头开始创建站点,请按照"从头开始创建站点(Start a site from scratch)“的说明进行操作。
TL;DR: 对于不耐烦的专家的设置
在 Unix Shell 或 Windows 命令行中运行以下命令:
| |
现在,您可以在浏览器中预览 http://localhost:1313 中的新站点。
详细设置说明
克隆 Docsy 示例站点
示例站点为您构建文档站点提供了一个很好的起点,并且预先配置为自动引入 Docsy 主题作为 Hugo 模块。有两种不同的方法可以获取示例站点的本地克隆:
- 如果您只想创建本地副本,请选择选项1。
- 如果您有 GitHub 帐户并希望为站点创建 GitHub 存储库,请选择选项2。
选项1:使用命令行(仅本地副本)
如果您想使用除GitHub之外的远程存储库(例如GitLab、BitBucket、AWS CodeCommit、Gitea),或者根本不需要远程存储库,只需直接使用git clone创建一个本地工作副本,将您选择的本地存储库名称(此处为my-new-site)作为最后一个参数即可:
| |
选项2:使用 GitHub UI(本地副本+关联的 GitHub 存储库)
由于Docsy示例站点存储库是模板存储库,因此创建自己的远程GitHub克隆Docsy示例站点存储库非常容易:
进入Docsy示例站点存储库,点击Use this template。
选择新存储库的名称(例如
my-new-site),并在Repository name字段中输入它。您还可以添加一个可选的Description。单击Create repository from template以创建新存储库。恭喜,您刚刚创建了远程Github克隆,现在它是您自己站点的起点!
使用
git clone创建您新创建的GitHub存储库的本地副本,并将其作为最后一个参数给出您的存储库的Web URL。1git clone https://github.com/me-at-github/my-new-site.git
注意
根据您的环境,您可能需要微调
config.toml中的模块顶级设置,例如添加代理以在下载远程模块时使用。您可以在Hugo模块文档中找到这些配置设置的详细信息。
现在,您可以对副本站点进行本地编辑并使用Hugo在本地进行测试。
预览您的站点
要在本地构建和预览站点,请切换到克隆项目的根目录并使用Hugo的server命令:
| |
在浏览器中预览站点:http://localhost:1313。由于Hugo的实时预览功能,您可以立即看到对本地存储库源文件进行更改的影响。您可以在任何时候使用Ctrl + c停止Hugo服务器。请参阅MacOS上的已知问题。
接下来呢?
1.1.3 - 创建新站点:从头开始创建新站点
Create a new site: Start a new site from scratch - 创建新站点:从头开始创建新站点
使用 Docsy 作为 Hugo 模块从头开始创建新的 Hugo 站点
创建 Docsy 站点的最简单方法是复制我们的示例站点。但是,如果您是经验丰富的 Hugo 用户或者我们示例站点的站点结构不符合您的需求,您可能更喜欢从头开始创建新的站点。使用此选项,您将获得 Docsy 的外观和感觉、导航和其他功能,但您需要指定自己的站点结构。
这些说明仅为您的站点项目提供最小的文件结构,以便您可以逐步构建和扩展您的实际站点。第一步是将 Docsy 主题作为 Hugo 模块添加到您的站点中。如果需要,您可以轻松地从 Docsy GitHub 存储库更新模块到最新版本。
TL;DR: 专家快速设置
在您的命令提示符下运行以下命令:
CLI:
=== “Unix shell”
```bash
hugo new site my-new-site
cd my-new-site
hugo mod init github.com/me/my-new-site
hugo mod get github.com/google/docsy@v0.6.0
cat >> config.toml <<EOL
[module]
proxy = "direct"
[[module.imports]]
path = "github.com/google/docsy"
[[module.imports]]
path = "github.com/google/docsy/dependencies"
EOL
hugo server
```
=== “Windows command line”
```bash
hugo new site my-new-site
cd my-new-site
hugo mod init github.com/me/my-new-site
hugo mod get github.com/google/docsy@v0.6.0
(echo [module]^
proxy = "direct"^
[[module.imports]]^
path = "github.com/google/docsy"^
[[module.imports]]^
path = "github.com/google/docsy/dependencies")>>config.toml
hugo server
```
现在,您可以在浏览器中预览您的新站点,网址为 http://localhost:1313。
详细设置说明
将 Docsy 主题指定为最小站点的 Hugo 模块可为您提供所有主题的好处,但您需要指定自己的站点结构。
创建新的骨架项目
要创建一个新的 Hugo 站点项目,然后将 Docs 主题作为子模块添加,从您的项目根目录运行以下命令。
| |
这将创建一个最小的站点结构,包含 archetypes、content、data、layouts、static 和 themes 文件夹以及一个配置文件(默认为 config.toml)。
提示
在 Hugo 0.110.0 中,默认配置文件的基本文件名已更改为
hugo.toml。如果您使用的是 hugo 0.110 或更高版本,请考虑将config.toml重命名为hugo.toml!
将 Docsy 主题模块作为站点的依赖项导入
只有作为 Hugo 模块的站点才能导入其他模块。要将您的站点转换为 Hugo 模块,请在新创建的站点目录中运行以下命令:
| |
这将创建两个新文件,go.mod 用于模块定义,go.sum 用于保存模块校验和。
接下来,将 Docsy 主题模块声明为站点的依赖项。
| |
此命令将 docsy主题模块添加到您的定义文件 go.mod 中。
添加主题模块配置设置
在您的站点配置文件(默认:config.toml)的末尾添加以下片段中的设置并保存文件。
Configuration file:
=== “hugo.yaml”
```yaml
module:
proxy: direct
hugoVersion:
extended: true
min: 0.73.0
imports:
- path: github.com/google/docsy
disable: false
- path: github.com/google/docsy/dependencies
disable: false
```
=== “hugo.toml”
```toml
[module]
proxy = "direct"
# uncomment line below for temporary local development of module
# replacements = "github.com/google/docsy -> ../../docsy"
[module.hugoVersion]
extended = true
min = "0.73.0"
[[module.imports]]
path = "github.com/google/docsy"
disable = false
[[module.imports]]
path = "github.com/google/docsy/dependencies"
disable = false
```
=== “hugo.json”
```json
{
"module": {
"proxy": "direct",
"hugoVersion": {
"extended": true,
"min": "0.73.0"
},
"imports": [
{
"path": "github.com/google/docsy",
"disable": false
},
{
"path": "github.com/google/docsy/dependencies",
"disable": false
}
]
}
}
```
您可以在Hugo模块文档中找到这些配置设置的详细信息。根据您的环境,您可能需要微调它们,例如添加代理以在下载远程模块时使用。
预览您的站点
要在本地构建和预览网站:
| |
默认情况下,您的网站将在 http://localhost:1313 上提供。如果遇到问题,请查看 已知问题(MacOS)。
当您尝试构建网站时,您可能会遇到缺少参数和值的Hugo错误。这通常是因为您缺少Docsy使用的某些配置设置的默认值 —— 一旦您添加它们,您的网站就应该可以正确构建了。您可以在基本网站配置中了解如何添加配置 —— 即使您从头开始创建网站,我们建议复制示例网站配置,因为它为许多必需的配置参数提供了默认值。
下一步是什么?
Add some basic configuration
添加一些基本配置
1.2 - 其他设置选项
Other setup options - 其他设置选项
https://www.docsy.dev/docs/get-started/other-options/
使用 Git 或 NPM 创建一个新的 Docsy 站点
如果您不想将 Docsy 用作 Hugo 模块(例如,如果您不想安装 Go),但仍不想将主题文件复制到自己的存储库中,则可以将 Docsy 用作 Git 子模块。使用子模块还允许 Hugo 使用 Docsy 存储库中的主题文件,但比 Hugo 模块方法更复杂。这是在旧版本的 Docsy 示例站点中使用的方法,目前仍然得到支持。如果您正在使用 Docy 作为子模块,但想迁移到 Hugo 模块,请参阅我们的迁移指南。
另外,如果您不想让 Hugo 从外部存储库获取主题文件(例如,如果您想直接自定义和维护本主题的副本,或者您的部署选择要求您在存储库中包含本主题的副本),则可以将文件直接克隆到您的站点源。
最后,您可以将 Docsy 安装为 NPM 包。
This guide provides instructions for all of these options, along with common prerequisites.
本指南提供了所有这些选项的说明,以及常见的先决条件。
先决条件
安装 Hugo
要本地构建和预览使用 Docsy 的网站(如本示例网站),您需要一个最新的 extended 版本的Hugo(我们推荐使用 0.73.0 版本或更高版本)。如果您从发布页面安装,请确保获取支持 SCSS 的extended Hugo 版本;您可能需要滚动列表以查看它。
有关全面的 Hugo 文档,请参见 gohugo.io。
在 Linux 上
请注意,使用 sudo apt-get install hugo 可能不会为所有 Debian/Ubuntu 版本提供 extended 版本,而且可能不会与最新的 Hugo 版本保持同步。
如果您已经安装了 Hugo,请检查您的版本:
hugo version
如果结果是 v0.73 或更早版本,或者您没有看到 Extended,那么您需要安装最新版本。您可以在 安装 Hugo 中看到完整的 Linux 安装选项。以下是如何从发布页面安装 Hugo 的说明:
转到 Hugo 发布页面。
在最新版本中,向下滚动,直到找到扩展版本列表。
下载最新的扩展版本(
hugo_extended_0.9X_Linux-64bit.tar.gz)。创建一个新目录:
1mkdir hugo提取您下载的文件到
hugo。切换到新目录:
1cd hugo安装 Hugo:
sudo install hugo /usr/bin
在 macOS 上
使用 Brew安装 Hugo。
作为 NPM 模块
您可以使用 hugo-extended 将 Hugo 安装为 NPM 模块。要安装 Hugo 的扩展版本:
npm install hugo-extended --save-dev
Node:获取最新 LTS 版本
如果已经安装了 Node,请检查您的 Node 版本。例如:
| |
将您的Node版本安装或升级到活跃的LTS版本。我们建议使用nvm来管理您的Node安装(显示Linux命令):
| |
安装PostCSS
要构建或更新站点的CSS资源,您还需要PostCSS。使用Node包管理器npm安装它。
重要提示:检查您的Node版本
某些旧版本的Node安装的PostCSS软件包与Docsy不兼容。将您的Node版本与活动的LTS版本进行对比,并在必要时进行升级。有关详细信息,请参阅Node:获取最新的LTS版本。
从您的项目根目录运行以下命令:
| |
选项1:将Docsy作为Git子模块
对于新站点
要创建一个新站点并将Docsy主题作为Git子模块添加,运行以下命令:
创建站点:
1 2 3hugo new site myproject cd myproject git init按照先前的说明安装postCSS。
按照下面的说明为现有站点进行操作。
对于已经存在的站点
要将Docsy主题添加到现有站点,请从项目的根目录运行以下命令:
将Docsy作为Git子模块安装:
1 2 3git submodule add https://github.com/google/docsy.git themes/docsy cd themes/docsy git checkout v0.6.0要从Docsy的开发版本中进行操作(不建议),请改为运行以下命令:
1git submodule add --depth 1 https://github.com/google/docsy.git themes/docsy将Docsy添加为主题,例如:
1echo 'theme = "docsy"' >> config.toml提示
在Hugo 0.110.0中,默认配置基础文件名更改为
hugo.toml。如果您使用的是hugo 0.110或更高版本,请考虑将您的config.toml重命名为hugo.toml!获取Docsy依赖项:
1(cd themes/docsy && npm install)(可选但建议)为了避免每次更新Docsy时都需要重复上一步操作,请考虑向项目的
package.json文件添加以下NPM脚本:1 2 3 4 5 6 7 8 9 10{ "...": "...", "scripts": { "get:submodule": "git submodule update --init --depth 1", "_prepare:docsy": "cd themes/docsy && npm install", "prepare": "npm run get:submodule && npm run _prepare:docsy", "...": "..." }, "...": "..." }每次从您的项目根目录运行
npm install时,prepare脚本将获取Docsy及其依赖的最新版本。
从这一点开始,使用通常的Hugo命令来构建和提供您的站点,例如:
| |
选项2:克隆该Docsy主题
如果您不想使用子模块(例如,如果您想直接自定义和维护本主题的副本,或者您的部署选择需要在存储库中包含本主题的副本),则可以将本主题克隆到项目的themes子目录中。
将 Docsy 版本为 v0.6.0 的代码库克隆到你的项目的 themes 文件夹中,请在你的项目根目录下运行以下命令:
| |
如果您想要使用 Docsy 的开发版本(不建议,除非您计划将更改上游(upstream )到 Docsy),则省略上面的克隆命令中的 -b v0.6.0 参数。
然后考虑设置一个 NPM prepare脚本,如选项 1 中所述。
有关更多信息,请参阅Hugo网站上的Theme Components。
选项 3:Docsy 作为 NPM 包
您可以按以下方式使用 Docsy 作为 NPM 模块:
创建您的站点,并将Docsy指定为站点主题:
1 2 3hugo new site myproject cd myproject echo 'theme = "docsy"' >> config.toml安装Docsy和postCSS(按照之前的说明):
1npm install --save-dev google/docsy#semver:0.6.0 autoprefixer postcss-cli postcss使用常规的Hugo命令构建或启动您的新站点,并指定Docsy主题文件的路径。例如,构建站点的命令如下:
1 2 3 4$ hugo --themesDir node_modules Start building sites … ... Total in 1890 ms你可以通过在站点的配置文件中添加本主题目录来删除
--themesDir ...标志:1echo 'themesDir = "node_modules"' >> config.toml
作为指定 themesDir 的替代方法,在某些平台上,你可以按如下方式创建指向 Docsy 主题目录的符号链接(显示了 Linux 命令,从站点根文件夹执行):
| |
预览您的站点
要在本地预览您的站点:
| |
默认情况下,您的站点将在 http://localhost:1313 上可用。有关MacOS上的已知问题,请参见已知问题。
如果您在尝试构建站点时遇到缺少参数和值的 Hugo 错误,则通常是因为 Docsy 使用了某些配置设置的默认值而您没有它们,一旦您添加了它们,您的站点应该能够正确构建。有关如何添加配置的信息,请参见基本站点配置 —— 即使您从头开始创建站点,我们建议复制示例站点配置,因为它为许多必需的配置参数提供了默认值。
下一步是什么?
添加一些基本站点配置
1.3 - 在 Docker 容器中部署 Docsy
Deploy Docsy inside a Docker container - 在 Docker 容器中部署 Docsy
https://www.docsy.dev/docs/get-started/quickstart-docker/
使用 Docker 镜像可以在本地运行和测试 Docsy 站点,无需安装所有 Docys 依赖项。
我们提供了一个 Docker 镜像,您可以使用它在本地运行和测试 Docsy 站点,而无需安装所有 Docsy 的依赖项。
安装先决条件
在 Mac 和 Windows 上,下载并安装 Docker Desktop。在 Linux 上,安装 Docker engine 和 Docker Compose。
安装可能需要您重新启动计算机以使更改生效。
从 docsy-example 模板创建您的存储库
docsy-example 存储库提供了一个基本的站点结构,您可以将其用作创建自己的文档的起点。
使用 docsy-example 模板 来 创建自己的存储库。
通过 克隆新创建的存储库 将代码下载到本地计算机。
将工作目录更改为新创建的文件夹:
1cd docsy-example
构建并运行容器
docsy-example 存储库包括一个 Dockerfile,您可以使用它来运行您的站点。
构建 Docker 镜像:
1docker-compose build运行该构建的镜像:
1docker-compose up在您的 Web 浏览器中打开地址
http://localhost:1313以加载 docsy-example 主页。现在您可以对源文件进行更改,在您的浏览器中进行实时重新加载。
Cleanup 清理
要清理您的系统并删除容器镜像,请按以下步骤操作。
使用 Ctrl + C 停止 Docker Compose。
删除生成的镜像
1docker-compose rm
接下来是什么?
- 了解 Docsy 的基本设置和配置。
- 添加内容并自定义您的站点
- 发布您的站点.
1.4 - 基本站点配置
Basic site configuration - 基本站点配置
https://www.docsy.dev/docs/get-started/basic-configuration/
新的 Docsy 站点的基本配置。
站点范围的配置细节和参数在项目的配置文件 (config.toml 或 hugo.toml) 中定义。这些包括你选择的 Hugo 主题(当然是 Docsy!)、项目名称、社区链接、Google Analytics 配置和 Markdown 解析器参数。在config.toml 的示例项目中查看带注释的示例,了解如何添加此信息。即使你只是使用主题而不是复制整个 Docsy 示例站点,我们建议复制此 config.toml 并进行编辑,因为它包括了许多参数的默认值,你需要设置这些参数才能正确构建站点。
你可能想要立即删除或自定义复制的 config.toml 文件中的某些默认值:
国际化
复制的 config.toml 文件定义了英语、挪威语和波斯语内容。你可以在 多语言支持 中了解 Docsy 如何支持多语言内容。
如果你不打算翻译你的站点,可以通过从 config.toml 中删除以下行来删除语言切换器:
[languages.no]
title = "Docsy"
description = "Docsy er operativsystem for skyen"
languageName ="Norsk"
contentDir = "content/no"
time_format_default = "02.01.2006"
time_format_blog = "02.01.2006"
[languages.fa]
title = "اسناد گلدی"
description = "یک نمونه برای پوسته داکسی"
languageName ="فارسی"
contentDir = "content/fa"
time_format_default = "2006.01.02"
time_format_blog = "2006.01.02"
搜索
默认情况下,Docsy 示例站点使用自己的谷歌自定义搜索引擎。要禁用此站点搜索,请删除或注释以下行:
# Google Custom Search Engine ID. Remove or comment out to disable search.
gcs_engine_id = "011737558837375720776:fsdu1nryfng"
要使用您自己的自定义搜索引擎,请将 gcs_engine_id 中的值替换为您自己搜索引擎的 ID。或选择其他搜索选项。
下一步是什么?
- 添加内容并自定义您的站点
- 从我们的示例站点和其他示例中获取一些想法。
- 发布您的站点.
1.5 - 已知问题
Known issues - 已知问题
https://www.docsy.dev/docs/get-started/known_issues/
在安装 Docsy 主题时的已知问题。
以下问题适用于 MacOS和 Windows Subsystem for Linux:
MacOS
Errors: too many open files or fatal error: pipe failed
默认情况下,MacOS允许打开少量文件描述符。对于较大的网站或同时运行多个应用程序时,当您运行hugo server本地预览网站时,您可能会收到以下错误之一:
POSTCSS v7 及更早版本:
ERROR 2020/04/14 12:37:16 Error: listen tcp 127.0.0.1:1313: socket: too many open filesPOSTCSS v8 及更高版本:
fatal error: pipe failed
Workaround 解决方法
为了暂时允许更多的打开文件:
通过运行以下命令查看当前设置:
1sudo launchctl limit maxfiles通过运行以下命令将限制增加到
65535个文件。如果您的站点文件较少,则可以选择设置较低的软(65535)和硬(200000)限制。1 2 3 4sudo launchctl limit maxfiles 65535 200000 ulimit -n 65535 sudo sysctl -w kern.maxfiles=200000 sudo sysctl -w kern.maxfilesperproc=65535
请注意,您可能需要为每个新的shell设置这些限制。了解有关这些限制及如何使其永久的更多信息。
Windows Subsystem for Linux (WSL)
如果您正在使用WSL,请确保在文件系统的Linux挂载上运行hugo,而不是在Windows挂载上运行,否则可能会出现意外错误。
2 - 内容和自定义
Content and Customization - 内容和自定义
https://www.docsy.dev/docs/adding-content/
How to add content to and customize your Docsy site.
如何向您的Docsy站点添加内容并进行自定义。
添加内容
Add different types of content to your Docsy site.
向您的Docsy站点添加不同类型的内容。
Look and Feel
Customize colors, fonts, code highlighting, and more for your site.
自定义您站点的颜色、字体、代码高亮等。
Navigation and Search
Customize site navigation and search for your Docsy site.
为您的Docsy站点自定义站点导航和搜索。
Doc Versioning
Customize navigation and banners for multiple versions of your docs.
为文档的多个版本自定义导航和横幅。
Docsy Shortcodes
Use Docsy’s Hugo shortcodes to quickly build site pages.
使用Docsy的Hugo短代码快速构建站点页面。
Logos and Images
Add and customize logos, icons, and images in your project.
在您的项目中添加和自定义标识、图标和图像。
Print Support
Making it easier to print entire sections of documentation.
使整个文档部分易于打印。
Analytics, User Feedback, and SEO
Add Google Analytics tracking to your site, collect user feedback and learn about the page description meta tag.
向您的站点添加Google Analytics跟踪,收集用户反馈并了解页面描述元标记。
Repository Links
Help your users interact with your source repository.
帮助您的用户与您的源存储库进行交互。
Taxonomy Support
Structure the content using taxonomies like tags, categories, labels.
使用标签、类别、标签等分类方法来结构化内容。
Diagrams and Formulae
Add generated diagrams and scientific formulae to your site.
向您的站点添加生成的图表和科学公式。
2.1 - 添加内容
Adding Content - 添加内容
https://www.docsy.dev/docs/adding-content/content/
向 你的Docsy 站点添加不同类型的内容。
现在你有了一个带有 Docsy 的新 Hugo 站点,是时候添加一些内容了!本页面告诉你如何使用主题来添加和组织站点内容。
内容根目录
你可以在你的 Hugo 站点项目的内容根目录下添加站点内容 - 即 content/ 或语言特定的根目录,比如 content/en/。这里的主要例外是你不想构建到站点中的静态文件:你可以在下面的添加静态内容中了解更多关于添加这些文件的位置。你的内容根目录中的文件通常按照站点章节和模板分组到子目录中,我们将在内容章节和模板中查看这些子目录。
你可以在目录结构解释中了解有关 Hugo 目录结构的更多信息。
内容章节和模板
Hugo 使用你提供的内容文件和站点主题提供的任何模板来构建你的站点页面。这些模板(在 Hugo 术语中称为"layouts(布局)")包括你的页面的页眉、页脚、导航和样式表链接:基本上除了页面的具体内容以外的一切。这些模板又可以由局部组成:用于页面元素(如页眉、搜索框等)的小型可重用 HTML 片段。
因为大多数技术文档站点有不同的章节来存放不同类型的内容,Docsy 主题提供了以下顶级站点章节的模板:
它还提供了一种默认的"着陆页"模板类型,带有站点页眉和页脚,但没有左侧导航,你可以用它来作为任何其他章节的模板。在这个站点和我们的示例站点中,它用于站点主页和About页面。
你站点中的每个顶级章节都对应着站点内容根目录中的一个目录。根据内容所在的文件夹,Hugo 自动应用适当的模板来渲染该章节。例如,此页面位于站点内容根目录 content/en/ 的 docs 子目录中,因此 Hugo 自动应用 docs 模板。你可以通过显式指定特定页面的模板或内容类型来覆盖此行为。
如果你复制了示例站点,则已经拥有适当命名的顶级章节目录来使用 Docsy 的模板,每个目录都有一个索引页面( _index.md 或 index.html)供用户访问。这些顶级章节也会出现在示例站点的顶级菜单中。
自定义章节
如果您复制了示例站点,但并不想使用提供的任何内容章节之一,只需删除相应的内容子目录即可。同样,如果您想添加一个顶级章节,只需添加一个新的子目录,但如果您想使用除默认模板之外的任何现有Docsy模板,则需要在每个页面的前置元数据中明确指定布局或内容类型。例如,如果您创建一个新目录content/en/amazing,并且希望该自定义章节中的一个或多个页面使用Docsy的docs模板,则在每个页面的前置元数据中添加type: docs:
Front matter:
=== “yaml”
```yaml
---
title: "My amazing new section"
weight: 1
type: docs
description: >
A special section with a docs layout.
---
```
=== “toml”
```toml
+++
title = "My amazing new section"
weight = 1
type = "docs"
description = '''
A special section with a docs layout.
'''
+++
```
=== “json”
```json
{
"title": "My amazing new section",
"weight": 1,
"type": "docs",
"description": "A special section with a docs layout.\n"
}
```
或者,根据现有模板,在您项目的layouts目录中为您的新章节创建自己的页面模板。
您可以在Hugo模板中了解更多有关Hugo页面布局的工作原理。本页面的其余部分将告诉您如何添加内容并使用Docsy的每个模板。
替代站点结构
如上所述,默认情况下,您的站点具有主页(使用_default布局),/docs/下的文档章节,/blog/下的博客章节和/community/下的社区章节。每个章节的类型(确定其使用的布局)与其目录名称匹配。
在某些情况下,您可能希望具有不同的目录结构,但仍要利用Docsy的布局。一个常见的例子是"文档站点",其中大多数页面(包括主页)都使用文档布局,或者您可能更喜欢将/news/目录视为博客布局。
自Hugo 0.76以来,通过使用目标特定级联前置元数据,而不需要复制布局到您的站点或在每个页面上都指定type: blog,这已经变得可行。
例如,对于/news/章节,您可以在index 页面中指定以下前置元数据,这将更改该章节及其以下所有内容的类型为"blog":
Front matter:
=== “yaml”
```yaml
---
title: "Latest News"
linkTitle: "News"
menu:
main:
weight: 30
cascade:
- type: "blog"
---
```
=== “toml”
```toml
+++
title = "Latest News"
linkTitle = "News"
[menu.main]
weight = 30
[[cascade]]
type = "blog"
+++
```
=== “json”
```json
{
"title": "Latest News",
"linkTitle": "News",
"menu": {
"main": {
"weight": 30
}
},
"cascade": [
{
"type": "blog"
}
]
}
```
如果您想创建一个"docs"站点,则在顶级_index.md中指定类似以下内容将使所有顶级章节都被视为"文档",除了"news":
Front matter:
=== “yaml”
```yaml
---
title: "My Wonderful Site"
cascade:
- type: "blog"
toc_root: true
_target:
path: "/news/**"
- type: "docs"
_target:
path: "/**"
---
```
=== “toml”
```toml
+++
title = "My Wonderful Site"
[[cascade]]
type = "blog"
toc_root = true
[cascade._target]
path = "/news/**"
[[cascade]]
type = "docs"
[cascade._target]
path = "/**"
+++
```
=== “json”
```json
{
"title": "My Wonderful Site",
"cascade": [
{
"type": "blog",
"toc_root": true,
"_target": {
"path": "/news/**"
}
},
{
"type": "docs",
"_target": {
"path": "/**"
}
}
]
}
```
请注意,这里增加了toc_root。将其设置为true,可以使其被视为站点的单独部分,具有自己的左侧导航菜单。
使用此技术的示例基于文档的站点可在mostly docs repo中找到。
页面前置元数据
Hugo站点中的每个页面文件都有元数据前置元数据,告诉Hugo有关页面的信息。您可以在TOML、YAML或JSON中指定页面前置元数据(我们的示例站点和此站点使用YAML)。使用前置元数据指定页面标题、描述、创建日期、链接标题、模板、菜单权重,甚至包括页面使用的任何资源,如图像。您可以在前置元数据中查看可能的页面前置元数据的完整列表。
例如,这是本页面的前置元数据:
Front matter:
=== “yaml”
```yaml
---
title: "Adding Content"
linkTitle: "Adding Content"
weight: 1
description: >
Add different types of content to your Docsy site.
---
```
=== “toml”
```toml
+++
title = "Adding Content"
linkTitle = "Adding Content"
weight = 1
description = '''
Add different types of content to your Docsy site.
'''
+++
```
=== “json”
```json
{
"title": "Adding Content",
"linkTitle": "Adding Content",
"weight": 1,
"description": "Add different types of content to your Docsy site.\n"
}
```
你需要提供的最基本的前置元数据是title(标题):其他的内容都由你决定!然而,如果你没有设置页面weight(权重),你的导航可能会有点混乱。你可能还想包括description,因为 Docsy 使用它来生成搜索引擎使用的mata description 标签。详见搜索引擎优化(SEO)元标签。
页面内容和标记
默认情况下,你可以像编写普通的 Markdown 或 HTML 文件一样,在 Docsy 站点上创建页面并添加页面前置元数据,就像上面描述的那样。从 0.100 版本开始,Goldmark是 Hugo 唯一支持的 Markdown 解析器。
提示
如果你之前使用的是在 0.60 版本之前的 Hugo 版本,使用 BlackFriday 作为 Markdown 解析器,你可能需要对你的站点进行一些小的更改才能与当前的
GoldmarkMarkdown 解析器一起工作。特别是,如果你克隆了我们的早期示例站点的一个版本,请在hugo.toml/hugo.yaml/hugo.json中添加以下内容,以允许 Goldmark 渲染原始 HTML 和 Markdown:=== “yaml”
```yaml markup: goldmark: renderer: unsafe: true ```=== “toml”
```toml [markup] [markup.goldmark] [markup.goldmark.renderer] unsafe = true ```=== “json”
```json { "markup": { "goldmark": { "renderer": { "unsafe": true } } } } ```
除了标记文本,你还可以使用 Hugo 和 Docsy 的 shortcodes(简码):可重用的 HTML 片段,可以快速构建你的页面。在 Docsy Shortcodes 中了解更多关于简码的内容。
注意
Hugo 也支持使用其他标记语言的外部解析器作为辅助工具来添加内容。例如,你可以使用
rst2html作为外部解析器来添加 RST 内容(尽管请注意,这不支持所有 RST 的变体,例如 Sphinx RST)。同样地,你可以使用asciidoctor来解析 Asciidoc 文件,或者使用pandoc解析其他格式的文件。 由于你需要安装外部解析器并运行 Hugo 来生成你的站点(例如,你将无法使用 Netlify 的持续部署功能),因此外部解析器可能并不适合与所有部署选项一起使用。此外,添加外部解析器可能会导致构建较大站点时出现性能问题。
处理链接
Hugo 允许你使用普通的 Markdown 语法指定链接,但请记住,你需要将链接相对于你站点的根 URL 指定,而相对 URL 在你站点生成的 HTML 中不会被 Hugo 更改。
或者,你可以使用 Hugo 的 helper ref 和 relref 简码来创建解析为正确 URL 的内部链接。但是,请注意,如果用户在你生成的站点之外查看你的页面,例如在 GitHub 的 Web UI 中使用渲染的 Markdown 功能,那么你的链接将根本不会出现为链接。
你可以在 Hugo Tips 中找到(或添加!)有关处理 Hugo 链接的技巧和提示。
内容样式
我们不强制要求您的页面内容采用任何特定的风格。然而,如果您需要一些关于如何编写和格式化清晰、简洁的技术文档的指导,我们推荐使用Google开发者文档风格指南,特别是其中的风格指南要点。
页面 bundles
您可以将站点页面创建为其所在章节或子章节目录中的独立文件,或者作为包含内容的文件夹,其中内容在文件夹的index页中。为您的页面创建一个文件夹可以让您将图像和其他资源与内容捆绑(bundle)在一起。
您可以在本站点和我们的示例站点中看到这两种方法的示例。例如,本页面的源代码只是一个独立的文件/content/en/docs/adding-content.md。然而,在本站点中,Docsy简码的源代码位于/content/en/docs/adding-content/shortcodes/index.md,该页面使用的图像资源位于同一个/shortcodes/目录中。在Hugo术语中,这被称为叶子bundle,因为它是一个文件夹,包含了单个站点页面的所有数据,没有任何子页面(并且使用了不带下划线的index.md)。
您可以在页面Bundles中找到更多有关使用Hugo捆绑管理资源的信息。
Adding docs and blog posts
您最常使用的模板可能是docs模板(如本页面所使用的)或非常相似的blog 模板。这两个模板都包括:
- a left nav
- GitHub链接(从您的站点配置中获取)供读者编辑页面或创建问题
- a page menu
以及所有站点页面都使用的常见页头和页脚。应用哪个模板取决于您是否将内容添加到blog或docs内容目录中。您可以在导航和搜索中了解有关如何创建导航和页面菜单的更多信息。
组织您的文档
虽然Docsy的顶级章节允许您为不同类型的内容创建站点章节,但您可能还希望在docs章节内组织您的文档内容。例如,本站点的docs章节目录有多个子目录,用于入门、内容和自定义等。每个子目录都有一个_index.md(也可以是_index.html),它作为一个章节索引页,告诉Hugo相关目录是您的文档的子章节。
Docsy的docs布局为您提供了一个左侧导航窗格,其中包含根据您的文档文件结构自动生成的嵌套菜单。在docs/目录中的每个独立页面或子章节_index.md或_index.html页面都会获得一个顶级菜单项,使用页面或index中的链接名称和weight元数据。
要向子章节添加文档,只需将页面文件添加到相应的子目录中。除子章节索引页面外,您添加到子章节的任何页面都将出现在子菜单中(请查看左侧以查看实际效果!),并按页面weight排序。在导航和搜索中了解有关添加Docsy导航元数据的更多信息。
如果您已经复制了示例站点,则在您的docs目录中已经有一些建议的子目录,并提供了放置何种类型内容以及一些示例Markdown页面的指导。您可以在组织您的内容中了解更多关于使用Docsy组织内容的信息。
文档章节着陆页面
默认情况下,文档章节着陆页(位于章节目录中的_index.md或_index.html)使用一种布局,该布局添加了一个格式化的链接列表,其中包含章节中的页面及其前置元数据描述。本站点中的内容和自定义着陆页面是一个很好的例子。
要显示一个简单的链接条目列表,指定在着陆页面的前置元数据中simple_list: true:
Front matter:
=== “yaml”
```yaml
---
title: "Simple List Page"
simple_list: true
weight: 20
---
```
=== “toml”
```toml
+++
title = "Simple List Page"
simple_list = true
weight = 20
+++
```
=== “json”
```json
{
"title": "Simple List Page",
"simple_list": true,
"weight": 20
}
```
要根本不显示任何链接,请在着陆页面的前置元数据中指定no_list: true:
Front matter:
=== “yaml”
```yaml
---
title: "No List Page"
no_list: true
weight: 20
---
```
=== “toml”
```toml
+++
title = "No List Page"
no_list = true
weight = 20
+++
```
=== “json”
```json
{
"title": "No List Page",
"no_list": true,
"weight": 20
}
```
组织您的博客文章
Docsy的blog布局也为您提供了一个左侧导航菜单(如docs布局),以及应用于/blog/_index.md的列表类型index 页,自动按反向时间顺序显示所有最新文章的片段。
To create different blog categories to organize your posts, create subfolders in blog/. For instance, in our example site we have news and releases. Each category needs to have its own _index.md or _index.html landing page file specifying the category title for it to appear properly in the left nav and top-level blog landing page. Here’s the index page for releases:
要创建不同的博客类别以组织您的文章,请在blog/中创建子文件夹。例如,在我们的示例站点中,我们有news和releases。每个类别都需要有自己的_index.md或_index.html着陆页面文件,指定类别标题以使其在左侧导航和顶级博客着陆页面上正确显示。这是releases的index 页面:
Front matter:
=== “yaml”
```yaml
---
title: "New Releases"
linkTitle: "Releases"
weight: 20
---
```
=== “toml”
```toml
+++
title = "New Releases"
linkTitle = "Releases"
weight = 20
+++
```
=== “json”
```json
{
"title": "New Releases",
"linkTitle": "Releases",
"weight": 20
}
```
要向博客文章添加作者和日期信息,请将它们添加到页面的前置元数据中:
Front matter:
=== “yaml”
```yaml
---
date: 2018-10-06
title: "Easy documentation with Docsy"
linkTitle: "Announcing Docsy"
description: "The Docsy Hugo theme lets project maintainers and contributors focus on content, not on reinventing a website infrastructure from scratch"
author: Riona MacNamara
resources:
- src: "**.{png,jpg}"
title: "Image #:counter"
params:
byline: "Photo: Riona MacNamara / CC-BY-CA"
---
```
=== “toml”
```toml
+++
date = 2018-10-06T00:00:00.000Z
title = "Easy documentation with Docsy"
linkTitle = "Announcing Docsy"
description = "The Docsy Hugo theme lets project maintainers and contributors focus on content, not on reinventing a website infrastructure from scratch"
author = "Riona MacNamara"
[[resources]]
src = "**.{png,jpg}"
title = "Image #:counter"
[resources.params]
byline = "Photo: Riona MacNamara / CC-BY-CA"
+++
```
=== “json”
```json
{
"date": "2018-10-06T00:00:00.000Z",
"title": "Easy documentation with Docsy",
"linkTitle": "Announcing Docsy",
"description": "The Docsy Hugo theme lets project maintainers and contributors focus on content, not on reinventing a website infrastructure from scratch",
"author": "Riona MacNamara",
"resources": [
{
"src": "**.{png,jpg}",
"title": "Image #:counter",
"params": {
"byline": "Photo: Riona MacNamara / CC-BY-CA"
}
}
]
}
```
如果您已经复制了示例站点,并且不想要blog 章节,或者想链接到外部博客,只需删除blog子目录即可。
Working with top-level landing pages. 使用顶级着陆页面
Docsy的默认页面模板没有左侧导航,适用于为您的站点或其他"着陆"类型页面创建主页。
自定义示例站点页面
如果你已经复制了示例站点,那么在 content/en/_index.html 文件中你已经有了一个简单的站点着陆页。它由 Docsy 提供的 Hugo shortcode 页面块组成。
要自定义大的着陆图片(在一个封面(cover)块中),请将项目中的 content/en/featured-background.jpg 文件替换为你自己的图片(文件名中必须包含background),你可以添加或删除尽可能多的块,以及添加你自己的内容。
示例站点还有一个About 页面,在 content/en/about/_index.html 中使用相同的 Docsy 模板。同样,它由页面块组成,包括 content/en/about/featured-background.jpg 中的另一个背景图片。与站点着陆页一样,你可以替换图片、删除或添加块,或者添加你自己的内容。
构建你自己的着陆页
如果你刚刚使用了这个主题,你仍然可以使用所有 Docsy 提供的页面块(或任何其他你想要的内容)在相同的文件位置构建自己的着陆页。
添加community 页面
community着陆页模板有样板内容,自动填充项目名称和在 hugo.toml/hugo.yaml/hugo.json 中指定的社区链接,为你的用户提供快速访问资源的链接,帮助他们参与你的项目。同样的链接也默认添加到你的站点页脚。
Configuration file:
=== “hugo.yaml”
```yaml
params:
links:
user:
- name: User mailing list
url: 'https://example.org/mail'
icon: fa fa-envelope
desc: Discussion and help from your fellow users
- name: Twitter
url: 'https://example.org/twitter'
icon: fab fa-twitter
desc: Follow us on Twitter to get the latest news!
- name: Stack Overflow
url: 'https://example.org/stack'
icon: fab fa-stack-overflow
desc: Practical questions and curated answers
developer:
- name: GitHub
url: 'https://github.com/google/docsy'
icon: fab fa-github
desc: Development takes place here!
- name: Slack
url: 'https://example.org/slack'
icon: fab fa-slack
desc: Chat with other project developers
- name: Developer mailing list
url: 'https://example.org/mail'
icon: fa fa-envelope
desc: Discuss development issues around the project
```
=== “hugo.toml”
```toml
[params.links]
# End user relevant links. These will show up on left side of footer and in the community page if you have one.
[[params.links.user]]
name = "User mailing list"
url = "https://example.org/mail"
icon = "fa fa-envelope"
desc = "Discussion and help from your fellow users"
[[params.links.user]]
name ="Twitter"
url = "https://example.org/twitter"
icon = "fab fa-twitter"
desc = "Follow us on Twitter to get the latest news!"
[[params.links.user]]
name = "Stack Overflow"
url = "https://example.org/stack"
icon = "fab fa-stack-overflow"
desc = "Practical questions and curated answers"
# Developer relevant links. These will show up on right side of footer and in the community page if you have one.
[[params.links.developer]]
name = "GitHub"
url = "https://github.com/google/docsy"
icon = "fab fa-github"
desc = "Development takes place here!"
[[params.links.developer]]
name = "Slack"
url = "https://example.org/slack"
icon = "fab fa-slack"
desc = "Chat with other project developers"
[[params.links.developer]]
name = "Developer mailing list"
url = "https://example.org/mail"
icon = "fa fa-envelope"
desc = "Discuss development issues around the project"
```
=== “hugo.json”
```json
{
"params": {
"links": {
"user": [
{
"name": "User mailing list",
"url": "https://example.org/mail",
"icon": "fa fa-envelope",
"desc": "Discussion and help from your fellow users"
},
{
"name": "Twitter",
"url": "https://example.org/twitter",
"icon": "fa-brands fa-twitter",
"desc": "Follow us on Twitter to get the latest news!"
},
{
"name": "Stack Overflow",
"url": "https://example.org/stack",
"icon": "fa-brands fa-stack-overflow",
"desc": "Practical questions and curated answers"
}
],
"developer": [
{
"name": "GitHub",
"url": "https://github.com/google/docsy",
"icon": "fa-brands fa-github",
"desc": "Development takes place here!"
},
{
"name": "Slack",
"url": "https://example.org/slack",
"icon": "fa-brands fa-slack",
"desc": "Chat with other project developers"
},
{
"name": "Developer mailing list",
"url": "https://example.org/mail",
"icon": "fa fa-envelope",
"desc": "Discuss development issues around the project"
}
]
}
}
}
```
如果你正在创建自己的站点,想要使用这个模板添加页面,请在你的内容根目录中添加一个 /community/_index.md 文件。如果你复制了示例站点,并不想要一个社区页面,请在项目存储库中删除 /content/en/community/ 目录。
添加静态内容
你可能想要将一些非 Hugo 构建的内容与你的站点一起提供:例如,如果你使用 Doxygen、Javadoc 或其他文档生成工具生成参考文档。
要添加静态内容以"原样(as-is)“提供,请在站点的 static 目录中添加文件夹和/或文件。在部署站点时,该目录中的内容将在站点根路径下提供服务。因此,例如,如果你在 /static/reference/cpp/ 添加了内容,用户可以在 http://{server-url}/reference/cpp/ 访问该内容,你可以从其他页面在 /reference/cpp/{file name} 上链接到该目录中的页面。
你还可以在该目录中使用你的项目使用的其他文件,包括图像文件。你可以在静态文件中了解更多关于提供静态文件的信息,包括配置多个静态内容目录。
RSS 订阅
Hugo 默认会为主页和任何章节创建一个 RSS 订阅。对于主 RSS 订阅,你可以通过设置 hugo.toml/hugo.yaml/hugo.json 中的站点参数来控制包含哪些章节。这是默认配置:
Configuration file:
=== “hugo.yaml”
```yaml
rss_sections:
- blog
```
=== “hugo.toml”
```toml
rss_sections = ["blog"]
```
=== “hugo.json”
```json
{
"rss_sections": [
"blog"
]
}
```
要禁用所有RSS订阅,请在hugo.toml/hugo.yaml/hugo.json中添加以下内容:
Configuration file:
=== “hugo.yaml”
```yaml
disableKinds:
- RSS
```
=== “hugo.toml”
```toml
disableKinds = ["RSS"]
```
=== “hugo.json”
```json
{
"disableKinds": [
"RSS"
]
}
```
注意
如果您已启用我们的打印功能或以其他方式在
hugo.toml/hugo.yaml/hugo.json中指定了章节级别的输出格式,请确保"RSS"被列为输出格式,否则您将无法获得章节级别的RSS订阅(并且您的博客章节将不会有漂亮的橙色RSS按钮)。您的hugo.toml/hugo.yaml/hugo.json规范将覆盖Hugo用于章节的默认输出格式,这些格式为HTML和RSS。Configuration file:
=== “hugo.yaml”
```yaml outputs: section: - HTML - RSS - print ```=== “hugo.toml”
```toml [outputs] section = [ "HTML", "RSS", "print" ] ```=== “hugo.json”
```json { "outputs": { "section": [ "HTML", "RSS", "print" ] } } ```
Sitemap
Hugo默认为您的生成站点创建sitemap.xml文件:例如,这是本站的sitemap。
您可以在hugo.toml/hugo.yaml/hugo.json中配置您的sitemap更新频率、sitemap文件名和默认页面优先级:
Configuration file:
=== “hugo.yaml”
```yaml
sitemap:
changefreq: monthly
filename: sitemap.xml
priority: 0.5
```
=== “hugo.toml”
```toml
[sitemap]
changefreq = "monthly"
filename = "sitemap.xml"
priority = 0.5
```
=== “hugo.json”
```json
{
"sitemap": {
"changefreq": "monthly",
"filename": "sitemap.xml",
"priority": 0.5
}
}
```
要为给定页面覆盖这些值,请在页面的前置元数据中指定:
Front matter:
=== “yaml”
```yaml
---
title: "Adding Content"
linkTitle: "Adding Content"
weight: 1
description: >
Add different types of content to your Docsy site.
sitemap:
priority: 1.0
---
```
=== “toml”
```toml
+++
title = "Adding Content"
linkTitle = "Adding Content"
weight = 1
description = '''
Add different types of content to your Docsy site.
'''
[sitemap]
priority = 1
+++
```
=== “json”
```json
{
"title": "Adding Content",
"linkTitle": "Adding Content",
"weight": 1,
"description": "Add different types of content to your Docsy site.\n",
"sitemap": {
"priority": 1
}
}
```
要了解有关配置站点地图的更多信息,请参阅Sitemap模板。
2.2 - 外观与感受
Look and Feel - 外观与感受
https://www.docsy.dev/docs/adding-content/lookandfeel/
自定义您的站点颜色、字体、代码高亮等等。
默认情况下,使用 Docsy 的站点具有主题的默认字体、颜色和一般外观和感受。然而,如果您想要自己的颜色方案(您可能会想要!),您可以使用自己项目特定的值非常容易地覆盖主题默认值——Hugo 在查找构建您的站点的信息时将首先查找您的项目文件。并且,由于 Docsy 使用 Bootstrap 4 和 SCSS 进行样式化,您可以在其特殊的 SCSS 项目变量文件中仅覆盖单个值(如项目颜色和字体),或通过创建自己的样式进行更进一步的定制。
Docsy 还提供了使用 Chroma 或 Prism 进行高亮显示代码块的选项。
项目样式文件
要自定义项目的外观和感受,请创建以下任一 Docsy 占位符文件的您自己的版本(注意下划线后缀 _project.scss):
assets/scss/_variables_project.scss是您添加项目特定的主题变量定义(如站点颜色)以及您想要设置的任何其他 Bootstrap 变量值的地方。您可以在assets/scss/_variables.scss中找到 Docsy 主题变量及其默认值的列表。有关其他 Bootstrap 4 变量的信息,请参见变量默认值和 Bootstrap 的 v4-dev/scss/_variables.scss 文件。assets/scss/_styles_project.scss是您可以添加自己的自定义 SCSS 样式的地方,包括覆盖 Docsy 主题 SCSS 文件中的任何样式。
提示
在服务器模式下运行时未启用 PostCSS(CSS 浏览器前缀自动添加)(速度较慢),因此 Chrome 是推荐的开发选择。
站点颜色
要自定义您的站点颜色,请在 assets/scss/_variables_project.scss 中添加 SCSS 变量覆盖。例如,您可以设置主色和次要色:
| |
该主题默认启用渐变背景 ($enable-gradients) 和阴影 ($enable-shadows) 等功能。您也可以在项目变量文件中通过将变量设置为 false 来切换这些功能。
字体
该主题使用Open Sans 作为其主要字体。要禁用 Google Fonts 并使用系统字体,请在 assets/scss/_variables_project.scss 中设置此 SCSS 变量:
| |
要配置其他 Google 字体:
| |
请注意,如果您决定选择具有不同权重的字体(在内置配置中,这是 300(轻),400(中)和 700(粗)),您还需要调整与权重相关的变量,即以 $font-weight- 开头的变量。
CSS 实用程序
有关可用 CSS 实用程序类的文档,请参见 Bootstrap 文档。这个主题在这个领域自己添加的很少。但是,我们添加了一些颜色状态的 CSS 类,这些类在动态上下文中可能会很有用:
.-bg-<color>.-text-<color>
例如,当您不知道primary色是暗色还是亮色时,您可以使用这些类将文本样式为适当的颜色,以确保正确的颜色对比度。当您收到颜色代码作为短代码参数时,它们也很有用。
<color> 的值可以是任何颜色名称,例如 primary、white、dark、warning、light、success、300、blue、orange 等。
当您使用 .-bg-<color> 时,文本颜色将调整以获得适当的对比度:
| |
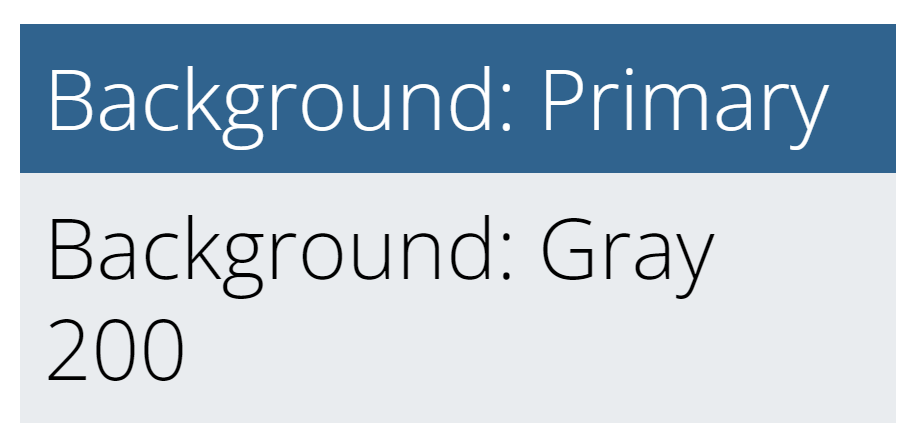
.-text-<color> 仅设置文本颜色:
| |

使用Chroma进行代码高亮
从Hugo版本0.60开始,您可以使用Chroma选择一系列代码块高亮和颜色样式,并将其默认应用于您的围栏代码块。如果您复制了最近的config.toml,则您的站点将使用Tango(像这个站点一样),否则Hugo默认为Monokai。您可以使用您的hugo.toml/hugo.yaml/hugo.json切换到任何可用的Chroma样式(包括我们的Docsy默认Tango)。
Configuration file:
=== “hugo.yaml”
```yaml
markup:
goldmark:
renderer:
unsafe: true
highlight:
style: tango
```
=== “hugo.toml”
```toml
[markup]
[markup.goldmark]
[markup.goldmark.renderer]
unsafe = true
[markup.highlight]
# See a complete list of available styles at https://xyproto.github.io/splash/docs/all.html
style = "tango"
```
=== “hugo.json”
```json
{
"markup": {
"goldmark": {
"renderer": {
"unsafe": true
}
},
"highlight": {
"style": "tango"
}
}
}
```
默认情况下,未指定语言的代码块不会应用代码高亮样式,而是会获得Docsy的默认灰色背景黑色文本的样式。如果您希望代码高亮样式适用于所有代码块,即使没有语言,请在您的hugo.toml/hugo.yaml/hugo.json中的[markup.highlight]下取消注释或添加以下行。
Configuration file:
=== “hugo.yaml”
```yaml
guessSyntax: true
```
=== “hugo.toml”
```toml
# Uncomment if you want your chosen highlight style used for code blocks without a specified language
guessSyntax = true
```
=== “hugo.json”
```json
{
"guessSyntax": true
}
```
您可以在语法高亮中了解有关在Hugo中使用Chroma进行代码高亮的更多信息。
使用Prism进行代码高亮
您还可以在您的hugo.toml/hugo.yaml/hugo.json中启用Prism语法高亮:
Configuration file:
=== “hugo.yaml”
```yaml
prism_syntax_highlighting: true
```
=== “hugo.toml”
```toml
# Enable syntax highlighting and copy buttons on code blocks with Prism
prism_syntax_highlighting = true
```
=== “hugo.json”
```json
{
"prism_syntax_highlighting": true
}
```
启用此选项后,您的站点将使用Prism而不是Chroma进行代码块高亮。
Prism是一种流行的开源语法高亮器,支持200多种语言和各种插件。
Docsy包含了用于基本Prism配置的JavaScript和CSS文件,支持:
- 使用Prism
Default主题样式化的代码块 - 代码块上的复制到剪贴板按钮
- 为许多常见语言指定的语法高亮,如下面的Prism下载链接中所指定的,定制您的下载。
没有语言的代码块
默认情况下,Prism代码高亮样式不会应用于没有指定语言的代码块,而是获得Docsy的默认灰色背景黑色文本的样式。要将Prism样式应用于没有语言或不受Prism支持的语言的代码块,请在三个反引号后指定none作为语言。
扩展Prism以支持其他语言或插件
如果包含的Prism配置不能满足您的要求,并且您想使用其他语言或插件,您可以使用您自己的文件替换包含的文件。
- 从https://prismjs.com/download.html下载您自己的Prism JS和CSS文件
- 用您下载的文件替换包含的Prism JS和CSS文件:
- 将JavaScript文件复制到
static/js/prism.js - 将CSS文件复制到
static/css/prism.css
- 将JavaScript文件复制到
导航栏
对于包含blocks/cover shortcode的页面(如大多数主页),只要主题图片没有向上滚动到导航栏上方,导航栏就是半透明的。例如,请参阅About Docsy页面。这种最初的半透明设置确保主题图片最大程度地可见。
在主题图片滚过导航栏之后,导航栏(不透明)的背景色被设置为站点的主色调。
有些主题图片的导航栏条目的文本可能难以阅读。在这些情况下,您可以通过在站点配置文件中将params.ui.navbar_translucent_over_cover_disable选项设置为true来禁用导航栏的半透明效果。
美化您的项目标识和名称
默认的Docsy导航栏(.td-navbar)显示您的站点标识,包括以下内容:
您的logo,作为内联SVG包含在导航栏中,并由
.td-navbar .navbar-brand svg样式化。有关样式详细信息,请参见_nav.scss。为确保您的logo 正确显示,您可能需要调整其大小并确保它没有高度和宽度属性,以便其大小完全响应。根据需要覆盖
.td-navbar .navbar-brand svg或(等效地).td-navbar .navbar-brand__logo的默认样式。您的项目名称,即站点
title。如果您不希望您的项目名称出现(例如,因为您的标志是或包含字体商标),则可以将以下自定义样式添加到您项目的样式中:1 2 3.td-navbar .navbar-brand__name { display: none; }
表格
Docsy通过类.td-table对所有表格应用以下样式:
Bootstrap表格样式:
.table.table-striped.table-responsive
display: block,这对于表格响应性很重要。
这种样式配置让您仅使用Markdown即可获得响应式表格,而无需将表格包装在<div>中。然而,这意味着所有表格的display设置为block。如果您不希望这样,请为表格创建自己的自定义样式。
注意
我们的表格样式违反了Bootstrap建议将表格包装在
.table-responsive中 —— 然而,我们认为让用户仅使用Markdown表格语法创建响应式表格更方便。
要在没有 Docsy 样式的情况下呈现表格,请将 .td-initial 类应用于表格。从生成的 <table> 样式基础上,更容易应用自定义样式(而不是试图撤消 Docsy 表格样式),如以下示例所示:
| |
上面的示例使用了 Markdown 属性语法,并可能渲染为如下:
| 形状 | 边数 |
|---|---|
| Triangle | 3 |
| Square | 4 |
自定义模板
将代码添加到 head 或 before body end
如果您需要在每个页面的 head 部分添加一些代码(CSS 导入、cookie 同意或类似),请将 head-end.html 局部添加到您的项目中:
layouts/partials/hooks/head-end.html
并在该文件中添加您需要的代码。您的局部代码会自动包含在主题局部head.html 结束前。本主题版本的 head-end.html 为空。
类似地,如果您想在 body end 前添加一些代码,请创建以下文件的自己的版本:
layouts/partials/hooks/body-end.html
此文件中的任何代码都会自动包含在本主题局部 scripts.html 的结尾。
head.html 和 scripts.html 都用于构建 Docsy 的基本页面布局,该布局被所有其他页面模板所使用:
| |
2.3 - 导航和搜索
Navigation and Search - 导航和搜索
https://www.docsy.dev/docs/adding-content/navigation/
为您的 Docsy 站点自定义站点导航和搜索。
顶层菜单
顶层菜单(出现在整个站点的顶部导航栏中)使用您站点的主菜单(main menu)。所有的 Hugo 站点都有一个主菜单(main menu)项数组,可以通过 .Site.Menus 站点变量进行访问,通过页面前置元数据或您站点的 hugo.toml/hugo.yaml/hugo.json 进行填充。
要将页面或章节添加到此菜单中,请将其添加到站点的主菜单(main menu)中,无论是在 hugo.toml/hugo.yaml/hugo.json 中还是在目标页面的前置元数据中(在 _index.md 或 _index.html 中作为章节着陆页面)。例如,这里是我们如何将 Documentation 章节着陆页添加到该站点的主菜单中的示例:
Front matter:
=== “yaml”
```yaml
---
title: "Welcome to Docsy"
linkTitle: "Documentation"
menu:
main:
weight: 20
pre: <i class='fa-solid fa-book'></i>
---
```
=== “toml”
```toml
+++
title = "Welcome to Docsy"
linkTitle = "Documentation"
[menu.main]
weight = 20
pre = "<i class='fa-solid fa-book'></i>"
+++
```
=== “json”
```json
{
"title": "Welcome to Docsy",
"linkTitle": "Documentation",
"menu": {
"main": {
"weight": 20,
"pre": "<i class='fa-solid fa-book'></i>"
}
}
}
```
该菜单按页面weight从左到右排序。例如,页面weight: 30 的章节索引或页面将出现在菜单中的 Documentation 章节之后,而weight: 10的页面将出现在它之前。
如果要将外部站点的链接添加到此菜单中,请在 hugo.toml/hugo.yaml/hugo.json 中添加,指定weight。
Configuration file:
=== “hugo.yaml”
```yaml
menu:
main:
- name: GitHub
weight: 50
url: 'https://github.com/google/docsy/'
```
=== “hugo.toml”
```toml
[[menu.main]]
name = "GitHub"
weight = 50
url = "https://github.com/google/docsy/"
```
=== “hugo.json”
```json
{
"menu": {
"main": [
{
"name": "GitHub",
"weight": 50,
"url": "https://github.com/google/docsy/"
}
]
}
}
```
将图标添加到顶层菜单
如 Hugo 文档中所述,您可以使用站点的 hugo.toml/hugo.yaml/hugo.json 或页面前置元数据中定义的主菜单项的 pre 和/或 post 参数为顶层菜单项添加图标。例如,以下配置将 GitHub 图标添加到 GitHub 菜单项,并添加 New! 警报以指示这是菜单的新添加。
Configuration file:
=== “hugo.yaml”
```yaml
menu:
main:
- name: GitHub
weight: 50
url: 'https://github.com/google/docsy/'
pre: <i class="fa-brands fa-github"></i>
post: <span class='alert'>New!</span>
```
=== “hugo.toml”
```toml
[[menu.main]]
name = "GitHub"
weight = 50
url = "https://github.com/google/docsy/"
pre = "<i class="fa-brands fa-github"></i>"
post = "<span class='alert'>New!</span>"
```
=== “hugo.json”
```json
{
"menu": {
"main": [
{
"name": "GitHub",
"weight": 50,
"url": "https://github.com/google/docsy/",
"pre": "<i class="fa-brands fa-github"></i>",
"post": "<span class='alert'>New!</span>"
}
]
}
}
```
您可以在FontAwesome文档中找到完整的图标列表。Docsy主题默认包含免费的FontAwesome图标。
添加版本下拉菜单
如果在hugo.toml中添加了一些[params.versions],Docsy主题将在顶级菜单中添加一个版本选择器下拉菜单。
您可以在版本控制指南中了解更多信息。
添加语言下拉菜单
如果在hugo.toml中配置了多种语言,Docsy主题将在顶级菜单中添加一个语言选择器下拉菜单。选择语言将带用户到当前页面的翻译版本,或给定语言的主页。
您可以在多语言支持中了解更多信息。
章节菜单
章节菜单位于docs章节的左侧,自动从content树中构建。与顶级菜单一样,按页面或章节索引weight(或按页面创建date,如果未设置weight)排序,页面或索引的title或linkTitle(如果不同)作为菜单中的链接标题。如果一个章节子文件夹除了_index.md或_index.html之外还有其他页面,那么这些页面将作为子菜单出现,再次按weight排序。例如,这是这个页面的元数据,显示它的weight和title:
Front matter:
=== “yaml”
```yaml
---
title: "Navigation and Search"
linkTitle: "Navigation and Search"
date: 2017-01-05
weight: 3
description: >
Customize site navigation and search for your Docsy site.
---
```
=== “toml”
```toml
+++
title = "Navigation and Search"
linkTitle = "Navigation and Search"
date = 2017-01-05T00:00:00.000Z
weight = 3
description = '''
Customize site navigation and search for your Docsy site.
'''
+++
```
=== “json”
```json
{
"title": "Navigation and Search",
"linkTitle": "Navigation and Search",
"date": "2017-01-05T00:00:00.000Z",
"weight": 3,
"description": "Customize site navigation and search for your Docsy site.\n"
}
```
要从左侧导航菜单中隐藏页面或章节,请在前置元数据中设置toc_hide: true。
要从文档章节着落页的章节摘要中隐藏一个页面,请在该页面的前置元数据中设置hide_summary: true。如果您想从目录菜单和章节摘要列表中隐藏一个页面,您需要在该页面的前置元数据中将toc_hide和hide_summary都设置为true。
Front matter:
=== “yaml”
```yaml
---
title: "My Hidden Page"
weight: 99
toc_hide: true
hide_summary: true
description: >
Page hidden from both the TOC menu and the section summary list.
---
```
=== “toml”
```toml
+++
title = "My Hidden Page"
weight = 99
toc_hide = true
hide_summary = true
description = '''
Page hidden from both the TOC menu and the section summary list.
'''
+++
```
=== “json”
```json
{
"title": "My Hidden Page",
"weight": 99,
"toc_hide": true,
"hide_summary": true,
"description": "Page hidden from both the TOC menu and the section summary list.\n"
}
```
章节菜单选项
默认情况下,章节菜单完全展开显示当前章节。对于大型站点,这可能会使左侧导航过长,难以扫描。尝试在hugo.toml中设置站点参数ui.sidebar_menu_compact = true。
使用紧凑菜单(.ui.sidebar_menu_compact = true),只显示当前页面的祖先、同级和直接后代。您可以使用可选参数.ui.ul_show来设置所需的菜单深度始终可见。例如,使用.ui.ul_show = 1将始终显示第一级菜单。
除了完全展开和紧凑的菜单选项,您还可以通过在hugo.toml中设置站点参数ui.sidebar_menu_foldable = true来创建折叠菜单。折叠菜单让用户通过在菜单中的父节点旁边切换箭头图标来展开和折叠该菜单章节。
在大型站点上(默认情况下:>2000页),该章节菜单不会为每个页面生成,而是为整个章节进行缓存。然后使用JS设置标记活动菜单项(和菜单路径)的HTML类。您可以使用可选参数.ui.sidebar_cache_limit调整激活缓存的章节菜单的限制。
下面的选项卡窗格列出了您可以在项目配置文件中定义的菜单章节选项。
Configuration file:
=== “hugo.yaml”
```yaml
params:
ui:
sidebar_menu_compact: true
ul_show: 1
sidebar_menu_foldable: true
sidebar_cache_limit: 1000
```
=== “hugo.toml”
```toml
[params.ui]
sidebar_menu_compact = true
ul_show = 1
sidebar_menu_foldable = true
sidebar_cache_limit = 1000
```
=== “hugo.json”
```json
{
"params": {
"ui": {
"sidebar_menu_compact": true,
"ul_show": 1,
"sidebar_menu_foldable": true,
"sidebar_cache_limit": 1000,
}
}
}
```
向章节菜单添加图标
您可以通过在页面前置元数据中设置icon参数(例如icon: fa-solid fa-screwdriver-wrench)向侧边栏中的章节菜单添加图标。
您可以在FontAwesome文档中找到要使用的所有图标的完整列表。Docsy默认包含免费的FontAwesome图标。
开箱即用,如果您想使用图标,您应该为同一菜单级别上的所有项定义图标,以确保适当的外观。如果该图标以不同的方式使用,则可能需要进行个别CSS调整。
向章节菜单添加手动链接
默认情况下,章节菜单完全是从您的章节页面生成的。如果您想在此菜单中添加手动链接,例如链接到外部站点或你站点中的不同章节中的页面,则可以通过在doc层次结构中创建具有适当权重和一些特殊参数的占位符页面文件(frontmatter)来实现这一点,以指定链接详细信息。
要创建占位符页面,请按通常方式在要在该菜单中显示链接的目录中创建一个页面文件,并将manualLink参数添加到其元数据中。如果一个页面在其元数据中具有manualLink,则Docsy会为此页面在章节菜单和章节索引中(章节在着陆页面上的子页面列表中 —— 请参见Docsy文档中的描述)生成链接,但该链接目标会被替换为manualLink的值。该链接文本是您的占位符页面的title(如果设置了linkTitle,则是linkTitle)。您还可以使用manualLinkTitle参数设置链接的title属性以及使用manualLinkTarget设置链接目标 —— 例如,如果您希望一个外部链接在新选项卡中打开,则可以将其链接目标设置为_blank。Docsy会自动将rel=noopener添加到打开新标签页的链接中,作为安全最佳实践。
您还可以使用manualLink将其他现有站点页面的附加交叉引用添加到站点中。对于内部链接,您可以选择使用manualLinkRelref参数而不是manualLink来使用内置的Hugo函数relref。如果relref无法在您的站点中找到唯一页面,则Hugo会抛出错误消息。
注意
尽管基于您的占位符文件生成的所有菜单和着陆页链接都根据参数
manualLink或manualLinkRelref设置,但 Hugo 仍会为该文件生成一个常规的 HTML 站点页面,尽管没有生成的链接指向该页面。为避免用户意外着陆到生成的占位符页面时产生混淆,我们建议在该页面的正常内容和/或页面描述中指定外部链接的 URL。
面包屑导航
默认情况下,面包屑导航链接出现在每个页面的顶部。要禁用面包屑导航,请在hugo.toml中设置站点参数ui.breadcrumb_disable = true。
分类结果页面上的每个项(例如,单击一个分类标签,例如:标签/类别)也会显示面包屑导航链接。可以通过在hugo.toml中设置站点参数ui.taxonomy_breadcrumb_disable = true来禁用这些面包屑。
下面的选项卡窗格列出了您可以在项目配置文件中定义的面包屑导航选项。
Configuration file:
=== “hugo.yaml”
```yaml
params:
ui:
breadcrumb_disable: true
taxonomy_breadcrumb_disable: true
```
=== “hugo.toml”
```toml
[params.ui]
breadcrumb_disable = true
taxonomy_breadcrumb_disable = true
```
=== “hugo.json”
```json
{
"params": {
"ui": {
"breadcrumb_disable": true,
"taxonomy_breadcrumb_disable": true
}
}
}
```
站点搜索选项
Docsy提供多个选项,让您的读者搜索您的站点内容,因此您可以选择适合您需求的选项。您可以选择以下选项:
- Google自定义搜索引擎(GCSE),默认选项,使用Google的公共站点索引生成搜索结果页面。
- Algolia DocSearch使用Algolia的索引和搜索机制,并在读者使用搜索框时提供组织良好的下拉式搜索结果列表。 Algolia DocSearch对公共文档站点是免费的。
- 使用Lunr进行本地搜索,它使用JavaScript对您的站点进行索引和搜索,而无需连接到外部服务。此选项不需要将您的站点公开。
如果你在项目的配置文件中启用了这些搜索选项,那么一个搜索框将显示在你的顶部导航栏右侧。默认情况下,在左侧导航窗格的章节菜单顶部也会显示一个搜索框,如果你愿意,或者如果你使用的搜索选项仅适用于顶部搜索框,你可以禁用它。
请注意,如果您在项目配置文件中意外启用了多个搜索选项,您可能会得到意外的结果(例如,如果您添加了Algolia DocSearch的.js文件,如果启用了GCSE搜索但忘记禁用Algolia搜索,则会得到Algolia的结果)。
禁用侧边栏搜索框
默认情况下,搜索框会显示在顶部导航栏和侧边栏左侧导航窗格的顶部。如果您不想要侧边栏搜索框,请在hugo.toml/hugo.yaml/hugo.json中设置sidebar_search_disable为true。
Configuration file:
=== “hugo.yaml”
```yaml
sidebar_search_disable: true
```
=== “hugo.toml”
```toml
sidebar_search_disable = true
```
=== “hugo.json”
```json
{
"sidebar_search_disable": true
}
```
使用 Google 自定义搜索引擎配置搜索
默认情况下,Docsy 使用 Google 自定义搜索引擎 (GCSE) 搜索您的站点。要启用此功能,您首先需要确保已构建并部署了您站点的生产版本,否则您的站点将无法被爬取和索引。
设置站点搜索
- 在Custom Search page上点击New search engine,按照说明为已部署的站点创建一个 Google 自定义搜索引擎。记下您的新搜索引擎的 ID。
- 使用Edit search engine选项添加您想要的任何其他配置到您的搜索引擎中。特别是您可能需要执行以下操作:
- 选择Look and feel。将默认的Overlay布局更改为Results only,因为这个选项意味着您的搜索结果被嵌入到搜索页面中,而不是出现在单独的框中。单击Save以保存更改。
- 编辑默认的结果链接行为,使来自您站点的搜索结果不会在新标签页中打开。要执行此操作,请选择Search Features - Advanced - Websearch Settings。在Link Target字段中键入"_parent"。单击Save以保存更改。
提示
您的站点搜索结果应该会在几天内显示。如果需要更长的时间,你可以通过 Google 搜索控制台提交站点地图来手动请求索引。
添加搜索页面
一旦您设置好搜索引擎,就可以将此功能添加到您的站点:
确保在
content/en/search.md中有一个 Markdown 文件 (如果需要,其他语言也需要一个) 来显示您的搜索结果。它只需要一个title和layout: search,如以下示例:Front matter:
=== “yaml”
```yaml
---
title: Search Results
layout: search
---
```
=== “toml”
```toml
+++
title = "Search Results"
layout = "search"
+++
```
=== “json”
```json
{
"title": "Search Results",
"layout": "search"
}
```
将您的 Google 自定义搜索引擎 ID 添加到
hugo.toml/hugo.yaml/hugo.json的站点参数中。如果需要,您可以针对每种语言添加不同的值。Configuration file:
=== “hugo.yaml”
```yaml
gcs_engine_id: '011737558837375720776:fsdu1nryfng'
```
=== “hugo.toml”
```toml
gcs_engine_id = "011737558837375720776:fsdu1nryfng"
```
=== “hugo.json”
```json
{
"gcs_engine_id": "011737558837375720776:fsdu1nryfng"
}
```
禁用 GCSE 搜索
如果您未为您的项目指定 Google 自定义搜索引擎 ID 并且未启用任何其他搜索选项,则搜索框将不会出现在您的站点中。如果您正在使用示例站点中的默认 hugo.toml 并想禁用搜索,请注释或删除相关行。
配置 Algolia DocSearch
作为 GCSE 的替代方案,您可以使用此主题的 Algolia DocSearch。Algolia DocSearch 对于公共文档站点是免费的。Docsy 支持 Algolia DocSearch v3。
注意
Docsy 以前支持 Algolia DocSearch v2,现在已被弃用。如果您是现有的 Algolia DocSearch v2 用户并想使用最新版本的 Docsy,请按照 DocSearch 文档中的迁移说明更新您的 DocSearch 代码片段。
注册 Algolia DocSearch
在 https://docsearch.algolia.com/apply/ 上完成表单。
如果您被接受to the program,您将通过电子邮件收到从Algolia获取的用于添加到您的文档站点的代码。
添加Algolia DocSearch
Configuration file:
在
hugo.toml/hugo.yaml/hugo.json中启用Algolia DocSearch。
=== “hugo.yaml”
```yaml
algolia_docsearch: true
```
=== “hugo.toml”
```toml
algolia_docsearch = true
```
=== “hugo.json”
```json
{
"algolia_docsearch": true
}
```
移除或注释掉
hugo.toml/hugo.yaml/hugo.json中的任何GCSE ID,并确保将本地搜索设置为false,因为您只能启用一种类型的搜索。请参阅禁用GCSE搜索。在
hugo.toml/hugo.yaml/hugo.json中禁用侧边栏搜索,因为目前它不支持Algolia DocSearch。请参阅禁用侧边栏搜索框。按照Add code to head or before body end中的说明,在站点的每个页面的head和body中添加用于使用Algolia的CSS和JS。
在
head-end.html中添加DocSearch CSS:1<link rel="stylesheet" href="https://cdn.jsdelivr.net/npm/@docsearch/css@3" />在
body-end.html中添加DocSearch脚本,用从 Algolia 获取的代码段替换docsearch的详细信息(下面的示例是Algolia自己的站点索引!)。您必须提供#docsearch作为container值,因为那是 Docsy 布局中提供的div的 ID:1 2 3 4 5 6 7<script src="https://cdn.jsdelivr.net/npm/@docsearch/js@3"></script> <script type="text/javascript">docsearch({ container: '#docsearch', appId: 'R2IYF7ETH7', apiKey: '599cec31baffa4868cae4e79f180729b', indexName: 'docsearch', });</script>
您可以在Algolia DocSearch V3 Getting started中了解有关如何配置DocSearch的更多信息。
当你完成这些步骤后,Algolia搜索就应该在你的站点上启用了。搜索结果会显示在一个弹窗中,因此你不需要添加任何搜索结果页面。
配置Lunr本地搜索
Lunr 是一种基于 Javascript 的搜索选项,它可以让您对站点进行索引并进行搜索,无需外部服务器端搜索服务。这是一个特别适合较小或非公共站点的好选择。
要将Lunr搜索添加到您的Docsy站点中:
- 在
hugo.toml/hugo.yaml/hugo.json中启用本地搜索。
=== “hugo.yaml”
```yaml
offlineSearch: true
```
=== “hugo.toml”
```toml
offlineSearch = true
```
=== “hugo.json”
```json
{
"offlineSearch": true
}
```
- 在
hugo.toml/hugo.yaml/hugo.json中删除或注释掉任何 GCSE ID,并确保 Algolia DocSearch 设置为false,因为您只能启用一种类型的搜索。请参阅 禁用 GCSE 搜索。
完成这些步骤后,本地搜索已在您的站点上启用,搜索结果会在您使用搜索框时以下拉列表形式出现。
提示
如果您正在使用Hugo的本地服务器功能进行本地测试,则需要首先通过运行
hugo来构建您的offline-search-index.xxx.json文件。如果您在构建offline-search-index.xxx.json文件时已经运行Hugo服务器,则可能需要停止服务器并重新启动才能看到您的搜索结果。
更改本地搜索结果摘要长度
您可以通过在 hugo.toml/hugo.yaml/hugo.json 中设置 offlineSearchSummaryLength 来自定义摘要长度。
Configuration file:
=== “hugo.yaml”
```yaml
offlineSearch: true
offlineSearchSummaryLength: 200
```
=== “hugo.toml”
```toml
#Enable offline search with Lunr.js
offlineSearch = true
offlineSearchSummaryLength = 200
```
=== “hugo.json”
```json
{
"offlineSearch": true,
"offlineSearchSummaryLength": 200
}
```
更改本地搜索的最大结果数
您可以通过在 hugo.toml/hugo.yaml/hugo.json 中设置 offlineSearchMaxResults 来自定义最大结果数。
Configuration file:
=== “hugo.yaml”
```yaml
offlineSearch: true
offlineSearchMaxResults: 25
```
=== “hugo.toml”
```toml
offlineSearch = true
offlineSearchMaxResults = 25
```
=== “hugo.json”
```json
{
"offlineSearch": true,
"offlineSearchMaxResults": 25
}
```
更改本地搜索结果弹出窗口的宽度
搜索结果弹出窗口的宽度将根据内容自动扩展。
如果您想限制宽度,请将以下 scss 添加到 assets/scss/_variables_project.scss。
| |
排除页面不出现在本地搜索结果中
要将一些页面排除在本地搜索结果之外,请在这些页面的每个页面的前置元数据中添加 exclude_search: true:
front matter:
=== “yaml”
```yaml
---
title: "Index"
weight: 10
exclude_search: true
---
```
=== “toml”
```toml
+++
title = "Index"
weight = 10
exclude_search = true
+++
```
=== “json”
```json
{
"title": "Index",
"weight": 10,
"exclude_search": true
}
```
2.4 - 文档版本控制
Doc Versioning - 文档版本控制
https://www.docsy.dev/docs/adding-content/versioning/
定制多个文档版本的导航和横幅。
根据您的项目的发布和版本控制,您可能希望让用户访问您的文档的先前版本。如何部署先前的版本取决于您。本页面介绍了 Docsy 中可用的功能,可用于在不同版本的文档之间提供导航,并在归档站点上显示信息横幅。
添加版本下拉菜单
如果在 hugo.toml/hugo.yaml/hugo.json 中添加一些 [params.versions],Docsy 主题将在顶级菜单中添加版本选择器下拉菜单。您可以指定每个版本的 URL 和名称,如下面的示例所示:
Configuration file:
=== “hugo.yaml”
```yaml
params:
versions:
- version: master
url: 'https://master.kubeflow.org'
- version: v0.2
url: 'https://v0-2.kubeflow.org'
- version: v0.3
url: 'https://v0-3.kubeflow.org'
```
=== “hugo.toml”
```toml
# Add your release versions here
[[params.versions]]
version = "master"
url = "https://master.kubeflow.org"
[[params.versions]]
version = "v0.2"
url = "https://v0-2.kubeflow.org"
[[params.versions]]
version = "v0.3"
url = "https://v0-3.kubeflow.org"
```
=== “hugo.json”
```json
{
"params": {
"versions": [
{
"version": "master",
"url": "https://master.kubeflow.org"
},
{
"version": "v0.2",
"url": "https://v0-2.kubeflow.org"
},
{
"version": "v0.3",
"url": "https://v0-3.kubeflow.org"
}
]
}
}
```
记得添加当前版本,以便用户可以导航回去!
版本下拉菜单的默认标题为 Releases。要更改标题,请更改 hugo.toml/hugo.yaml/hugo.json 中的 version_menu 参数:
Configuration file:
=== “hugo.yaml”
```yaml
version_menu: 'Releases'
```
=== “hugo.toml”
```toml
version_menu = "Releases"
```
=== “hugo.json”
```json
{
"version_menu": "Releases"
}
```
如果将 version_menu_pagelinks 参数设置为 true,则版本下拉菜单中的链接指向其他版本中的当前页面,而不是主页面。如果文档在不同版本之间几乎没有变化,则此功能可能很有用。请注意,如果其他版本中不存在当前页面,则链接将被broken。
您可以在导航和搜索指南中阅读有关 Docsy 菜单的更多信息。
在归档的文档站点上显示横幅
如果为文档的早期版本创建了归档快照,则可以在归档的文档的每个页面顶部添加注释,以让读者知道他们正在查看未维护的快照,并向他们提供最新版本的链接。
例如,请参见 Kubeflow v0.6 的归档文档:
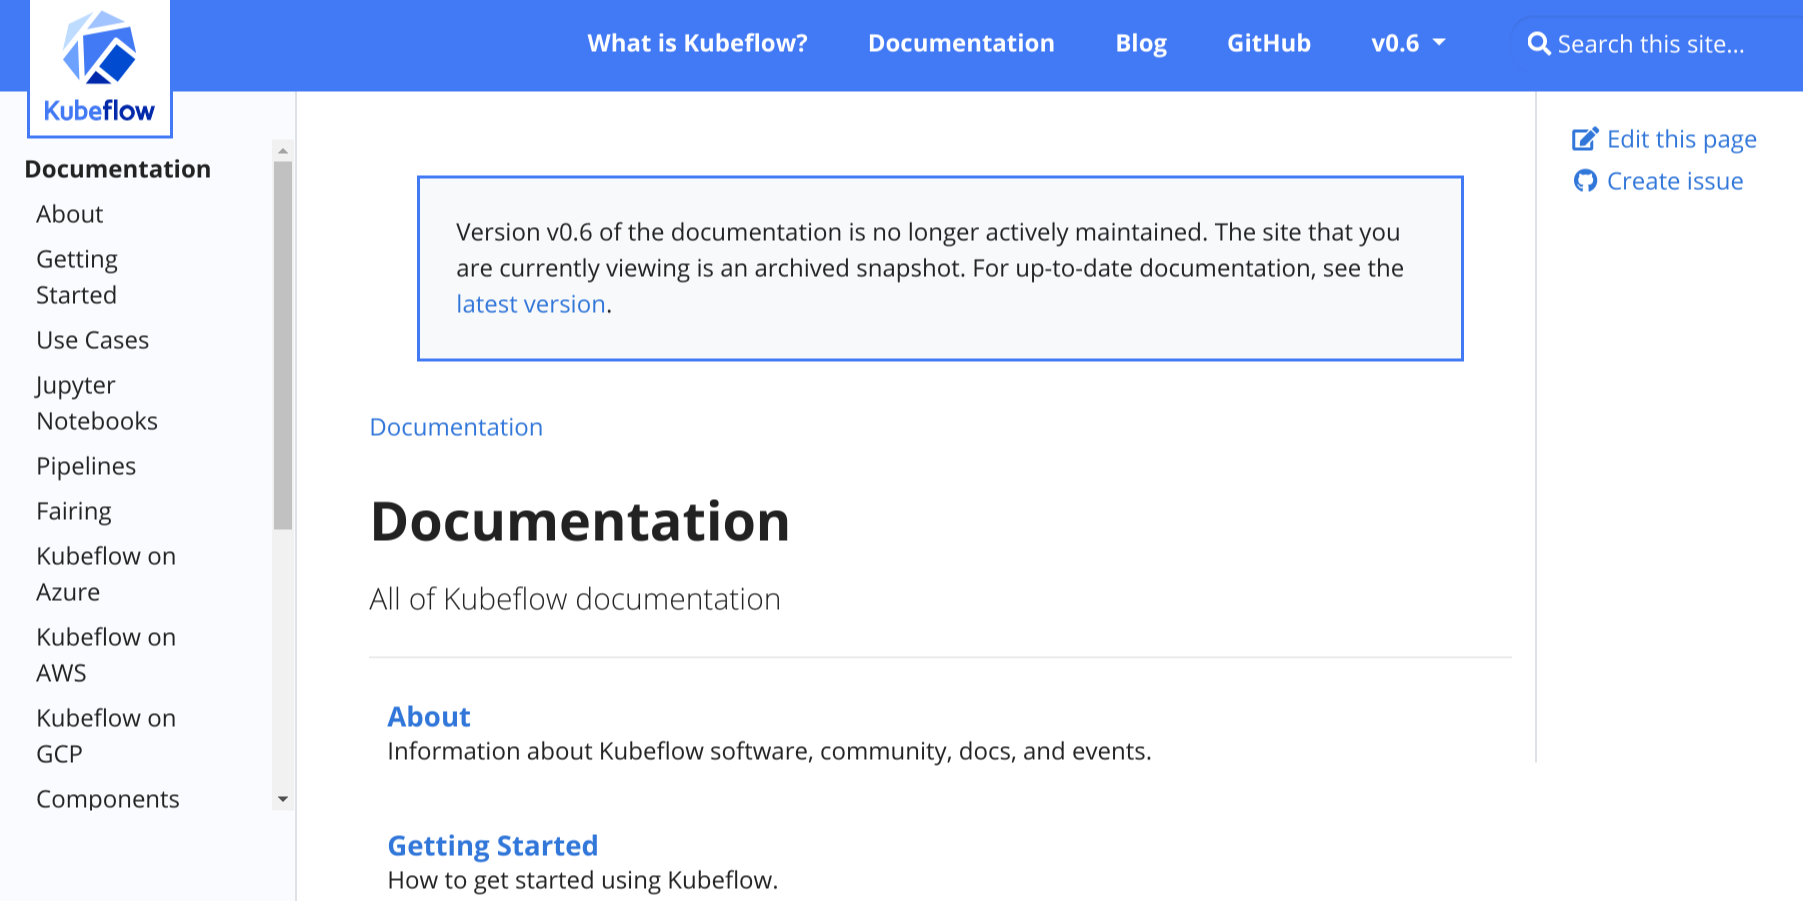
图1:Kubeflow v0.6归档文档上的横幅
要在文档站点上添加横幅,请在hugo.toml/hugo.yaml/hugo.json文件中进行以下更改:
将
archived_version参数设置为true:Configuration file:
=== “hugo.yaml”
```yaml
archived_version: true
```
=== “hugo.toml”
```toml
archived_version = true
```
=== “hugo.json”
```json
{
"archived_version": true
}
```
将
version参数设置为归档文档集的版本。例如,如果归档文档是版本0.1:Configuration file:
=== “hugo.yaml”
```yaml
version: '0.1'
```
=== “hugo.toml”
```toml
version = "0.1"
```
=== “hugo.json”
```json
{
"version": "0.1"
}
```
确保
url_latest_version包含您想要指向读者的站点的URL。在大多数情况下,这应该是您文档的最新版本的URL:Configuration file:
=== “hugo.yaml”
```yaml
url_latest_version: 'https://your-latest-doc-site.com'
```
=== “hugo.toml”
```toml
url_latest_version = "https://your-latest-doc-site.com"
```
=== “hugo.json”
```json
{
"url_latest_version": "https://your-latest-doc-site.com"
}
```
2.5 - Docsy简码
Docsy Shortcodes - Docsy简码
https://www.docsy.dev/docs/adding-content/shortcodes/
使用Docsy的Hugo简码快速构建站点页面。
Hugo 允许你定义并使用 简码,而不是从头编写所有站点页面。这些可重复使用的内容片段可以包含在你的页面中,通常使用 HTML 创建难以或不可能在简单的 Markdown 中实现的效果。简码还可以具有参数,例如,让你向花哨的简码文本框中添加自己的文本。除了 Hugo 的内置简码外,Docsy 还提供了一些自己的 简码,以帮助你构建页面。
简码分隔符
如下所示,使用花括号样式的简码分隔符\{\{\<...\>\}\}告诉Hugo内部内容是HTML/纯文本,无需进一步处理。通过使用分隔符\{\{\%...\%\}\},Hugo将把简码body视为Markdown。您可以在页面中使用这两种样式。
简码块
本主题附带一组自定义页面块(Page Block )简码,可用于组合着陆页面、About页面等。
这些块共享一些通用参数:
height
块容器的预定义高度。可以是
min、med、max、full或auto中的一个。将其设置为full将填充视口高度,这对于着陆页非常有用。color
如果未提供,块将被分配一个主题调色板的颜色,但如果需要,您可以设置自己的颜色。您可以使用所有 Bootstrap 的颜色名称、主题颜色名称或灰度阴影。一些例子包括
primary、white、dark、warning、light、success、300、blue、orange。这将成为块的背景颜色,但文本颜色将适应以获得适当的对比度。
blocks/cover
blocks/cover简码创建填充页面顶部的着陆页类型块。
| |
请注意,上面提到的相关简码参数将具有合理的默认值,但为了完整性而包含在此处。
| Parameter | Default | Description |
|---|---|---|
| title | The main display title for the block. 该块的主要显示标题。 | |
| image_anchor | ||
| height | See above. | |
| color | See above. | |
| byline | Byline text on featured image. 在特色图片上的署名文本。 |
要设置背景图像,请在该页面的Page Bundle中放置一个带有"background"单词的图像名称。例如,在我们的示例站点中,首页的封面块中的背景图像为featured-background.jpg,在同一目录中。
提示
如果在图像名称中还包括featured单词,例如
my-featured-background.jpg,则在共享时它也将用作Twitter Card图像。
有关可用图标,请参见Font Awesome。
blocks/lead
blocks/lead简码是一个简单的引导/标题块,具有居中的文本和向下箭头指向下一节。
| |
| Parameter | Default | Description |
|---|---|---|
| height | auto | See Shortcode blocks |
| color | .Ordinal | See Shortcode blocks |
blocks/section
blocks/section简码旨在作为通用内容容器使用。它有两种"口味(flavors)",一种适用于一般内容,另一种则具有更适合包装水平特征章节的样式。
下面的示例显示一个包含3个特征章节的章节。
| |
| 参数 | 默认值 | 描述 |
|---|---|---|
height | See above. | |
color | See above. | |
type | 如果您想要一个一般的容器,请指定"container"(默认值),或者如果该章节包含列 - 必须是直接子级,则指定"row"。 |
blocks/feature
| |
| 参数 | 默认值 | 描述 |
|---|---|---|
| title | The title to use. | |
| url | The URL to link to. | |
| icon | The icon class to use. |
blocks/link-down
blocks/link-down简码创建导航链接到下一个章节。它旨在与其他块简码结合使用。
| |
| 参数 | 默认值 | 描述 |
|---|---|---|
| color | info | See above. |
简码助手(helpers)
alert
alert简码创建一个警报块,可用于显示通知或警告。
| |
渲染为:

| 参数 | 默认值 | 描述 |
|---|---|---|
| color | primary | 其中之一的主题颜色,例如primary,info,warning等。 |
pageinfo
pageinfo 简码创建了一个文本框,您可以使用它来为页面添加横幅信息,例如告诉用户页面包含占位内容,内容已过时或记录了一个 beta 功能。
| |
渲染成:

| 参数 | 默认值 | 描述 |
|---|---|---|
| color | primary | 其中之一的主题颜色,例如primary,info,warning等。 |
imgproc
imgproc简码会在当前Page Bundle中查找图片,并根据给定的一组处理指令对其进行缩放。
| |

上面的示例还添加了带有照片归属地的副标题。当使用来自WikiMedia等免费许可的插图时,大多数情况下需要一种方法来归属作者或许可证持有人。您可以在你的页面前置元数据中的页面资源中添加元数据。在此主题中,byline 参数通常用于此目的:
Front matter:
=== “yaml”
```yaml
---
resources:
- src: "**spruce*.jpg"
params:
byline: "Photo: Bjørn Erik Pedersen / CC-BY-SA"
---
```
=== “toml”
```toml
+++
[[resources]]
src = "**spruce*.jpg"
[resources.params]
byline = "Photo: Bjørn Erik Pedersen / CC-BY-SA"
+++
```
=== “json”
```json
{
"resources": [
{
"src": "**spruce*.jpg",
"params": {
"byline": "Photo: Bjørn Erik Pedersen / CC-BY-SA"
}
}
]
}
```
| 参数 | 描述 |
|---|---|
| 1 | 图片文件名或足够的文件名以便识别它(我们使用Glob匹配) |
| 2 | 命令。可以是Fit、Resize、Fill或Crop中的一个。参见Image Processing Methods。 |
| 3 | 处理选项,例如 400x450 r180。参见Image Processing Options。 |
swaggerui
swaggerui 简码可以放置在任何使用 swagger 布局 的页面中;它使用任何 OpenAPI YAML 或 JSON 文件作为源来渲染 Swagger UI。该文件可以托管在任何位置,例如您站点的根 /static 文件夹中。
Front matter:
=== “yaml”
```yaml
---
title: "Pet Store API"
type: swagger
weight: 1
description: Reference for the Pet Store API
---
\{\{\< swaggerui src="/openapi/petstore.yaml" \>\}\}
```
=== “toml”
```toml
+++
title = "Pet Store API"
type = "swagger"
weight = 1
description = "Reference for the Pet Store API"
+++
\{\{\< swaggerui src="/openapi/petstore.yaml" \>\}\}
```
=== “json”
```json
{
"title": "Pet Store API",
"type": "swagger",
"weight": 1,
"description": "Reference for the Pet Store API"
}
\{\{\< swaggerui src="/openapi/petstore.yaml" \>\}\}
```
您可以通过覆盖Swagger的CSS或通过编辑和编译Swagger UI dist自己来自定义Swagger UI的外观和感觉,并替换themes/docsy/static/css/swagger-ui.css。
redoc
redoc简码使用开源Redoc工具从OpenAPI YAML或JSON文件中渲染参考API文档。该文件可以托管在您喜欢的任何位置,例如在站点的根/static 文件夹中,但您也可以使用一个URL,例如:
| |
iframe
使用此简码,您可以将外部内容作为内联框架(iframe)嵌入Docsy页面,参见:https://www.w3schools.com/tags/tag_iframe.asp
| 参数 | 默认值 | 描述 |
|---|---|---|
| src | 外部内容的URL | |
| width | 100% | iframe的宽度 |
tryautoheight | true | 如果为 true,则该简码将尝试使用 JavaScript 计算嵌入式内容所需的高度,如此处所述:https://stackoverflow.com/a/14618068。这仅在嵌入式内容与当前域名相同时才可能实现(https://stackoverflow.com/questions/22086722/resize-cross-domain-iframe-height)。请注意,即使嵌入式内容与当前域名相同,仍取决于内容的结构是否能够正确计算高度。 |
| style | min-height:98vh; border:none; | 用于 iframe 的 CSS 样式。min-height: 98vh; 是在 tryautoheight 不起作用时的备选项。border: none; 将 iframe 的边框删除 - 如果您希望嵌入式内容看起来更像页面中的内部内容,则这很有用。 |
| sandbox | false | 您可以通过设置 sandbox = true 完全打开沙盒模式,或使用在 HTML 标准 中定义的 iframe 参数 sandbox 的常见值来允许特定功能。 |
| name | iframe-name | 指定该iframe的名称。 |
| id | iframe-id | 设置该iframe的ID。 |
| class | 设置该iframe的类的可选参数。 | |
| sub | 您的浏览器无法显示嵌入框架。您可以通过以下链接访问嵌入页面: | 如果用户的浏览器无法显示嵌入式框架,则显示的文本(除了嵌入的 URL)。 |
警告
只有在服务器的
X-Frame-Options未设置或明确允许被嵌入到您的站点时,才能嵌入外部内容。有关详细信息,请参见https://developer.mozilla.org/zh-CN/docs/Web/HTTP/Headers/X-Frame-Options。
有几种工具可用于检查站点是否可以通过iframe嵌入,例如:https://gf.dev/x-frame-options-test。请注意,当此测试显示"Couldn’t find the X-Frame-Options header in the response headers.“时,您可以嵌入它,但是当测试显示"Great! X-Frame-Options header was found in the HTTP response headers as highlighted below.“时,除非已明确启用了您的站点,否则您不可以嵌入它。
Tabbed panes 选项卡式窗格
在编写内容时,有时非常有用的是选项卡式窗格。一个常见的用例是显示多个语法突出显示的代码块,这些代码块展示了同一问题在不同编程语言中的解决方法。例如,下面的选项卡式窗格显示了通常在学习新编程语言时编写的Hello world!程序的语言特定变体:
=== “C”
```C
#include <stdio.h>
#include <stdlib.h>
int main(void)
{
puts("Hello World!");
return EXIT_SUCCESS;
}
```
=== “C++”
```C++
#include <iostream>
int main()
{
std::cout << "Hello World!" << std::endl;
}
```
=== “Go”
```Go
package main
import "fmt"
func main() {
fmt.Printf("Hello World!\n")
}
```
=== “Java”
```Java
class HelloWorld {
static public void main( String args[] ) {
System.out.println( "Hello World!" );
}
}
```
=== “Kotlin”
```Kotlin
fun main(args : Array<String>) {
println("Hello, world!")
}
```
=== “Lua”
```Lua
print "Hello world"
```
=== “PHP”
```PHP
<?php
echo 'Hello World!';
?>
```
=== “Python”
```Python
print("Hello World!")
```
=== “Ruby”
```Ruby
puts "Hello World!"
```
=== “Scala”
```Scala
object HelloWorld extends App {
println("Hello world!")
}
```
=== “Reference”
```c
```
Docsy模板提供了两个简码tabpane和tab,让您轻松创建选项卡式窗格。要了解如何使用它们,请查看以下代码块,该代码块渲染为右对齐的窗格,其中一个选项卡被禁用,另外三个选项卡处于活动状态:
| |
这段代码转换为下面的右对齐选项卡窗格,显示英语、德语或斯瓦希里语的Welcome!问候:
Languages:
=== “English”

=== “German”

=== “Swahili”

简码详细信息
选项卡式窗格使用两个简码实现:
tabpane简码是选项卡的容器元素。该简码可以包含可选的命名参数lang、highlight和right。可选参数lang和highlight的值会作为 Hugo 内置函数 highlight 的第二个LANG和第三个OPTIONS参数传递,该函数用于渲染各个选项卡中的代码块。如果您想要右对齐选项卡,请指定right=true。如果选项卡的标题文本等于选项卡代码块中使用的语言(如上面的第一个选项卡窗格示例),您可以在周围的tabpane简码中指定langEqualsHeader=true。然后,各个选项卡的标题文本将自动设置为相应选项卡的lang参数。各种选项卡简码代表您想要显示的选项卡。对于每个选项卡,通过指定命名参数
header来设置选项卡的标题文本。如果header参数是您选项卡简码中唯一的参数,则可以将标题设置为未命名参数,例如{ tab "My header" }} … {{ /tab }}。如果您的选项卡简码没有任何参数,则选项卡的header 将默认为Tab n。要将窗格分为左对齐和右对齐的选项卡组,请在分隔选项卡中指定right=true。通过多次设置right=true,您甚至可以渲染多个选项卡组。通过指定参数disabled=true可以禁用选项卡。对于启用的选项卡,有两种内容显示模式,代码表示和文本表示:- 默认情况下,选项卡的内容将渲染为代码块。为了获得适当的语法高亮显示,请为每个选项卡指定命名参数
lang,并可选地指定参数highlight。在父选项卡窗格简码中设置的参数将被覆盖。 - 如果您的选项卡内容应该渲染为具有不同样式和可选图像的文本,请将
text=true作为tabpane(或tab)的参数。如果您的内容是 Markdown,请使用百分号%作为选项卡简码的最外层分隔符,您的标记应如下所示:\{\{\% tab \%\}\}Your **markdown** content\{\{\% /tab \%\}\}。对于 HTML 内容,请使用方括号<>作为最外层分隔符:\{\{\< tab \>\}\}Your <b>HTML</b> content\{\{\< /tab \>\}\}。
- 默认情况下,选项卡的内容将渲染为代码块。为了获得适当的语法高亮显示,请为每个选项卡指定命名参数
信息
默认情况下,所选tab(选项卡) 的语言将存储并在不同的浏览器会话之间保留。如果选项卡内的内容长度差异很大,则在切换选项卡时可能会导致不必要的滚动。要禁用此不必要的行为,请在
tabpane简码中指定persistLang=false。
Card panes 卡片窗格
在编写内容时,将类似的文本块或代码片段放在类似卡片的元素上,可以让它们可选地并排呈现,这在某些情况下非常有用。下面是一个样本卡片组,展示了美国的前四位总统,我们来演示一下这个功能:

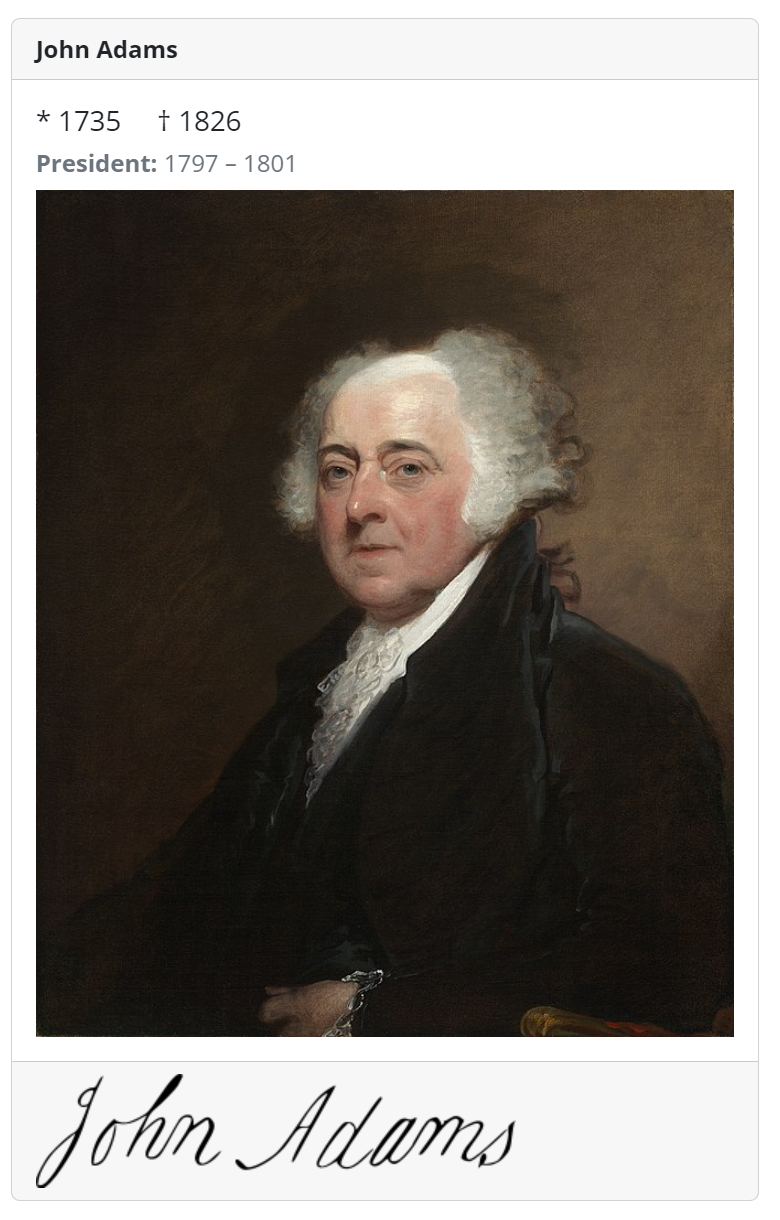
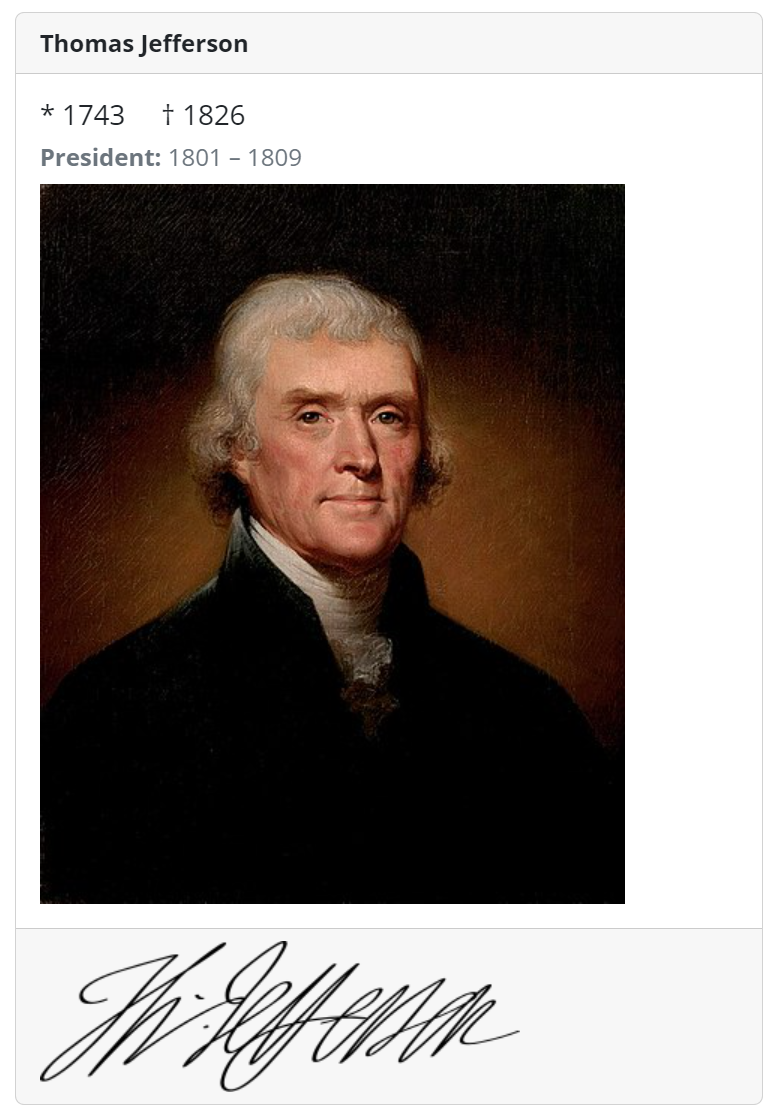
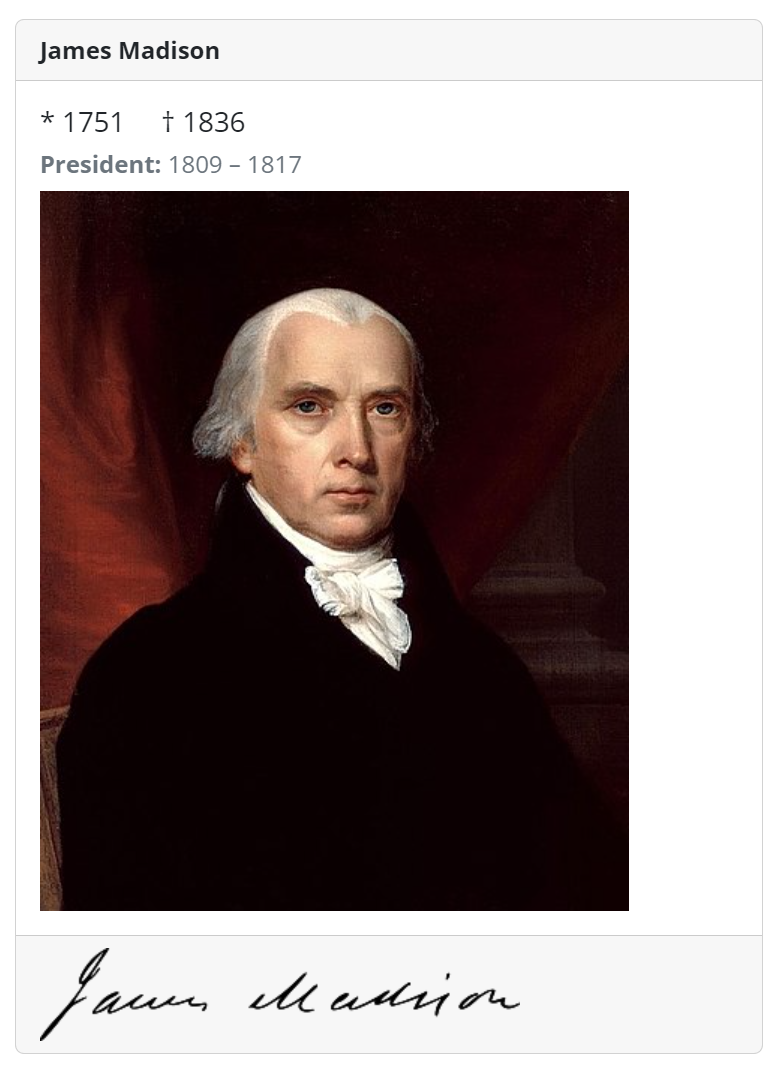
Docsy 支持通过不同的简码创建此类卡片窗格:
cardpane简码是用来包含不同卡片的容器元素。card简码代表一个单独的卡片,每个简码代表一个独立的卡片。虽然卡片通常会出现在卡片组内,但一个单独的卡片也可以单独呈现。card简码可以包含文本、图片或任何其他任意类型的 Markdown 或 HTML 标记作为内容。如果你的内容是编程代码,建议使用card-code简码,这是一种具有代码高亮和其他可选功能(如行号、某些行的高亮等)的特殊卡片。
简码card(用于文本、图像等)
如上所述,卡片可以使用 card 或 card-code 简码之一进行编码。如果您的内容是除了编程代码以外的任何类型的文本,请使用通用的 card 简码。以下代码示例演示如何编码card 元素:
| |
此代码转换为下面的左侧的卡片,显示 John Lennon 著名歌曲 Imagine 的歌词。右侧的第二个说明性card 元素指示并解释了card 的各个组成部分:

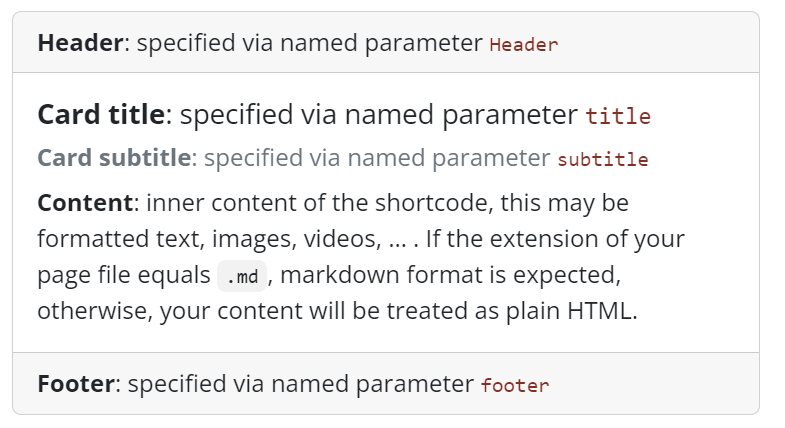
虽然卡片的主要内容取自 card 简码的内部标记,但可选元素 footer、header、title 和 subtitle 都作为简码的命名参数指定。
简码card-code(用于编程代码)
如果您想在卡片上显示编程代码,可以使用专门的card-code 简码。下面的示例演示了如何用C编写著名的Hello world!应用程序的卡片元素:
| |
这段代码将转换为下面的卡片:
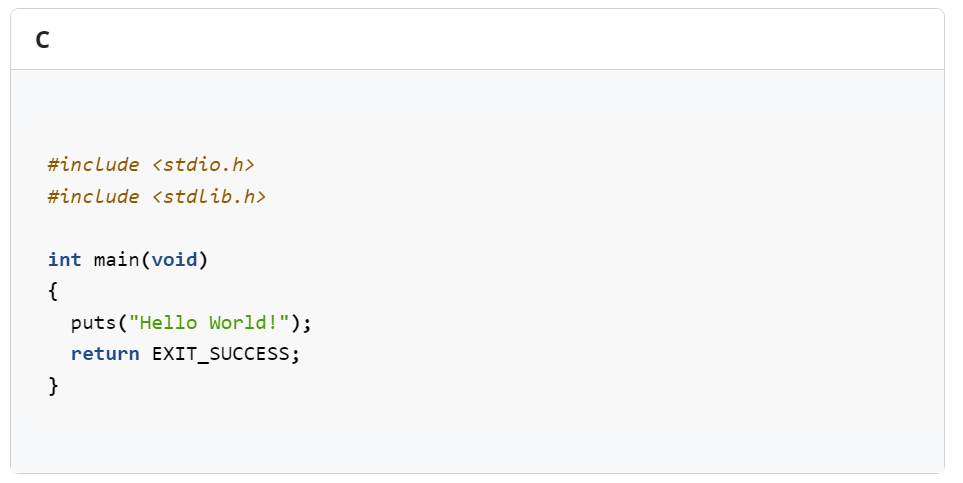
card-code 简码可以可选地包含lang和/或highlight命名参数。这些可选参数的值作为第二个LANG和第三个OPTIONS参数传递给Hugo的内置highlight函数,该函数用于渲染在卡片上呈现的代码块。
卡片组
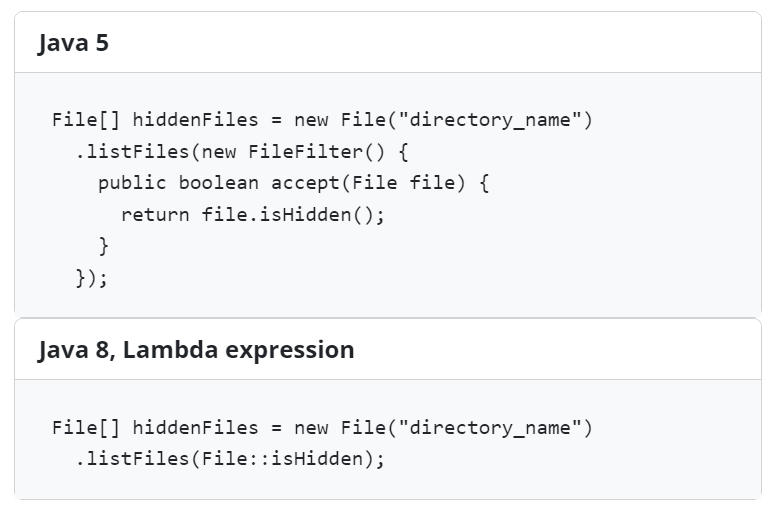
将两个或多个卡片并排显示可以通过将它们放在cardpane简码的开放和关闭元素之间轻松实现。卡片组的一般标记与选项卡窗格的标记非常相似:
| |
与选项卡(tabs)不同,卡片(cards )是并排呈现的。这尤其有用,如果您想在两个卡片上比较不同的编程技术(传统 vs. 现代),就像上面的示例演示的那样:
包含外部文件
有时候有一些内容对多个文档都是相关的,或者是存储在一个不一定是文档的文件中。对于这样的情况,readfile 简码允许您将外部文件的内容导入到文档中。
重用文档
如果您想在多个文档中重复使用一些内容,可以将该内容编写在一个单独的文件中,然后在需要时包含它。
例如,假设您有一个名为installation.md的文件,其内容如下:
| |
您可以将此部分导入到另一个文档中:
| |
这将渲染出好像指令在父文档中一样。导入文件包含简码时需要 Hugo v0.101.0+ 才能正确被渲染。
以下部分解释了如何安装数据库:
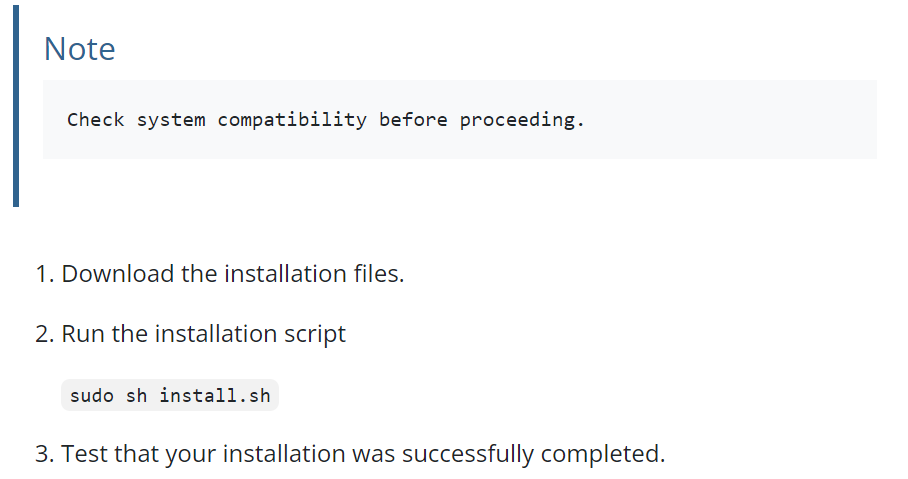
该参数是该文件的相对路径。仅支持在父文件的工作目录下的相对路径。
对于工作目录之外的文件,可以使用以 / 开头的绝对路径。根目录是 /content 文件夹。
包含代码文件
假设您有一个包含多个代码示例的includes文件夹,您希望将其用作文档的一部分。您可以使用readfile并带有一些额外的参数:
| |
该代码自动读取includes/config.yaml的内容并将其插入到文档中。渲染后的文本如下所示:
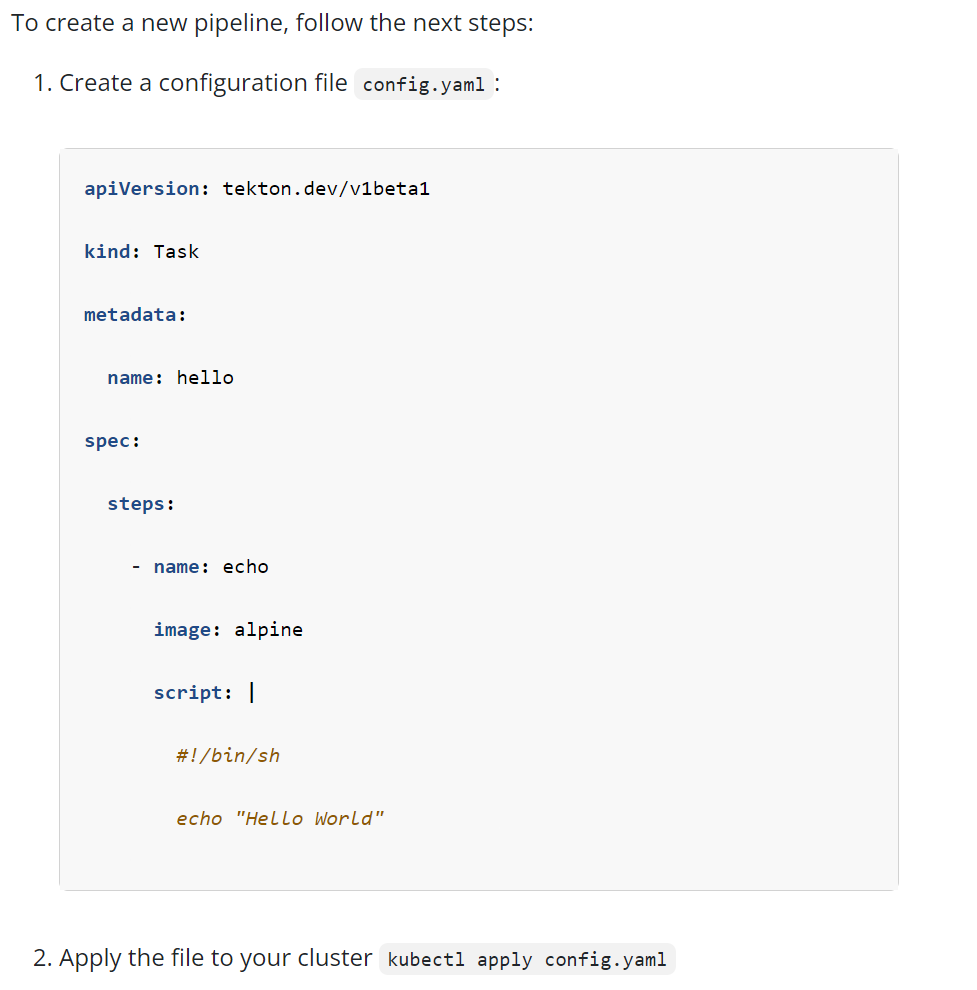
警告
为了使代码高亮显示正常工作,必须使用
\{\{\< \>\}\}的分隔符。
该"file"参数是文件的相对路径。仅支持在父文件的工作目录下的相对路径。
对于工作目录之外的文件,可以使用以 / 开头的绝对路径。根目录是 /content 文件夹。
| 参数 | 默认值 | 描述 |
|---|---|---|
| file | 外部文件路径 | |
| code | false | 布尔值。如果为true ,该内容将被视为代码 |
| lang | plain text | 编程语言 |
错误报告
如果该简码无法找到指定的文件,则该简码会抛出编译错误。
在下面的示例中,如果无法找到includes/deploy.yml文件,Hugo会抛出编译错误:
| |
或者,Hugo可以在呈现的页面上显示一条消息,而不是抛出编译错误。添加draft="true"参数。例如:
| |
条件文本
conditional-text 简码允许您根据配置文件中设置的 buildCondition 参数的值来显示或隐藏内容的某些部分。如果您正在从相同的源生成不同的构建,例如使用不同的产品名称,那么这将非常有用。这个简码帮助您处理这些构建之间的小差异。
| |
如果您正在使用此简码,请注意,在求值条件时,子字符串匹配也将被视为匹配。这意味着,如果您设置了 include-if="foobar",而 buildcondition = "foo",则匹配!
2.6 - Logo和图片
Logos and Images - Logo和图片
https://www.docsy.dev/docs/adding-content/iconsimages/
在您的项目中添加和自定义logo、icon和图片。
添加您的logo
默认情况下,Docsy在导航栏的开头即极左处显示一个站点logo。将您的项目的SVG logo放在assets/icons/logo.svg中。这将覆盖主题中默认的Docsy logo。
如果您不希望在导航栏中出现logo,则在您的项目配置中将navbar_logo设置为false:
Configuration file:
=== “hugo.yaml”
```yaml
navbar_logo: false
```
=== “hugo.toml”
```toml
navbar_logo = false
```
=== “hugo.json”
```json
{
"navbar_logo": false
}
```
有关样式化您的logo的信息,请参见样式化您的项目logo和名称。
使用 icons
Docsy 默认包含了免费的 FontAwesome 图标,其中包括 GitHub 和 Stack Overflow 等网站的logo。您可以在 FontAwesome 文档 中查看所有可用的图标,包括 FontAwesome 版本以及该图标是否可供免费使用。检查 Docsy 的 package.json 和发行说明,了解 Docsy 当前包含的 FontAwesome 版本。
您可以在 顶级菜单、章节菜单 或文本的任何位置添加 FontAwesome 图标。
添加您的favicon
最简单的方法是通过 http://cthedot.de/icongen(允许您从单个图像创建各种图标大小和选项)和/或 https://favicon.io 来创建一组网站图标,然后将它们放在站点项目的 static/favicons 目录中。这将覆盖本主题的默认图标。
请注意,https://favicon.io 并不像 Icongen 那样创建范围广泛的尺寸,但它可以让您快速从文本创建 favicon:如果您想创建文本 favicon,则可以使用该站点生成它们,然后使用 Icongen 从生成的 .png 文件中创建更多尺寸(如果需要)。
如果您有特殊的网站图标要求,可以创建自己的 layouts/partials/favicons.html 文件并添加相应的链接。
添加图像
着陆页面
Docsy 的 blocks/cover 简码 可以方便地向你的 着陆 pages 中添加大型封面图片。这个 简码 在 landing page 的 Page Bundle 中查找一个名字中带有"background"的图片——例如,如果你复制了本示例站点,则 content/en/_index.html 中的 landing page 图片是 content/en/featured-background.jpg。
你可以使用块的 height 参数指定 cover 块容器(及其图片)的首选显示高度。对于全视口高度,请使用 full:
| |
对于较短的图片,例如本示例站点的 About 页面,请使用 min、med、max 或 auto(实际图片的高度)之一:
| |
其他页面
要向其他页面添加内联图片,请使用 imgproc 简码。或者,如果你喜欢,只需使用常规的 Markdown 或 HTML 图像,并将你的图像文件添加到你的项目的 static 目录中。你可以在添加静态内容中了解更多关于使用此目录的信息。
在本站点中使用的图片
2.7 - 打印支持
Print Support - 打印支持
https://www.docsy.dev/docs/adding-content/print/
更容易地打印整个文档章节。
大多数浏览器中的个别文档页面都可以很好地打印,因为布局已经被设计成从打印输出中省略导航界面。
在一些站点上,启用"打印整个章节"功能可能很有用(就像在本用户指南中所看到的)。选择此选项将使用适合打印的格式呈现当前顶级章节(例如此页面的Content 和Customization)的所有子页面和子章节,并附带该章节的目录。
要启用此功能,请在站点的hugo.toml/hugo.yaml/hugo.json文件中为"section"类型添加"print"输出格式:
Configuration file:
=== “hugo.yaml”
```yaml
outputs:
section:
- HTML
- RSS
- print
```
=== “hugo.toml”
```toml
[outputs]
section = [ "HTML", "RSS", "print" ]
```
=== “hugo.json”
```json
{
"outputs": {
"section": [
"HTML",
"RSS",
"print"
]
}
}
```
然后,站点应在右侧导航中显示一个"打印整个章节"的链接。
进一步的定制
禁用目录
要在可打印视图中禁用目录,请在页面前置元数据或hugo.toml/hugo.yaml/hugo.json中将disable_toc参数设置为true:
Front matter:
=== “yaml”
```yaml
---
…
disable_toc: true
…
---
```
=== “toml”
```toml
+++
…
disable_toc = true
…
+++
```
=== “json”
```json
{
…,
"disable_toc": true,
…
}
```
或配置文件:
=== “hugo.yaml”
```yaml
params:
print:
disable_toc: true
```
=== “hugo.toml”
```toml
[params.print]
disable_toc = true
```
=== “hugo.json”
```json
{
"params": {
"print": {
"disable_toc": true
}
}
}
```
布局钩子
有一些布局的partial和hook被定义用于自定义打印格式。它们可以在layouts/partials/print中找到。
Hook可以按类型定义。例如,您可能想自定义"blog"页面和"docs"页面的标题布局。可以通过创建layouts/partials/print/page-heading-<type>.html来实现,例如page-heading-blog.html。它默认使用页面title 和description 作为标题(heading)。
类似地,每个页面的格式可以通过创建layouts/partials/print/content-<type>.html进行自定义。
2.8 - 分析、用户反馈和SEO
Analytics, User Feedback, and SEO - 分析、用户反馈和SEO
https://www.docsy.dev/docs/adding-content/feedback/
为您的站点添加Google Analytics跟踪,收集用户反馈并了解页面描述元标记。
添加分析
Docsy 主题基于 Hugo 对 Google Analytics 的支持,Hugo 通过 内部模板 提供支持。一旦您按照下面的说明设置了分析,您的网站使用信息(如页面浏览量)将发送到您的 Google Analytics 账户。
先决条件
在继续之前,您需要为您的网站获取一个 分析 ID(技术上称为测量 ID 或属性 ID,但在本指南中我们将使用"analytics ID(分析 ID)“这个术语)。如果您还没有分析 ID,请参见 介绍 Google Analytics 4 (GA4) 的 入门指南 部分。
提示
您的项目的 分析 ID 是以
G-(GA4 测量 ID)或UA-(通用分析属性 ID)开头的字符串。
设置
通过将项目的分析 ID 添加到站点配置文件中来启用 Google Analytics。有关详细信息,请参见 配置 Google Analytics。
默认情况下,Docsy 主题使用 gtag.js 分析库来支持 GA4(它 需要 gtag.js)和通用分析(UA)站点标签。如果您更喜欢在您的 UA 站点标签中使用较旧的 analytics.js 库,则在您的项目 配置文件 中设置 params.disableGtagForUniversalAnalytics 为 true。
Configuration file:
=== “hugo.yaml”
```yaml
params:
disableGtagForUniversalAnalytics: true
```
=== “hugo.toml”
```toml
[params]
disableGtagForUniversalAnalytics = true
```
=== “hugo.json”
```json
{
"params": {
"disableGtagForUniversalAnalytics": true
}
}
```
警告
您可以通过设置顶层
googleAnalytics配置参数或services.googleAnalytics.id来配置项目的分析 ID。不要同时定义这两个参数,否则可能会导致意外行为。有关详细信息,请参见 Is services.googleAnalytics.id an alias for googleAnalytics。
Production-only feature! 仅限于生产环境!
分析仅在生产环境(在 Hugo 术语中称为"环境(environments)")中启用。有关 Hugo 环境及如何设置它们的信息,请参见以下 讨论。
用户反馈
默认情况下,Docsy 在每个文档页面底部放置一个"was this page helpful?“的反馈小部件,如图1所示。

图1. 反馈小部件,用红线勾勒出来。
点击"Yes"后,用户应该会看到类似图2的响应。您可以在项目的 配置文件 hugo.toml 中配置响应文本。

图2. 一个"Yes"响应的示例。
这些数据有什么用处?
当您有大量文档,且没有足够的时间更新所有文档时,您可以使用"was this page helpful?” 的反馈数据来帮助您决定哪些页面需要优先考虑。通常,从访问量高且评级低的页面开始。在此上下文中,“Low ratings"意味着用户更经常地点击No——页面不够有用——而不是Yes——页面有用。您还可以研究您评级高的页面,以制定关于为什么您的用户认为它们有用的假设。
一般来说,如果可能的话,您可以在文档中引入孤立的更改,以更加确定用户喜欢或不喜欢的模式。例如,假设您发现一个教程不再匹配产品。您更新了说明,一个月后再次检查,分数已经提高。现在您有了最新说明和更高评分之间的相关性。或者,假设您研究了高评分页面,并发现它们都以代码示例开头。您找到另外10个代码示例在底部的页面,将示例移动到顶部,发现每个页面的分数都有所提高。由于这是您在每个页面上引入的唯一更改,因此更有理由相信您的用户发现页面顶部的代码示例有帮助。换句话说,这是将科学方法应用于技术写作!
Setup 设置
打开
hugo.toml/hugo.yaml/hugo.json。确保启用了谷歌分析,如上所述。
设置用户在点击Yes或No后看到的响应文本。
Configuration file:
=== “hugo.yaml”
```yaml
params:
ui:
feedback:
enable: true
'yes': >-
Glad to hear it! Please <a href="https://github.com/USERNAME/REPOSITORY/issues/new">
tell us how we can improve</a>.
'no': >-
Sorry to hear that. Please <a href="https://github.com/USERNAME/REPOSITORY/issues/new">
tell us how we can improve</a>.
```
=== “hugo.toml”
```toml
[params.ui.feedback]
enable = true
yes = 'Glad to hear it! Please <a href="https://github.com/USERNAME/REPOSITORY/issues/new">tell us how we can improve</a>.'
no = 'Sorry to hear that. Please <a href="https://github.com/USERNAME/REPOSITORY/issues/new">tell us how we can improve</a>.'
```
=== “hugo.json”
```json
{
"params": {
"ui": {
"feedback": {
"enable": true,
"yes": "Glad to hear it! Please <a href=\"https://github.com/USERNAME/REPOSITORY/issues/new\"> tell us how we can improve</a>.",
"no": "Sorry to hear that. Please <a href=\"https://github.com/USERNAME/REPOSITORY/issues/new\"> tell us how we can improve</a>."
}
}
}
}
```
- 保存并关闭
hugo.toml/hugo.yaml/hugo.json。
访问反馈数据
本节假设您基本熟悉Google Analytics。例如,您应该知道如何检查某个时间范围内的页面浏览量,并在访问多个文档站点的情况下在帐户之间导航。
- 打开 Google Analytics。
- 打开 Behavior > Events > Overview。
- 在Event Category表中点击 Helpful 行。如果看不到 Helpful 行,请点击view full report。
- 点击Event Label。现在您可以按页面对评级进行详细分类。
以下是这四列的含义:
- Total Events是用户点击 Yes 或 No 的总次数。
- Unique Events提供了一个粗略的指标,用于指示用户在每个会话中评价您的页面的频率。例如,假设您的Total Events为5000,而Unique Events为2500。这意味着您有 2500 个用户每个会话对 2 个页面进行评级。
- Event Value 并不是非常有用。
- Avg. Value 是该页面的聚合评级。该值始终在 0 和 1 之间。当用户点击 No 时,会发送值 0 到 Google Analytics。当用户点击 Yes 时,会发送值 1。您可以将其视为百分比。如果某个页面的 Avg. Value 为 0.67,则表示有 67% 的用户点击了 Yes,33% 的用户点击了 No。
存储"was this page helpful?“数据的基础 Google Analytics 基础架构称为事件(Events)。查看 docsy pull request #1 来了解用户单击 Yes 或 No 按钮时发生的确切事件。这只是一个click事件监听器,触发了 Google Analytics 的 JavaScript 函数来记录事件、禁用 Yes 和 No 按钮,并显示响应文本。
在单个页面上禁用反馈
在页面的前置元数据中添加 hide_feedback 参数并将其设置为 true。
Front matter:
=== “yaml”
```yaml
---
hide_feedback: true
---
```
=== “toml”
```toml
+++
hide_feedback = true
+++
```
=== “json”
```json
{
"hide_feedback": true
}
```
在所有页面上禁用反馈
在 hugo.toml/hugo.yaml/hugo.json 中将 params.ui.feedback.enable 设置为 false:
Configuration file:
=== “hugo.yaml”
```yaml
params:
ui:
feedback:
enable: false
```
=== “hugo.toml”
```toml
[params.ui.feedback]
enable = false
```
=== “hugo.json”
```json
{
"params": {
"ui": {
"feedback": {
"enable": false
}
}
}
}
```
使用 Fabform 添加联系表单
您可以为您的站点创建一个联系表单,并在 fabform.io 上收集您的表单提交。要使用此功能,您首先需要在 Fabform 上注册一个帐户。以下示例显示如何将收集用户电子邮件地址的简单表单添加到您的站点源代码中:
| |
有关更多详细信息,请参见 Fabform 文档中的添加 Hugo 联系表单。
搜索引擎优化元标签
要了解如何优化您的站点以进行SEO,请参见搜索引擎优化(SEO)入门指南。
Google建议使用description元标签告诉搜索引擎您的页面内容。对于每个生成的页面,Docsy将使用以下第一个定义的内容来设置元description的内容:
有关用于执行此计算的模板代码,请参见layouts/partials/page-description.html。
有关用于执行此计算的模板代码,请参见 layouts/partials/page-description.html。
根据需要向项目的 head-end.html partial 中添加更多的元标签。有关详情,请参见 自定义模板。
2.9 - 代码库链接
Repository Links - 代码库链接
https://www.docsy.dev/docs/adding-content/repository-links/
帮助您的用户与您的源代码库进行交互。
Docsy 文档和博客布局 包括让读者可以通过您的网站源代码仓库编辑页面或为您的文档或项目创建问题的链接。当前生成的每个文档或博客页面的链接如下:
- View page source:将用户带到您的文档存储库中的页面源代码。
- Edit this page:将用户带到页面内容的可编辑版本,位于他们的文档库复刻中(如果有的话)。如果用户没有您的文档库的当前 fork,则在进行编辑之前,将邀请他们创建一个 fork。然后,用户可以为您的文档创建拉取请求。
- Create child page:将用户带到在他们的文档库 fork 中创建新文件的表单中。新文件将作为他们单击链接页面的子级位置。该表单将使用一个模板进行预填,用户可以编辑此模板以创建自己的页面。您可以通过将
assets/stubs/new-page-template.md添加到您自己的项目中来更改此设置。 - Create documentation issue:将用户带到一个新的 issue 表单,在其中,当前页面的名称为该问题的标题。
- Create project issue(可选):将用户带到项目仓库中的一个新的issue 表单。如果您有单独的项目和文档存储库,并且您的用户想要针对正在讨论的项目功能提交问题,而不是针对您的文档,那么这可能很有用。
此页面向您展示了如何配置这些链接。
目前,Docsy仅支持GitHub存储库链接。由于GitLab可以处理相同的链接方案,因此也应该有效。如果您正在使用其他存储库(例如Bitbucket)并希望生成存储库链接,请随时 添加功能请求或更新我们的主题。
链接配置
在 hugo.toml/hugo.yaml/hugo.json 文件中,有四个变量可以配置以设置链接,同时在您的页面元数据中也有一个变量可以配置。
github_repo
您站点的源代码仓库的URL。此链接用于生成Edit this page、Create child page和Create documentation issue等链接。
Configuration file:
=== “hugo.yaml”
```yaml
github_repo: 'https://github.com/google/docsy'
```
=== “hugo.toml”
```toml
github_repo = "https://github.com/google/docsy"
```
=== “hugo.json”
```json
{
"github_repo": "https://github.com/google/docsy"
}
```
github_subdir (可选)
如果您的内容目录不在仓库的根目录中,请在此指定一个值。例如,此站点位于其仓库的 userguide 子目录中。设置此值意味着您的编辑链接将指向正确的页面。
Configuration file:
=== “hugo.yaml”
```yaml
github_subdir: 'userguide'
```
=== “hugo.toml”
```toml
github_subdir = "userguide"
```
=== “hugo.json”
```json
{
"github_subdir": "userguide"
}
```
github_project_repo (可选)
如果您有一个单独的项目仓库,希望您的用户能够从相关的文档中创建项目issues,请在此指定一个值。只有在设置了此项后,Create project issue链接才会显示。
Configuration file:
=== “hugo.yaml”
```yaml
github_project_repo: 'https://github.com/google/docsy'
```
=== “hugo.toml”
```toml
github_project_repo = "https://github.com/google/docsy"
```
=== “hugo.json”
```json
{
"github_project_repo": "https://github.com/google/docsy"
}
```
github_branch (可选)
如果您希望引用其他的 github 设置(如 Edit this page或 Create project issue)的不同分支,请在此指定一个值。
Configuration file:
=== “hugo.yaml”
```yaml
github_branch: 'release'
```
=== “hugo.toml”
```toml
github_branch = "release"
```
=== “hugo.json”
```json
{
"github_branch": "release"
}
```
path_base_for_github_subdir (可选)
假设 content/some-section 下的所有页面的源文件来自另一个仓库,例如git 子模块。在该章节的索引页中添加以下设置,以便该章节中的所有页面的存储库链接均指向源 仓库:
Front matter:
=== “yaml”
```yaml
---
title: Some super section
cascade:
github_repo: https://github.com/some-username/another-repo/
github_subdir: docs
path_base_for_github_subdir: content/some-section
…
---
```
=== “toml”
```toml
+++
title = "Some super section"
[cascade]
github_repo = "https://github.com/some-username/another-repo/"
github_subdir = "docs"
path_base_for_github_subdir = "content/some-section"
…
+++
```
=== “json”
```json
{
"title": "Some super section",
"cascade": {
"github_repo": "https://github.com/some-username/another-repo/",
"github_subdir": "docs",
"path_base_for_github_subdir": "content/some-section"
}
}
```
例如,考虑一个位于路径 content/some-section/subpath/some-page.md 的页面,全局 github_branch 设置为 main。上面的索引页面设置将为 some-page.md 生成以下编辑链接:
https://github.com/some-username/another-repo/edit/main/docs/subpath/some-page.md
如果您只有一个来自另一个仓库的页面,请省略 cascade 键,并编写与上面所示相同的顶级设置。
如果您希望用户也能在源仓库中创建项目问题,则还需设置 github_project_repo,例如:
| |
Front matter:
=== “yaml”
```yaml
---
…
cascade:
github_repo: &repo https://github.com/some-username/another-repo/
github_project_repo: *repo
…
---
```
=== “toml”
```toml
+++
…
[cascade]
github_repo = "https://github.com/some-username/another-repo/"
github_project_repo = "https://github.com/some-username/another-repo/"
…
+++
```
=== “json”
```json
{
"cascade": {
"github_repo": "https://github.com/some-username/another-repo/",
"github_project_repo": "https://github.com/some-username/another-repo/"
}
}
```
提示
请注意,YAML 代码片段使用了 YAML 锚点。使用 YAML 锚点是可选的,但它有助于保持设置的 DRY(不重复自己)。
path_base_for_github_subdir 设置是一个正则表达式,因此即使您的站点包含 多个语言,您仍然可以使用它,例如:
Front matter:
=== “yaml”
```yaml
---
…
path_base_for_github_subdir: content/\w+/some-section
…
---
```
=== “toml”
```toml
+++
…
path_base_for_github_subdir = "content/\w+/some-section"
…
+++
```
=== “json”
```json
{
…
"path_base_for_github_subdir": "content/\w+/some-section"
…
}
```
在某些情况下,页面来源于具有不同名称的文件,您可以指定 from 和 to 路径重命名设置。以下是一个例子,其中一个索引文件在来源仓库中命名为 README.md:
Front matter:
=== “yaml”
```yaml
---
…
github_repo: https://github.com/some-username/another-repo/
github_subdir: docs
path_base_for_github_subdir:
from: content/some-section/(.*?)/_index.md
to: $1/README.md
…
---
```
=== “toml”
```toml
+++
…
github_repo = "https://github.com/some-username/another-repo/"
github_subdir = "docs"
[path_base_for_github_subdir]
from = "content/some-section/(.*?)/_index.md"
to = "$1/README.md"
…
+++
```
=== “json”
```json
{
…
"github_repo": "https://github.com/some-username/another-repo/",
"github_subdir": "docs",
"path_base_for_github_subdir": {
"from": "content/some-section/(.*?)/_index.md",
"to": "$1/README.md"
},
…
}
```
github_url (可选)
弃用说明
该设置已弃用。请改用 path_base_for_github_subdir。
在您的页面元数据中指定此值以设置此页面的特定编辑 URL,例如以下示例:
Front matter:
=== “yaml”
```yaml
---
title: Some page
github_url: https://github.com/some-username/another-repo/edit/main/README.md
…
---
```
=== “toml”
```toml
+++
title = "Some page"
github_url = "https://github.com/some-username/another-repo/edit/main/README.md"
…
+++
```
=== “json”
```json
{
"title": "Some page",
"github_url": "https://github.com/some-username/another-repo/edit/main/README.md",
…
}
```
如果您的页面源文件在多个 Git 存储库中,或需要非 GitHub URL,则可以使用此选项。使用此值的页面仅具有 Edit this page 链接。
禁用链接
您可以使用 CSS 有选择性地禁用(隐藏)链接。例如,将以下内容添加到 项目的 _styles_project.scss 文件中,以从所有页面中隐藏 Create child page 链接:
| |
每种链接类型都有一个与之关联的唯一类名 .td-page-meta--KIND,如下表所定义:
| 链接类型 | 类名 |
|---|---|
| View page source | .td-page-meta--view |
| Edit this page | .td-page-meta--edit |
| Create child page | .td-page-meta--child |
| Create documentation issue | .td-page-meta--issue |
| Create project issue | .td-page-meta--project-issue |
当然,您也可以使用这些类为您的项目为仓库链接提供独特的样式。
2.10 - 分类支持
Taxonomy Support - 分类支持
https://www.docsy.dev/docs/adding-content/taxonomy/
使用标签、分类、标签结构等分类法来组织内容。

Docsy支持Hugo的分类法(参见:https://gohugo.io/content-management/taxonomies/)用于文档和博客章节。您可以在此页面上查看默认布局,并测试生成的链接行为。
Terminology 术语
要理解分类法的用法,您应理解以下术语:
Taxonomy 分类法
可用于对内容进行分类的类别,例如:标签、分类、项目、人员。
Term 条目
分类法内的关键词,例如:在项目中:项目A、项目B。
Value 值
分配给条目的内容,例如:您站点上的页面,它属于特定的项目
在官方Hugo文档中可以找到一个电影站点的分类法示例:https://gohugo.io/content-management/taxonomies/#example-taxonomy-movie-website。
参数
有各种参数来控制项目配置文件中分类法的功能。
默认情况下,Hugo 中启用tags和categories的分类法(参见:https://gohugo.io/content-management/taxonomies/#default-taxonomies)。在 Docsy 中,默认情况下在 hugo.toml/hugo.yaml/hugo.json 中禁用分类法:
Configuration file:
=== “hugo.yaml”
```yaml
disableKinds:
- taxonomy
- taxonomyTerm
```
=== “hugo.toml”
```toml
disableKinds = ["taxonomy", "taxonomyTerm"]
```
=== “hugo.json”
```json
{
"disableKinds": [
"taxonomy",
"taxonomyTerm"
]
}
```
如果你想在Docsy中启用分类法,你需要在你的项目的 hugo.toml/hugo.yaml/hugo.json 文件中删除(或注释掉)这一行。然后Hugo将生成 tags 和 categories 的分类法页面。如果你想使用其他分类法,你需要在你的配置文件中定义它们。如果你想同时使用自己的分类法和默认的 tags 和 categories 分类法,你还需要除了你自己的分类法外定义它们。你需要为每个分类法提供复数和单数标签。
通过以下示例,你可以定义一个名为 projects 的额外分类法,除了默认的 tags 和 categories 分类法之外:
Configuration file:
=== “hugo.yaml”
```yaml
taxonomies:
tag: tags
category: categories
project: projects
```
=== “hugo.toml”
```toml
[taxonomies]
tag = "tags"
category = "categories"
project = "projects"
```
=== “hugo.json”
```json
{
"taxonomies": {
"tag": "tags",
"category": "categories",
"project": "projects"
}
}
```
你可以在你项目的 hugo.toml/hugo.yaml/hugo.json 中使用以下参数来控制在Docsy中为每篇文章或页面分配的分类法条目的输出,或在Docsy的右侧边栏中显示"标签云":
Configuration file:
=== “hugo.yaml”
```yaml
params:
taxonomy:
taxonomyCloud:
- projects # remove all entries
- tags # to hide taxonomy clouds
taxonomyCloudTitle: # if used, must have the same
- Our Projects # number of entries as taxonomyCloud
- Tag Cloud
taxonomyPageHeader:
- tags # remove all entries
- categories # to hide taxonomy clouds
```
=== “hugo.toml”
```toml
[params.taxonomy]
taxonomyCloud = ["projects", "tags"] # set taxonomyCloud = [] to hide taxonomy clouds
taxonomyCloudTitle = ["Our Projects", "Tag Cloud"] # if used, must have same length as taxonomyCloud
taxonomyPageHeader = ["tags", "categories"] # set taxonomyPageHeader = [] to hide taxonomies on the page headers
```
=== “hugo.json”
```json
{
"params": {
"taxonomy": {
"taxonomyCloud": [
"projects",
"tags"
],
"taxonomyCloudTitle": [
"Our Projects",
"Tag Cloud"
],
"taxonomyPageHeader": [
"tags",
"categories"
]
}
}
}
```
以上设置仅在Docsy的右侧边栏中显示 projects 和 tags 的分类法云(分别带有"Our Projects"和"Tag Cloud"标题),以及每个页面的分类法 tags 和 categories 的分配条目。
要禁用任何分类法云,你需要设置参数 taxonomyCloud = []。如果你不想显示分配的条目,你需要设置 taxonomyPageHeader = []。
默认情况下,一个分类法的复数标签被用作云标题。你可以使用 taxonomyCloudTitle 覆盖默认的云标题。但是如果你这样做了,你必须为每个启用的分类法云定义一个手动标题(taxonomyCloud 和 taxonomyCloudTitle 必须具有相同的长度!)。
如果您没有设置参数 taxonomyCloud 或 taxonomyPageHeader,则会生成所有定义的分类法的分类云或分配术语。
Partials 局部
默认使用的partials用于显示分类法,因此定义它们时您应该也能够在自己的布局中轻松使用它们。
taxonomy_terms_article
partial taxonomy_terms_article 显示给定文章或页面的给定分类法(partial参数 taxo)的所有分配术语(partial参数 context,大多数情况下是当前页面或上下文 .)。
在 layouts/docs/list.html 中示例用法,用于文档章节中每个页面的标题:
| |
对于当前页面(或上下文(resp. context))中定义的每个分类法,这将为您提供一个列出所有已分配术语的列表:
| |
taxonomy_terms_article_wrapper
partial taxonomy_terms_article_wrapper 是部分 taxonomy_terms_article 的包装器,仅带有参数 context(大多数情况下是当前页面或上下文(context ) .),并检查您的项目的 hugo.toml / hugo.yaml / hugo.json 的分类法参数,以循环遍历参数 taxonomyPageHeader 的所有列出的分类法或页面的所有定义的分类法,如果未设置 taxonomyPageHeader。
taxonomy_terms_cloud
partial taxonomy_terms_cloud 显示站点(部分参数 context,大多数情况下是当前页面或上下文 .)给定分类法(partial 参数 taxo)的所有使用术语,并使用参数 title 作为标题。
在partial taxonomy_terms_clouds 中示例用法,用于显示所有定义的分类法及其术语:
| |
例如,这将为分类法 categories 提供以下 HTML 标记:
| |
taxonomy_terms_clouds
partial taxonomy_terms_clouds 是partial taxonomy_terms_cloud 的包装器,仅带有参数 context(大多数情况下是当前页面或上下文 .),并检查您的项目的 hugo.toml / hugo.yaml / hugo.json 的分类法参数,以循环遍历参数 taxonomyCloud 的所有列出的分类法或页面的所有定义的分类法,如果未设置 taxonomyCloud。
分类法的多语言支持
与分类法条目相关的内容只在相同语言内进行计数和链接!分类法支持的控制参数也可以分配给特定的语言。
2.11 - 图表和公式
Diagrams and Formulae - 图表和公式
https://www.docsy.dev/docs/adding-content/diagrams-and-formulae/
在您的站点中添加生成的图表和科学公式。
Docsy内置支持多个图表创建和排版工具,您可以使用这些工具向您的站点添加丰富的内容,包括KaTeX、Mermaid、Diagrams.net、PlantUML和MarkMap。
使用 KaTeX 支持 LaTeX
LaTeX是一种高质量的排版系统,用于制作技术和科学文档。由于其出色的数学排版能力,TeX成为了科学文档的沟通和出版的事实标准,特别是如果这些文档包含大量数学公式。LaTeX由Donald Knuth设计和主要编写,最初的版本于1978年发布。由于其起始时间很早,LaTeX的主要输出目标是pdf,并不特别适合生成Web的HTML输出。幸运的是,有一个快速易用的JavaScript库,即 KaTeX,可以用于在Web上呈现TeX数学公式,它已经集成到Docsy主题中。
通过在Docsy中启用KaTeX支持,您可以将复杂的数学公式嵌入到网页中,以行内或独立的方式居中显示。由于KaTeX依赖于服务器端渲染,因此它会生成相同的输出,无论您的浏览器或环境如何。公式可以以行内或显示模式显示:
内联公式
以下代码示例生成一个带有三个内联公式的文本行:
| |

显示模式的公式
以下代码示例生成一个介绍性文本行,后跟一个编号为(1)的单独行上的公式:
| |
该公式本身写在 GLFM 数学块中。上面的代码片段渲染为:

警告
math代码块仅在 Hugo 版本 0.93 及以上版本中受支持。 在 Hugo 版本 0.92 或更低版本的情况下,请使用此代码段显示公式:
1 2 3$$ \tag*{(1)} P(E) = {n \choose k} p^k (1-p)^{n-k} $$
提示
这个维基页面提供了有关使用 LaTeX 排版系统排版数学公式的详细信息。
激活和配置 KaTeX 支持
自动激活
只要在页面上使用 math 代码块,KaTeX 支持就会自动启用。
手动激活(没有 math 代码块存在或使用的是 hugo 0.92 或更低版本)
如果你想使用内联公式,并且在页面上没有 math 代码块触发自动激活,那么你需要手动激活 KaTeX 支持。最简单的方法是在页面的前置元数据中添加一个 math 属性,并将其设置为 true:
Page front matter:
=== “yaml”
```yaml
---
math: true
---
```
=== “toml”
```toml
+++
math = true
+++
```
=== “json”
```json
{
"math": true
}
```
如果你在大多数页面中使用公式,你也可以在 Docsy 主题中启用站点范围的 KaTeX 支持。要这样做,请更新 hugo.toml/hugo.yaml/hugo.json:
Site configuration file:
=== “hugo.yaml”
```yaml
params:
katex:
enable: true
```
=== “hugo.toml”
```toml
[params.katex]
enable = true
```
=== “hugo.json”
```json
{
"params": {
"katex": {
"enable": true
}
}
}
```
此外,如果需要,还可以在 hugo.toml/hugo.yaml/hugo.json 中自定义各种 KaTeX 选项:
Site configuration file:
=== “hugo.yaml”
```yaml
params:
katex:
enable: true # enable/disable KaTeX support
html_dom_element: document.body # Element(s) scanned by auto render extension. Default: document.body
options:
# If true (the default), KaTeX will throw a ParseError when it encounters an
# unsupported command or invalid LaTeX. If false, KaTeX will render unsupported
# commands as text, and render invalid LaTeX as its source code with hover text
# giving the error, in the color given by errorColor.
throwOnError: false
errorColor: '#CD5C5C'
# This is a list of delimiters to look for math, processed in the same order as
# the list. Each delimiter has three properties:
# left: A string which starts the math expression (i.e. the left delimiter).
# right: A string which ends the math expression (i.e. the right delimiter).
# display: Whether math in the expression should be rendered in display mode.
delimiters:
- left: $$
right: $$
display: true
- left: $
right: $
display: false
- left: \(
right: \)
display: false
- left: \[
right: \]
display: true
```
=== “hugo.toml”
```toml
[params.katex]
# enable/disable KaTeX support
enable = true
# Element(s) scanned by auto render extension. Default: document.body
html_dom_element = "document.body"
[params.katex.options]
# If true (the default), KaTeX will throw a ParseError when it encounters an
# unsupported command or invalid LaTeX. If false, KaTeX will render unsupported
# commands as text, and render invalid LaTeX as its source code with hover text
# giving the error, in the color given by errorColor.
throwOnError = false
errorColor = "#CD5C5C"
# This is a list of delimiters to look for math, processed in the same order as
# the list. Each delimiter has three properties:
# left: A string which starts the math expression (i.e. the left delimiter).
# right: A string which ends the math expression (i.e. the right delimiter).
# display: Whether math in the expression should be rendered in display mode.
[[params.katex.options.delimiters]]
left = "$$"
right = "$$"
display = true
[[params.katex.options.delimiters]]
left = "$"
right = "$"
display = false
[[params.katex.options.delimiters]]
left = "\\("
right = "\\)"
display = false
[[params.katex.options.delimiters]]
left = "\\["
right = "\\]"
display = true
```
=== “hugo.json”
```json
{
"params": {
"katex": {
"enable": true,
"html_dom_element": "document.body",
"options": {
"throwOnError": false,
"errorColor": "#CD5C5C",
"delimiters": [
{
"left": "$$",
"right": "$$",
"display": true
},
{
"left": "$",
"right": "$",
"display": false
},
{
"left": "\\(",
"right": "\\)",
"display": false
},
{
"left": "\\[",
"right": "\\]",
"display": true
}
]
}
}
}
}
```
完整的选项列表及其详细描述,请查看 KaTeX 的 Rendering API options 和 configuration options 文档。
化学方程式和物理单位的显示
mhchem 是一个 LaTeX 包,用于排版化学分子式和方程式。幸运的是,KaTeX 提供了 mhchem 扩展,使得在编写 web 内容时能够使用 mhchem 包。启用 mhchem 扩展后,您可以轻松地将化学方程式包含在您的页面中,方程式可以以行内或独立行的形式显示。以下代码示例生成一个包含化学方程式的文本行:
*Precipitation of barium sulfate:* \\(\ce{SO4^2- + Ba^2+ -> BaSO4 v}\\)

硫酸钡的沉淀:
更复杂的方程式需要单独占据一行。使用附有 chem 的代码块即可实现此目的:
| |

Warning
chem代码块仅在 Hugo 版本 0.93 及以上版本中受支持。 在 hugo 版本 0.92 或更低版本中,使用此代码片段来显示公式:
1 2 3$$ \tag*{(2)} \ce{Zn^2+ <=>[+ 2OH-][+ 2H+] $\underset{\text{amphoteric hydroxide}}{\ce{Zn(OH)2 v}}$ <=>[+ 2OH-][+ 2H+] $\underset{\text{tetrahydroxozincate}}{\ce{[Zn(OH)4]^2-}}$} $$
Note
mchem 的手册 提供了使用
mhchem工具排版化学式和物理单位的输入语法的详细信息。
使用 mhchem 并不仅限于编写化学方程式,通过包含的 \pu 命令,也可以轻松地编写漂亮的物理单位。下面的代码示例生成了两行带有四个数字及其对应物理单位的文本:
* Scientific number notation: \\(\pu{1.2e3 kJ}\\) or \\(\pu{1.2E3 kJ}\\) \\
* Divisions: \\(\pu{123 kJ/mol}\\) or \\(\pu{123 kJ//mol}\\)

要查看有关编写物理单位的所有选项,请查看 mhchem 文档中的 物理单位章节。
激活化学公式的渲染支持
自动激活
只要在页面上使用了 chem 代码块,就会自动启用化学公式的渲染支持。
手动激活(没有 chem 代码块存在或使用的是 hugo 0.92 或更低版本)
如果您想在内联中使用化学公式,并且在您的页面中没有触发自动激活的 chem 代码块,您需要手动激活化学公式的渲染支持。最简单的方法是在页面的前置元数据中添加一个 chem 属性并将其设置为 true:
Page front matter:
=== “yaml”
```yaml
---
chem: true
---
```
=== “toml”
```toml
+++
chem = true
+++
```
=== “json”
```json
{
"chem": true
}
```
如果您在大多数页面中使用公式,也可以在 Docsy 主题中启用站点范围的化学公式渲染支持。为此,请在 hugo.toml / hugo.yaml / hugo.json 中启用 mhchem:
Site configuration file:
=== “hugo.yaml”
```yaml
params:
katex:
enable: true
mhchem:
enable: true
```
=== “hugo.toml”
```toml
[params.katex]
enable = true
[params.katex.mhchem]
enable = true
```
=== “hugo.json”
```json
{
"params": {
"katex": {
"enable": true,
"mhchem": {
"enable": true
}
}
}
}
```
使用 Mermaid 绘制图表
Mermaid 是一个用于在浏览器中将简单文本定义转换为有用图表的 JavaScript 库。它可以生成各种不同类型的图表,包括流程图、时序图、类图、状态图、ER 图、用户旅程图、甘特图和饼图。
在 Docsy 中启用 Mermaid 支持后,您可以在代码块中包含 Mermaid 图表的文本定义,并在页面加载后自动在浏览器中渲染它。
这样做的巨大优势在于,任何可以编辑页面的人现在都可以编辑图表——不再需要寻找原始工具和版本来进行新的编辑。
例如,以下定义了一个简单的流程图:
```mermaid
graph TD
Start --> Need{"Hugo version >= 0.93.0"}
Need -- No --> Off["Set params.mermaid.enable = true"]
Off --> Author
Need -- Yes --> Author[Insert mermaid codeblock]
```
自动渲染为:
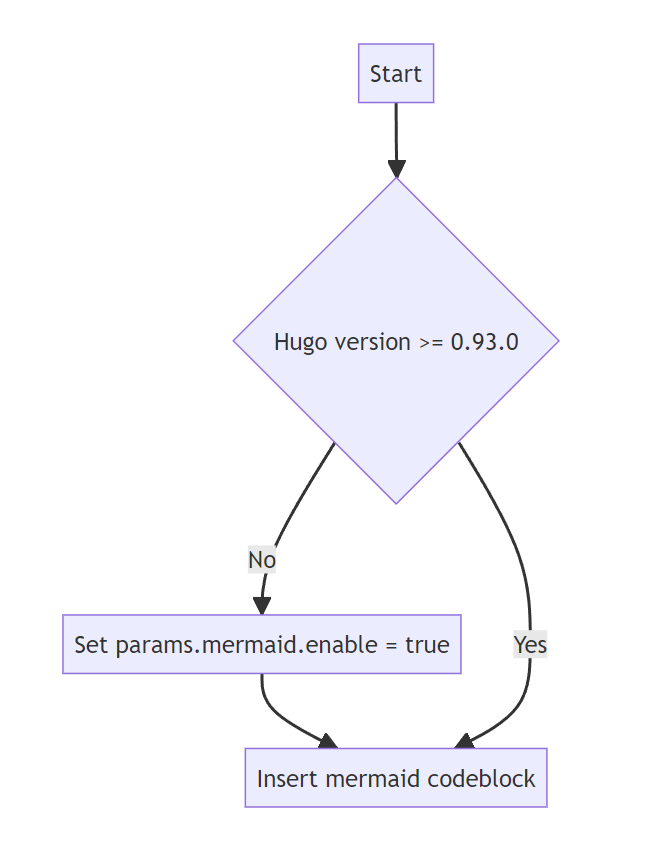
使用hugo版本0.93或更高版本时,只要在页面上使用mermaid代码块,就会自动启用Mermaid图表的支持。
如果使用的是hugo版本0.92或更低版本,则需要通过更新hugo.toml/hugo.yaml/hugo.json来手动启用Mermaid。
Hugo version <= 0.92 only:
=== “hugo.yaml”
```yaml
params:
mermaid:
enable: true
```
=== “hugo.toml”
```toml
[params.mermaid]
enable = true
```
=== “hugo.json”
```json
{
"params": {
"mermaid": {
"enable": true
}
}
}
```
如果需要,您可以在hugo.toml/hugo.yaml/hugo.json中定义自定义设置,例如主题、填充等。
Configuration file:
=== “hugo.yaml”
```yaml
params:
mermaid:
theme: neutral
flowchart:
diagramPadding: 6
```
=== “hugo.toml”
```toml
[params.mermaid]
theme = "neutral"
[params.mermaid.flowchart]
diagramPadding = 6
```
=== “hugo.json”
```json
{
"params": {
"mermaid": {
"theme": "neutral",
"flowchart": {
"diagramPadding": 6
}
}
}
}
```
有关可以覆盖的默认设置列表,请参见Mermaid文档。
也可以通过在图表定义开头使用%%init%%头来在每个图表上覆盖设置。有关更多信息,请参见Mermaid主题文档。
使用PlantUML绘制UML图表
PlantUML是Mermaid的替代方案,可以快速创建UML图表,包括时序图、用例图和状态图。与完全在浏览器中渲染的Mermaid图表不同,PlantUML使用PlantUML服务器创建图表。您可以使用提供的默认演示服务器(不建议用于生产环境),或者自己运行一个服务器。PlantUML提供了比Mermaid更广泛的图像类型,因此可能是某些用例的更好选择。
图表使用简单直观的语言定义。(请参见PlantUML语言参考指南)。
以下示例显示了一个用例图:
```plantuml
participant participant as Foo
actor actor as Foo1
boundary boundary as Foo2
control control as Foo3
entity entity as Foo4
database database as Foo5
collections collections as Foo6
queue queue as Foo7
Foo -> Foo1 : To actor
Foo -> Foo2 : To boundary
Foo -> Foo3 : To control
Foo -> Foo4 : To entity
Foo -> Foo5 : To database
Foo -> Foo6 : To collections
Foo -> Foo7: To queue
```
自动渲染为:
要启用/禁用PlantUML,请更新hugo.toml/hugo.yaml/hugo.json。
Configuration file:
=== “hugo.yaml”
```yaml
params:
plantuml:
enable: true
```
=== “hugo.toml”
```toml
[params.plantuml]
enable = true
```
=== “hugo.json”
```json
{
"params": {
"plantuml": {
"enable": true
}
}
}
```
其他可选设置包括:
Configuration file:
=== “hugo.yaml”
```yaml
params:
plantuml:
enable: true
theme: default
# Set url to plantuml server
# default is http://www.plantuml.com/plantuml/svg/
svg_image_url: 'https://www.plantuml.com/plantuml/svg/'
# By default the plantuml implementation uses <img /> tags to display UML diagrams.
# When svg is set to true, diagrams are displayed using <svg /> tags, maintaining functionality like links e.g.
# default = false
svg: true
```
=== “hugo.toml”
```toml
[params.plantuml]
enable = true
theme = "default"
# Set url to plantuml server
# default is http://www.plantuml.com/plantuml/svg/
svg_image_url = "https://www.plantuml.com/plantuml/svg/"
# By default the plantuml implementation uses <img /> tags to display UML diagrams.
# When svg is set to true, diagrams are displayed using <svg /> tags, maintaining functionality like links e.g.
# default = false
svg = true
```
=== “hugo.json”
```json
{
"params": {
"plantuml": {
"enable": true,
"theme": "default",
"svg_image_url": "https://www.plantuml.com/plantuml/svg/",
"svg": true
}
}
}
```
使用MarkMap实现MindMap支持
MarkMap是一个JavaScript库,用于将简单的文本定义渲染为MindMap。
例如,以下示例定义了一个简单的MindMap:
```markmap
# markmap
## Links
- <https://markmap.js.org/>
- [GitHub](https://github.com/gera2ld/markmap)
## Related
- [coc-markmap](https://github.com/gera2ld/coc-markmap)
- [gatsby-remark-markmap](https://github.com/gera2ld/gatsby-remark-markmap)
## Features
- links
- **inline** ~~text~~ *styles*
- multiline
text
- `inline code`
-
```js
console.log('code block');
```
- Katex - $x = {-b \pm \sqrt{b^2-4ac} \over 2a}$
```
自动渲染为:
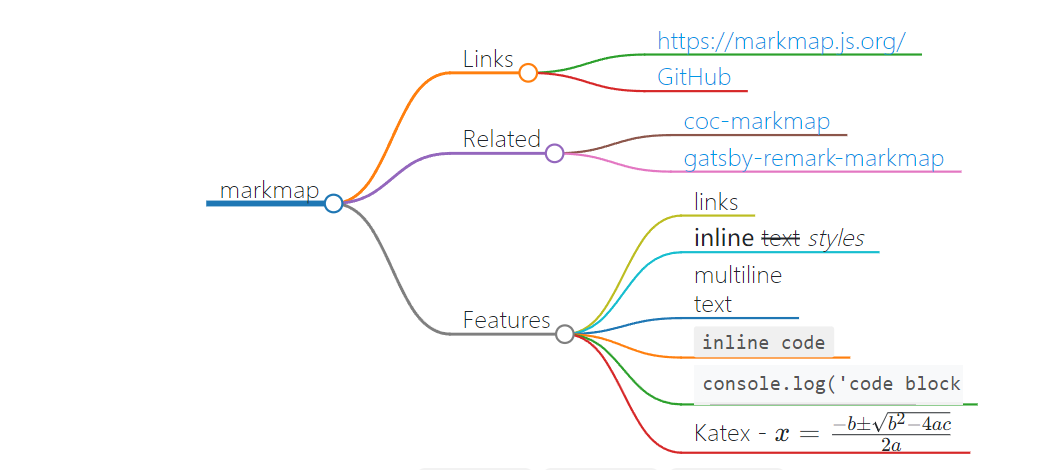
要启用/禁用MarkMap,请更新hugo.toml/hugo.yaml/hugo.json:
Configuration file:
=== “hugo.yaml”
```yaml
params:
markmap:
enable: true
```
=== “hugo.toml”
```toml
[params.markmap]
enable = true
```
=== “hugo.json”
```json
{
"params": {
"markmap": {
"enable": true
}
}
}
```
使用Diagrams.net绘制图表
Diagrams.net(又名draw.io)提供了一个免费且开源的图表编辑器,可以使用Web或桌面编辑器生成比Mermaid或PlantUML更广泛的图表。
使用该工具导出的SVG和PNG文件默认包含原始图表的源代码,这使得diagrams.net网站可以再次导入这些图像以进行将来的编辑。Docsy可以检测到这一点,并在任何可以使用在线站点进行编辑的图像上自动添加"edit" 按钮。
将鼠标悬停在下面的图像上,单击编辑即可立即开始使用。单击"Save" 按钮将导致编辑后的图表以相同的文件名和文件类型导出,并下载到您的浏览器中。
注意
如果您要创建一个新的图表,请务必选择File -> Export以svg 或png 格式导出(svg 通常是最好的选择),并确保选择了"包括我的图表副本",以便以后可以再次编辑它。
由于通过浏览器传输图表数据,因此diagrams.net服务器根本不需要直接访问您的Docsy服务器上的内容。
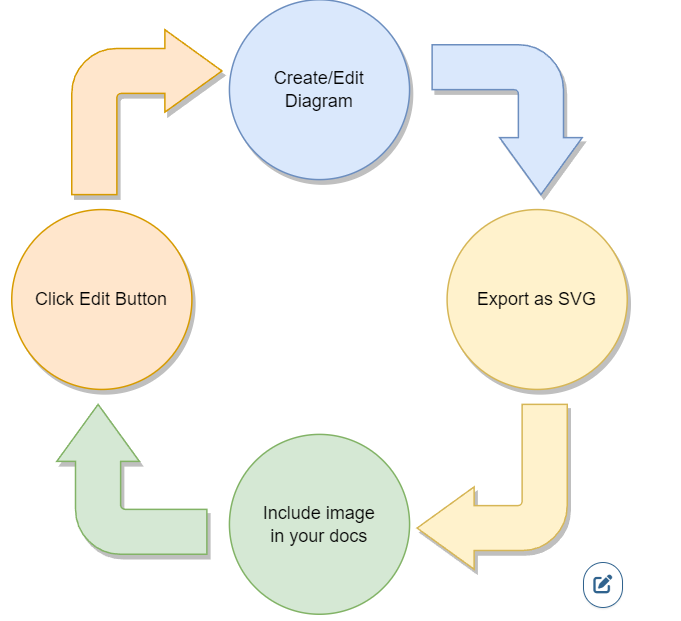
将鼠标悬停在上面的图像上,然后单击编辑按钮!
要禁用图表的检测,请更新hugo.toml/hugo.yaml/hugo.json:
Configuration file:
=== “hugo.yaml”
```yaml
params:
drawio:
enable: false
```
=== “hugo.toml”
```toml
[params.drawio]
enable = false
```
=== “hugo.json”
```json
{
"params": {
"drawio": {
"enable": false
}
}
}
```
您还可以部署和使用自己的服务器来编辑图表,在这种情况下,请更新配置以指向该服务器:
Configuration file:
=== “hugo.yaml”
```yaml
params:
drawio:
drawio_server: 'https://app.mydrawioserver.example.com'
```
=== “hugo.toml”
```toml
[params.drawio]
drawio_server = "https://app.mydrawioserver.example.com"
```
=== “hugo.json”
```json
{
"params": {
"drawio": {
"drawio_server": "https://app.mydrawioserver.example.com"
}
}
}
```
3 - 多语言支持
Multi-language Support - 多语言支持
https://www.docsy.dev/docs/language/
在您的站点中支持多种语言。
如果您想提供多种语言的站点内容,Docsy主题和Hugo可以轻松添加已翻译的内容,并使用户可以在语言版本之间导航。
内容和配置
要添加多语言内容,您首先需要在站点配置中的languages部分中定义可用语言。每种语言都可以有自己的语言特定配置。例如,Docsy示例站点配置指定它提供英语和挪威语的内容,并且访问者默认看到的语言版本是英语:
Configuration file:
=== “hugo.yaml”
```yaml
contentDir: content/en
defaultContentLanguage: en
defaultContentLanguageInSubdir: false
…
languages:
en:
title: Docsy
description: Docsy does docs
languageName: English
weight: 1 # used for sorting
'no':
title: Docsy
description: Docsy er operativsystem for skyen
languageName: Norsk
contentDir: content/no
time_format_default: 02.01.2006
time_format_blog: 02.01.2006
```
=== “hugo.toml”
```toml
contentDir = "content/en"
defaultContentLanguage = "en"
defaultContentLanguageInSubdir = false
...
[languages]
[languages.en]
title = "Docsy"
description = "Docsy does docs"
languageName ="English"
# Weight used for sorting.
weight = 1
[languages.no]
title = "Docsy"
description = "Docsy er operativsystem for skyen"
languageName ="Norsk"
contentDir = "content/no"
time_format_default = "02.01.2006"
time_format_blog = "02.01.2006"
```
=== “hugo.json”
```json
{
"contentDir": "content/en",
"defaultContentLanguage": "en",
"defaultContentLanguageInSubdir": false,
"languages": {
"en": {
"title": "Docsy",
"description": "Docsy does docs",
"languageName": "English",
"weight": 1
},
"no": {
"title": "Docsy",
"description": "Docsy er operativsystem for skyen",
"languageName": "Norsk",
"contentDir": "content/no",
"time_format_default": "02.01.2006",
"time_format_blog": "02.01.2006"
}
}
}
```
在[languages]块中未定义的任何设置都将回退到该设置的全局值。例如,上述站点所使用的内容目录将是content/en,除非用户选择了挪威语选项。
更新站点配置后,在源代码库中为每个语言版本创建一个内容根目录,例如英文文本的content/en,然后像平常一样添加内容。有关多语言支持的更多信息,请参阅Hugo Docs。
注意事项(仅在使用docsy作为hugo模块时)
如果您使用的是多语言安装,请确保在模块导入的
[module]部分之前声明配置文件中的[languages]部分。否则,您将会遇到麻烦!
提示
如果您的站点可能会被翻译成其他语言,请考虑使用语言特定的子目录创建您的站点,因为这意味着如果您添加另一种语言,您不需要移动它。
如果要添加其他站点元素的多个语言版本,例如按钮文本,请参见下面的国际化包章节。
选择语言
如果在配置文件中配置了多个语言,则Docsy主题将在顶级菜单中添加一个语言选择器下拉菜单。选择语言会将用户带到当前页面的翻译版本,或给定语言的主页。
国际化 bundles
所有UI字符串(按钮文本、存储库链接等)都打包在主题的/i18n目录中,每种语言有一个.toml文件。
如果您选择的语言当前未包含在主题中,并且为所有通用UI字符串创建了自己的.toml文件(例如,如果您将UI文本翻译成Esperanto,并创建了一个名为eo.toml的en.toml副本),我们建议您在本主题中执行此操作而不是在自己的项目中。然后,您可以打开pull request将您的翻译贡献给Docsy社区。
Hugo提示
在进行翻译工作时运行
hugo server --printI18nWarnings,因为它会提示您缺少哪些字符串。
创建自定义UI字符串
如果你选择的语言中 Docsy 主题的某些用户界面字符串不适合你的项目,或者你需要其他字符串来满足你的网站需求,你可以在你的项目的 /i18n 目录下创建一个专门的项目国际化文件。例如,如果你想覆盖 Docsy 的英语字符串中的任何内容,只需创建你自己的 /i18n/en.toml 文件并添加自定义字符串。你在此文件中指定的任何值都将覆盖本主题版本,而其余的字符串将来自本主题的对应国际化包。
4 - 预览和部署
Previews and Deployment - 预览和部署
https://www.docsy.dev/docs/deployment/
部署你的 Docsy 站点。
有多种可能的选项可用于部署 Hugo 站点,包括 Netlify、Firebase Hosting、带有 Aerobatic 的 Bitbucket 等等;您可以在 Hosting and Deployment中了解所有这些选项。Hugo 也可以轻松地在本地部署站点,以快速预览内容。
本地服务您的站点
Depending on your deployment choice you may want to serve your site locally during development to preview content changes. To serve your site locally:
根据您的部署选择,您可能希望在开发过程中本地服务您的站点以预览内容更改。要本地服务您的站点:
- 确保您从存储库克隆了最新的本地站点文件副本。
- 确保您在本地计算机上安装了Prerequisites and installation 中描述的工具,包括
postcss-cli(您需要它来在第一次运行服务器时生成站点资源)。 - 在站点根目录中运行
hugo server命令。默认情况下,您的站点将在 http://localhost:1313 上可用。
现在您正在本地服务站点,Hugo 将监视内容更改并自动刷新您的站点。如果您有多个本地 git 分支,则在切换 git 分支时,本地站点将反映当前分支中的文件。
构建环境和索引
默认情况下,使用hugo构建(而不是在本地使用hugo server)的Hugo站点具有Hugo构建环境production。使用production构建的Docsy站点可以被搜索引擎索引,包括Google定制搜索引擎。生产构建还为现场部署优化了JavaScript和CSS(例如,使用压缩后的JS而不是更易读的原始源)。
如果您不希望搜索引擎索引您的部署站点(例如,如果您仍在开发您的实时站点),或者如果您想构建用于离线分析的开发版本的站点,可以将Hugo构建环境设置为其他环境名称,例如development(在本地使用hugo server的默认设置),test或您选择的另一个环境名称。
设置的最简单方法是在指定或运行hugo命令时使用-e标志,如以下示例所示:
hugo -e development
使用 Netlify 部署
我们推荐使用Netlify作为一种特别简单的方法,从您的Git提供程序(GitHub、GitLab或BitBucket)提供您的站点,具有持续部署,在您或您的用户针对文档存储库创建拉取请求时生成的站点预览等功能。对于开源项目,Netlify是免费的,如果您需要更多支持,则有高级版。
在使用 Netlify 部署之前,请确保按照 使用主题 中的任何设置说明,将您的站点源代码推送到您选择的 GitHub(或其他提供者)仓库。
然后按照 在 Netlify 上托管 中的说明设置 Netlify 帐户(如果您还没有帐户),并授权访问您的 GitHub 或其他 Git 提供者帐户。登录后:
点击New site from Git。
点击您选择的Git提供者,然后从您的存储库列表中选择您的站点存储库。
在Deploy settings页面中:
指定您的构建命令。确切的构建命令取决于您选择使用Docsy的方式:
- 如果您将Docsy用作Git子模块,请指定
cd themes/docsy && git submodule update -f --init && cd ../.. && hugo。您需要指定这个命令,而不是只用hugo,以便Netlify可以使用主题的子模块。 - 如果您将Docsy用作Hugo module或NPM包,您可以只指定
hugo。
- 如果您将Docsy用作Git子模块,请指定
点击Show advanced。
在Advanced build settings章节,点击New variable。
将
HUGO_VERSION指定为新变量的Key,并将其Value设置为Hugo的最新版本(最低推荐版本为0.73)。在Advanced build settings章节,再次点击New variable。
将
GO_VERSION指定为新变量的Key,并将其Value设置为Go的最新版本(最低推荐版本为1.18)。
如果您不希望搜索引擎对您的站点进行索引,则可以在构建命令中添加环境标志来指定非production环境,如 构建环境和索引 中所述。
点击Deploy site。
注意
Netlify 在构建站点之前使用站点仓库的
package.json文件来安装任何 JavaScript 依赖项(如postcss)。如果您没有仅仅复制我们示例站点的此文件版本,请确保您已指定了我们所有的先决条件。 例如,如果您想使用高于 8.0.0 版本的
postcss-cli版本,则需要确保您的package.json文件还单独指定了postcss:
1 2 3 4 5"devDependencies": { "autoprefixer": "^9.8.8", "postcss-cli": "^8.0.0", "postcss": "^8.0.0" }
或者,您可以按照相同的说明,但在您的仓库中的 netlify.toml 文件 中指定您的部署设置,而不是在 部署设置 页面中指定。您可以在 Docsy 主题仓库 中看到一个示例(尽管请注意,此处的构建命令有点不寻常,因为 Docsy 用户指南在本主题仓库内部)。
如果您已有一个现有的部署,您可以通过在Netlify的站点列表中选择该站点,然后点击Site settings - Build and deploy来查看和更新相关信息。请确保在Build image selection章节中选择了Ubuntu Xenial 16.04 - 如果您正在创建新的部署,则默认使用此镜像。您需要使用此镜像来运行Hugo的扩展版本。
使用Amazon S3 + Amazon CloudFront进行部署
使用 Amazon Web Services 发布您的站点有几个选项,如这篇 博客文章 所述。本节介绍最基本的选项,即使用 S3 存储桶部署您的站点,并激活 CloudFront CDN(内容分发网络)以加速部署内容的传递。
在您在AWS上注册之后,创建您的S3存储桶,将其与您的域名连接,并将其添加到CloudFront CDN中。这篇博客文章提供了所有细节,并为整个过程提供了易于遵循的逐步说明。
下载并安装最新版本2的AWS命令行界面(CLI)。然后通过发出命令
aws configure来配置您的CLI实例(确保您随时掌握您的AWS访问密钥ID和AWS秘密访问密钥):$ aws configure AWS Access Key ID [None]: AKIAIOSFODNN7EXAMPLE AWS Secret Access Key [None]: wJalrXUtnFEMI/K7MDENG/bPxRfiCYEXAMPLEKEY Default region name [None]: eu-central-1 Default output format [None]:通过发出命令
aws s3 ls检查您的AWS CLI的正确配置,这应该输出您的S3存储桶列表。在您的
hugo.toml/hugo.yaml/hugo.json中添加一个像这样的[deployment]部分:Configuration file:
=== “hugo.yaml”
```yaml
deployment:
targets:
- name: aws
URL: 's3://www.your-domain.tld'
cloudFrontDistributionID: E9RZ8T1EXAMPLEID
```
=== “hugo.toml”
```toml
[deployment]
[[deployment.targets]]
name = "aws"
URL = "s3://www.your-domain.tld"
cloudFrontDistributionID = "E9RZ8T1EXAMPLEID"
```
=== “hugo.json”
```json
{
"deployment": {
"targets": [
{
"name": "aws",
"URL": "s3://www.your-domain.tld",
"cloudFrontDistributionID": "E9RZ8T1EXAMPLEID"
}
]
}
}
```
运行命令
hugo --gc --minify将站点资产渲染到您的Hugo构建环境的public/目录中。使用Hugo内置的
deploy命令将站点部署到S3:1 2 3 4 5 6hugo deploy Deploying to target "aws" (www.your-domain.tld) Identified 77 file(s) to upload, totaling 5.3 MB, and 0 file(s) to delete. Success! Invalidating CloudFront CDN... Success!正如您所看到的,发出
hugo deploy命令会自动使CloudFront CDN缓存失效。这就是您需要做的全部!从现在开始,您可以使用Hugo内置的
deploy命令轻松地将站点部署到S3存储桶!
有关Hugo deploy命令的更多信息,包括命令行选项,请参见此synopsis。特别是,您可能会发现--maxDeletes int选项或--force选项(强制上传所有文件)非常有用。
使用 GitHub actions 自动化部署
如果您的站点源代码存储在GitHub存储库中,您可以使用GitHub Actions在将更改提交到GitHub存储库时将站点部署到您的S3存储桶。此工作流程的设置在此博客文章中有描述。
处理别名
如果您使用别名进行URL管理,则应查看这篇博客文章。它解释了如何在使用Amazon S3时将别名转换为正确的
301重定向。
如果S3不能满足您的需求,请考虑使用AWS Amplify Console。这是一个更先进的持续部署(CD)平台,内置支持Hugo静态网站生成器。在Hugo的官方文档中可以找到一个入门指南。
5 - 更新 Docsy
Update Docsy - 更新 Docsy
https://www.docsy.dev/docs/updating/
保持 Docsy 主题最新。
我们希望与 Docsy 社区 一起持续改进本主题。如果您已经克隆了示例网站(或以 Hugo 模块或 Git 子模块的方式使用本主题),您可以轻松地自己更新 Docsy 主题。如果您已经将本主题本身克隆到自己的项目中,您也可以更新主题,但可能需要解决合并冲突。
更新 Docsy 意味着您的站点将使用HEAD中最新的 Docsy 版本构建,并包含自添加 Docsy 子模块或上次更新以来已合并的所有新提交或更改。更新不会影响您在自己的项目中所做的任何修改,以 覆盖 Docsy 的外观和感觉,因为您的覆盖不会修改主题本身。有关自上次更新以来主题发生了什么更改的详细信息,请参见 Docsy 提交列表。
如果您一直将本主题作为 Git 子模块使用,您还可以将您的站点更新为使用 Docsy 作为 Hugo 模块。这是从其存储库中拉取 Hugo 主题的最新和最简单的方法。如果您还没有准备好迁移到 Hugo 模块,不用担心,您的站点仍然可以工作,您可以像以前一样继续更新子模块。
更新您的 Docsy Hugo 模块
使用 Hugo 模块更新 Docsy 主题至最新版本。
不使用 Hugo 模块更新 Docsy
使用子模块或 git pull 更新 Docsy 主题至最新版本。
迁移到 Hugo 模块
将现有站点转换为使用 Docsy 作为 Hugo 模块。
5.1 - 更新您的 Docsy Hugo 模块
Update your Docsy Hugo Module - 更新您的 Docsy Hugo 模块
https://www.docsy.dev/docs/updating/updating-hugo-module/
使用 Hugo 模块更新你的 Docsy 主题至最新版本。
当将 Docsy 主题作为 Hugo 模块使用时,更新主题非常简单。
在命令提示符中,切换到现有站点的根目录。
| |
然后使用hugo的模块get子命令并带有update标志:
| |
Hugo 自动拉取最新的主题版本。就是这样,你的更新完成了!
提示
如果你想将你的模块设置为 Docsy 主题库中的某个版本,只需在更新主题时指定代表此版本的标签名称,例如:
1hugo mod get -u github.com/google/docsy@v0.6.0 你也可以指定一个提交哈希值,例如:
1hugo mod get -u github.com/google/docsy@6c8a3afe
5.2 - 不使用 Hugo 模块更新 Docsy
Update Docsy without Hugo Modules - 不使用 Hugo 模块更新 Docsy
https://www.docsy.dev/docs/updating/updating-submodules/
使用子模块或 git pull 更新 Docsy 主题至最新版本。
如果你不使用 Hugo 模块,根据你在现有站点上安装 Docsy 的方式,使用以下两个程序之一来更新你的主题。
提示
如果你打算更新你的站点,请考虑将你的站点转换为 Hugo 模块。转换后,更新 Docsy 就更简单了!
更新 Docsy 子模块
如果你在项目中将 Docsy 主题作为子模块使用,则按如下方式更新子模块:
导航到本地项目的根目录,然后运行:
1git submodule update --remote将更改添加到项目中并提交更改:
1 2git add themes/ git commit -m "Updating theme submodule"将提交推送到项目存储库。例如运行:
1git push origin master
Route 2:更新 Docsy 克隆版
如果你将 Docsy 主题克隆到项目的 themes 文件夹中,则使用 git pull 命令:
导航到本地项目的
themes目录:1cd themes确保
origin设置为https://github.com/google/docsy.git:1git remote -v更新本地克隆版:
1git pull origin master
如果你对克隆主题进行了任何本地更改,则必须手动解决任何合并冲突。
5.3 - 迁移到Hugo模块
Migrate to Hugo Modules - 迁移到Hugo模块
https://www.docsy.dev/docs/updating/convert-site-to-module/
将现有站点转换为使用Docsy作为Hugo模块
适用于急于求成的专家
从命令行运行以下命令:
CLI:
=== “Unix shell”
```bash
cd /path/to/my-existing-site
hugo mod init github.com/me-at-github/my-existing-site
hugo mod get github.com/google/docsy@v0.6.0
sed -i '/theme = \["docsy"\]/d' config.toml
cat >> config.toml <<EOL
[module]
proxy = "direct"
[[module.imports]]
path = "github.com/google/docsy"
[[module.imports]]
path = "github.com/google/docsy/dependencies"
EOL
hugo server
```
=== “Windows command line”
```bash
cd my-existing-site
hugo mod init github.com/me-at-github/my-existing-site
hugo mod get github.com/google/docsy@v0.6.0
findstr /v /c:"theme = [\"docsy\"]" config.toml > config.toml.temp
move /Y config.toml.temp config.toml
(echo [module]^
proxy = "direct"^
[[module.imports]]^
path = "github.com/google/docsy"^
[[module.imports]]^
path = "github.com/google/docsy/dependencies")>>config.toml
hugo server
```
详细的转换说明
将Docsy主题模块作为站点的依赖项导入
在命令提示符下,切换到现有站点的根目录。
| |
只有作为Hugo模块的站点才能导入其他Hugo模块。通过从站点目录中运行以下命令(将github.com/me/my-existing-site替换您的站点存储库),将现有站点转换为Hugo模块:
| |
这将创建两个新文件,go.mod用于模块定义和go.sum用于保存模块验证的校验和。
接下来,将Docsy主题模块声明为站点的依赖项。
| |
This command adds the docsy theme module to your definition file go.mod.
此命令将docsy主题模块添加到您的定义文件go.mod中。
更新您的配置文件
在您的 config.toml/config.yaml/config.json 文件中,更新该主题设置以使用Hugo模块。找到以下行:
Configuration file:
=== “config.yaml”
```yaml
theme: docsy
```
=== “config.toml”
```toml
theme = ["docsy"]
```
=== “config.json”
```json
"theme": "docsy"
```
将此行更改为:
Configuration file:
=== “config.yaml”
```yaml
theme:
- github.com/google/docsy
- github.com/google/docsy/dependencies
```
=== “config.toml”
```toml
theme = ["github.com/google/docsy", "github.com/google/docsy/dependencies"]
```
=== “config.json”
```json
"theme": [
"github.com/google/docsy",
"github.com/google/docsy/dependencies"
]
```
或者,您可以完全省略此行,并将其替换为以下代码段中给出的设置:
Configuration file:
=== “config.yaml”
```yaml
module:
proxy: direct
hugoVersion:
extended: true
min: 0.73.0
imports:
- path: github.com/google/docsy
disable: false
- path: github.com/google/docsy/dependencies
disable: false
```
=== “config.toml”
```toml
[module]
proxy = "direct"
# uncomment line below for temporary local development of module
# replacements = "github.com/google/docsy -> ../../docsy"
[module.hugoVersion]
extended = true
min = "0.73.0"
[[module.imports]]
path = "github.com/google/docsy"
disable = false
[[module.imports]]
path = "github.com/google/docsy/dependencies"
disable = false
```
=== “config.json”
```json
{
"module": {
"proxy": "direct",
"hugoVersion": {
"extended": true,
"min": "0.73.0"
},
"imports": [
{
"path": "github.com/google/docsy",
"disable": false
},
{
"path": "github.com/google/docsy/dependencies",
"disable": false
}
]
}
}
```
你可以在 Hugo 模块文档中找到这些配置设置的详细信息。根据你的环境,你可能需要进行一些微调,例如添加代理以在下载远程模块时使用。
提示
在 Hugo 0.110.0 中,默认的配置基础文件名已更改为
hugo.toml。如果你使用的是 hugo 0.110 或更高版本,请考虑将你的config.toml重命名为hugo.toml!
注意
如果你安装了多语言版本,请确保你的
config.toml中的[languages]部分在带有模块导入的[module]部分之前声明。否则,你将遇到问题!
检查配置设置的有效性
为了确保你的配置设置是正确的,请运行 hugo mod graph 命令,它会打印一个模块依赖项图:
| |
确保列出了 docsy、bootstrap 和 Font-Awesome 的三行依赖项。如果没有,请仔细检查你的配置设置。
提示
为了清理你的模块缓存,请执行命令
hugo mod clean
1 2 3 4 5 6hugo mod clean hugo: collected modules in 995 ms hugo: cleaned module cache for "github.com/FortAwesome/Font-Awesome" hugo: cleaned module cache for "github.com/google/docsy" hugo: cleaned module cache for "github.com/google/docsy/dependencies" hugo: cleaned module cache for "github.com/twbs/bootstrap"
清理你的仓库
由于你的站点现在使用 Hugo 模块,你可以按照下面的说明从themes目录中删除 docsy。首先,切换到你站点的根目录:
| |
先前将 Docsy 主题安装为 Git 克隆
只需删除 themes 目录中的子目录 docsy:
| |
先前将 Docsy 主题安装为 Git 子模块
如果您的 Docsy 主题是作为子模块安装的,请使用 git 的 rm 子命令删除 themes 目录中的子目录 docsy:
| |
现在,您可以提交更改到您的仓库中:
| |
注意
使用
rm -rf命令时请小心,确保您不会意外删除任何生产数据文件!
6 - 最佳实践
Best Practices - 最佳实践
https://www.docsy.dev/docs/best-practices/
关于组织、撰写和管理技术文档的可选指导和建议。
使用此章节了解使用 Docsy 创建技术文档的一些最佳实践。
Hugo 内容提示
为 Docsy 主题的 Hugo 站点撰写内容的提示。
组织您的内容
有关如何组织文档站点的可选指导和建议。
6.1 - Hugo 内容提示
Hugo Content Tips - Hugo 内容提示
https://www.docsy.dev/docs/best-practices/site-guidance/
适用于 Docsy 主题 Hugo 站点的内容编写技巧。
Docsy 是 Hugo静态站点生成器的一个主题。如果您还不熟悉 Hugo,本页面提供了一些有用的提示和潜在的注意事项,用于添加和编辑您站点的内容。欢迎添加您自己的建议!
Linking 链接
默认情况下,Hugo不会更改链接中的常规相对URL(它们在您站点的生成HTML中仍然是相对链接),因此一些硬编码的相对链接(例如 \[relative cross-link\]\(../../peer-folder/sub-file.md\))与它们在本地文件系统上的工作方式可能会有所不同。您可能会发现,使用Hugo内置的一些链接简码有助于避免在生成的站点中出现损坏的链接。例如,在Hugo中,\{\{\< ref "filename.md" \>\}\}链接实际上会找到并自动链接到名为filename.md的文件。
但是请注意,ref和relref链接无法与_index或index文件配合使用(例如,本站的内容着陆页),您需要使用常规的Markdown链接到章节着陆页或其他索引页面。将这些链接相对于站点的根URL指定,例如:/docs/adding-content/。
了解更多链接信息。
6.2 - 组织你的内容
Organizing Your Content - 组织你的内容
https://www.docsy.dev/docs/best-practices/organizing-content/
关于如何组织你的文档站点的指导和建议。
如果你查看我们的Example Site,你会看到我们将文档章节分成了多个子章节,并为每个章节提供了一些关于在该章节中应该放置什么内容的建议。
Do I need to use this structure? 我需要使用这个结构吗?
当然不是!示例站点中的站点结构是为满足大型产品的大型文档集中的特性、潜在任务和参考元素的需要而创建的。对于一个更简单的文档集(比如这个!),只需将你的文档围绕用户需要了解的特定功能进行结构化即可。即使对于更大的文档集,你可能会发现这个结构并不是很有用,或者你并不需要使用所有的章节类型。
我们建议你(就像我们在这里所做的那样)至少提供以下内容:
- 产品的概述(Overview)(在文档着陆页或单独的概述页面上)告诉用户为什么他们应该对你的项目感兴趣。
- 入门(Getting Started)页面。
- 一些示例(Examples)。
你也可能想为项目的功能创建一些任务/操作指南。如果你更喜欢这种简单的结构,可以自由地复制 Docsy 用户指南站点或只是文档章节。
提示
如果你想复制这个指南,请注意它的源文件在 Docsy 主题仓库内,因此它没有自己的
themes/目录:相反,我们运行hugo server --themesDir ../..从其父目录中使用 Docsy。你可以复制该站点并添加一个包含 Docsy 的themes/目录,或者只是将docs/文件夹复制到你现有站点的内容根目录中。
了解有关 Hugo 和 Docsy 如何使用文件夹和其他文件来组织你的站点的更多信息。
Why this structure? 为什么要这样组织结构?
我们的示例站点结构基于我们自己创建(和使用)不同类型项目的大型文档集的经验和我们对一些大型站点进行的用户研究。在用户研究中,我们发现用户最关心和最迫切寻找的是"入门(Get Started)“或"快速入门(Getting Started)“章节(以便他们可以开始工作),以及一些可以探索和复制的示例,因此我们将它们作为站点的重要顶级文档章节。用户还希望找到可以轻松查找以执行特定任务并组合成自己的应用程序或项目的"食谱(recipes)",因此我们建议你将这种内容添加为任务。其他内容类型,如概念文档、参考文档和端到端教程,对于所有文档集来说都不是很重要,特别是对于较小的项目。我们在示例站点中强调这些章节是可选的。
我们希望通过进一步了解用户如何与技术文档交互,特别是对于开源项目,来进一步改进示例站点结构。
写作风格指南
本指南和示例站点仅介绍如何将文档内容组织为页面和章节。有关如何组织和编写每个页面中的内容的一些指导,请参阅Google开发者文档风格指南,特别是Style Guide Highlights。
7 - 贡献指南
Contribution Guidelines
https://www.docsy.dev/docs/contribution-guidelines/
How to contribute to Docsy
Docsy is an open source project and we love getting patches and contributions to make Docsy and its docs even better.
Contributing to Docsy
The Docsy theme itself lives in https://github.com/google/docsy.
Contributor License Agreement
Contributions to this project must be accompanied by a Contributor License Agreement. You (or your employer) retain the copyright to your contribution; this simply gives us permission to use and redistribute your contributions as part of the project. Head over to https://cla.developers.google.com/ to see your current agreements on file or to sign a new one.
You generally only need to submit a CLA once, so if you’ve already submitted one (even if it was for a different project), you probably don’t need to do it again.
Code reviews
All submissions, including submissions by project members, require review. We use GitHub pull requests for this purpose. Consult GitHub Help for more information on using pull requests.
Previewing your changes
As Docsy is a theme rather than a site, you can’t serve the theme directly to check your changes work. Instead use your updated local theme in a local copy of the Docsy example site (copy or make your changes in the themes/docsy directory) and preview from there. Alternatively, clone the Docsy theme repo and test your changes in a local copy of this site, as described below.
Community guidelines
This project follows Google’s Open Source Community Guidelines.
Creating issues
Alternatively, if there’s something you’d like to see in Docsy (or if you’ve found something that isn’t working the way you’d expect), but you’re not sure how to fix it yourself, please create an issue.
Contributing to these docs
This user guide is, like our example site, a Docsy site that uses the Hugo static site generator. We welcome updates to the docs!
We use Netlify to manage the deployment of the site and provide previews of doc updates. The instructions here assume you’re familiar with basic GitHub workflows.
Quick start with Netlify
- Fork the Docsy repo on GitHub: this site’s files live in the
userguidesubdirectory. - Make your changes and send a pull request (PR).
- If you’re not yet ready for a review, add “WIP” to the PR name to indicate it’s a work in progress. (Don’t add the Hugo property “draft = true” to the page front matter, because that prevents the auto-deployment of the content preview described in the next point.)
- Wait for the automated PR workflow to do some checks. When it’s ready, you should see a comment like this: deploy/netlify — Deploy preview ready!
- Click Details to the right of “Deploy preview ready” to see a preview of your updates.
- Continue updating your doc and pushing your changes until you’re happy with the content.
- When you’re ready for a review, add a comment to the PR, and remove any “WIP” markers.
Updating a single page
If you’ve just spotted something you’d like to change while using the docs, Docsy has a shortcut for you:
- Click Edit this page in the top right hand corner of the page.
- If you don’t already have an up to date fork of the project repo, you are prompted to get one - click Fork this repository and propose changes or Update your Fork to get an up to date version of the project to edit. The appropriate page in your fork is displayed in edit mode.
- Follow the rest of the Quick start with Netlify process above to make and preview your changes.
Previewing your changes locally
If you want to run your own local Hugo server to preview your changes as you work:
Follow the instructions in Getting started to install Hugo and any other tools you need.
Fork the Docsy repo into your own project, then create a local copy using
git clone:1git clone https://github.com/google/docsy.gitChange to the
userguidedirectory and run the following Hugo command to build the site and start the Hugo server. Note that you need thethemesDirflag because the site files are inside the theme repo.1 2cd userguide hugo server --themesDir ../..By default your site will be available at http://localhost:1313/. Now that you’re serving your site locally, Hugo will watch for changes to the content and automatically refresh your site.
Continue with the usual GitHub workflow to edit files, commit them, push the changes up to your fork, and create a pull request.
Preview your changes using a Docker container
Docsy comes with Dockerfile and docker-compose files to run the server locally with Docker, without installing any additional dependencies.
Using Docker:
Build the Docker container:
1docker build -t docsy/user-guide .Run the container, mounting the repository as a shared volume:
1 2 3docker run -it --user=$(id -u):$(id -g) -p 1313:1313 \ -v $(pwd):/app/docsy -v /app/docsy/userguide/node_modules \ docsy/user-guide
Using Docker Compose:
Build the container:
1docker-compose buildRun the container:
1DOCSY_USER=$(id -u):$(id -g) docker-compose up
Open http://localhost:1313 in your web browser to load the docsy user guide. In most cases, docsy will automatically reload the site to reflect any changes to the documentation or the code. Changes to some parts of the docsy code may require manually reloading the page or re-starting the container.
Press Ctrl + C to stop the container.
Creating an issue
If there’s something you’d like to see in the docs, but you’re not sure how to fix it yourself, please create an issue in this repository. You can also create an issue about a specific page by clicking the Create Issue button in the top right hand corner of the page.